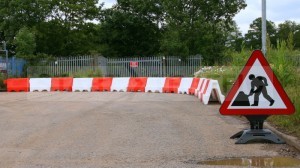
1M Water Filled Safety Barrier – Product Review

The 1M water filled safety barrier is a compact and sturdy safety barrier. Supplied mainly in red or white colours for increased visibility this 1M barrier system is ideal for use in town and city centres for vehicles. It is designed to be left in place for longer periods of time than the Avalon Safety Barrier due to its heavier weight when filled.
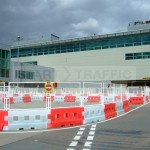
When empty this barrier weighs only 8kg, but once filled with water its weight is increased to 28 k. This makes the water filled safety barrier system very quick and easy to deploy, and also very cost effective as it requires minimal amounts of labour.

Continue reading 1M Water Filled Safety Barrier – Product Review

Speed Bump Fitting Guide & Installation

When installing our speed bumps, it is important to fit them correctly.  This simple guide aims to outline the speed bump fitting process (or installation) to install our speed bumps correctly.

This guide assumes that you are installing a speed bump using one of our Speed Bump Kits.

Things you will require:


A Good Fitting Surface
Before fitting the speed bumps you need to ensure that they are to be mounted on a smooth flat surface. If the surface you are fitting the speed bumps to has any deviations in it, such as pot holes or cracks in the tarmac, then our pot hole repair product VIAFIX can be used to prepare the surface.

Continue reading Speed Bump Fitting Guide & Installation

Barriers – Wind Speed Resistance Figures

Setting out barriers on the side of the road is all well and good, but what is really important is ‘will they still be there when you return in the morning?’. All barriers are affected by wind, but some are affected more than others. Below you will find a table detailing which of our barriers are resistant to what wind speeds before failure.

78mph GB2 Heavy Duty Road Barrier. This barrier was tested with two GB2 barriers interlocked in a straight line. They were placed perpendicular to the oncoming wind and did not move until wind speeds in excess of 78mph were reached. They were tested filled with water to the fill line.

Continue reading Barriers – Wind Speed Resistance Figures

Using Viafix for Cost Effective Permanent Pot Hole Repair.

Repairing a pot hole can be really difficult, especially if you don’t want to spend lots of money having a hot pot hole repair done.

Viafix is a revolutionary product in that it is applied cold, yet can out perform even hot repairs. It is simple to use, and can even be applied in extreme wet and cold conditions.

Applying the repair is simple.

  1. Remove all loose debris and rubble from the pothole.
  2. Put the Viafix compound into the Pot Hole.
  3. Compact the Viafix with a shovel or other weighted item. It can even be compacted by driving a car over it.
  4. Apply water.

Continue reading Using Viafix for Cost Effective Permanent Pot Hole Repair.

Correct Traffic Cone & Road Sign Sizing

There are strict rules on the sizes of traffic cones that can be used within certain speed limits and carriageway layouts. This guide sets out to explain the ins and outs of Cone legislation as detailed in the 1995 Safety at Street works and road works policy.

Primarily Traffic cone size is determined by the speed limit of the road they are to be used on, and also how many carriageways the road consists of.

These regulations are as follows:

30 Mph or Less Single Carriageway.

Cone height must be 450mm or above.

40 Mph or Less Single Carriageway.

Cone Height Must be 450mm or above.

40 Mph Dual Carriageway.

Cone Height Must be 450mm or above.

50 Mph Single Carriageway.

Cone Height Must be 450mm Or above.

50 Mph Dual Carriageway Road.

Cone Height must be 750mm Or above

60 Mph Single Carriageway Road.

Cone Height must be 750mm Or above

60 Mph Dual Carriageway Road.

Cone Height must be 750mm Or above

70 Mph Dual Carriageway Road.

Cone Height must be 750mm Or above

70 Mph Dual Carriageway Road.

Cone Height must be 750mm Or above

Traffic Cones must also follow the following rules:

  • The white reflective sleeve must be 40% of the overall height.
  • The red portion below the sleeve must be a minimum of 10% of the overall height.
  • The red portion at the top of the cone must be a minimum of 25% of the overall height of the cone.
  • The base of the cone must be red, black, grey, or brown in colour.

This article follows the basics of size and composition of traffic cones. It is always worth checking the chapter 8 guidelines for any updates or changes to these rules.