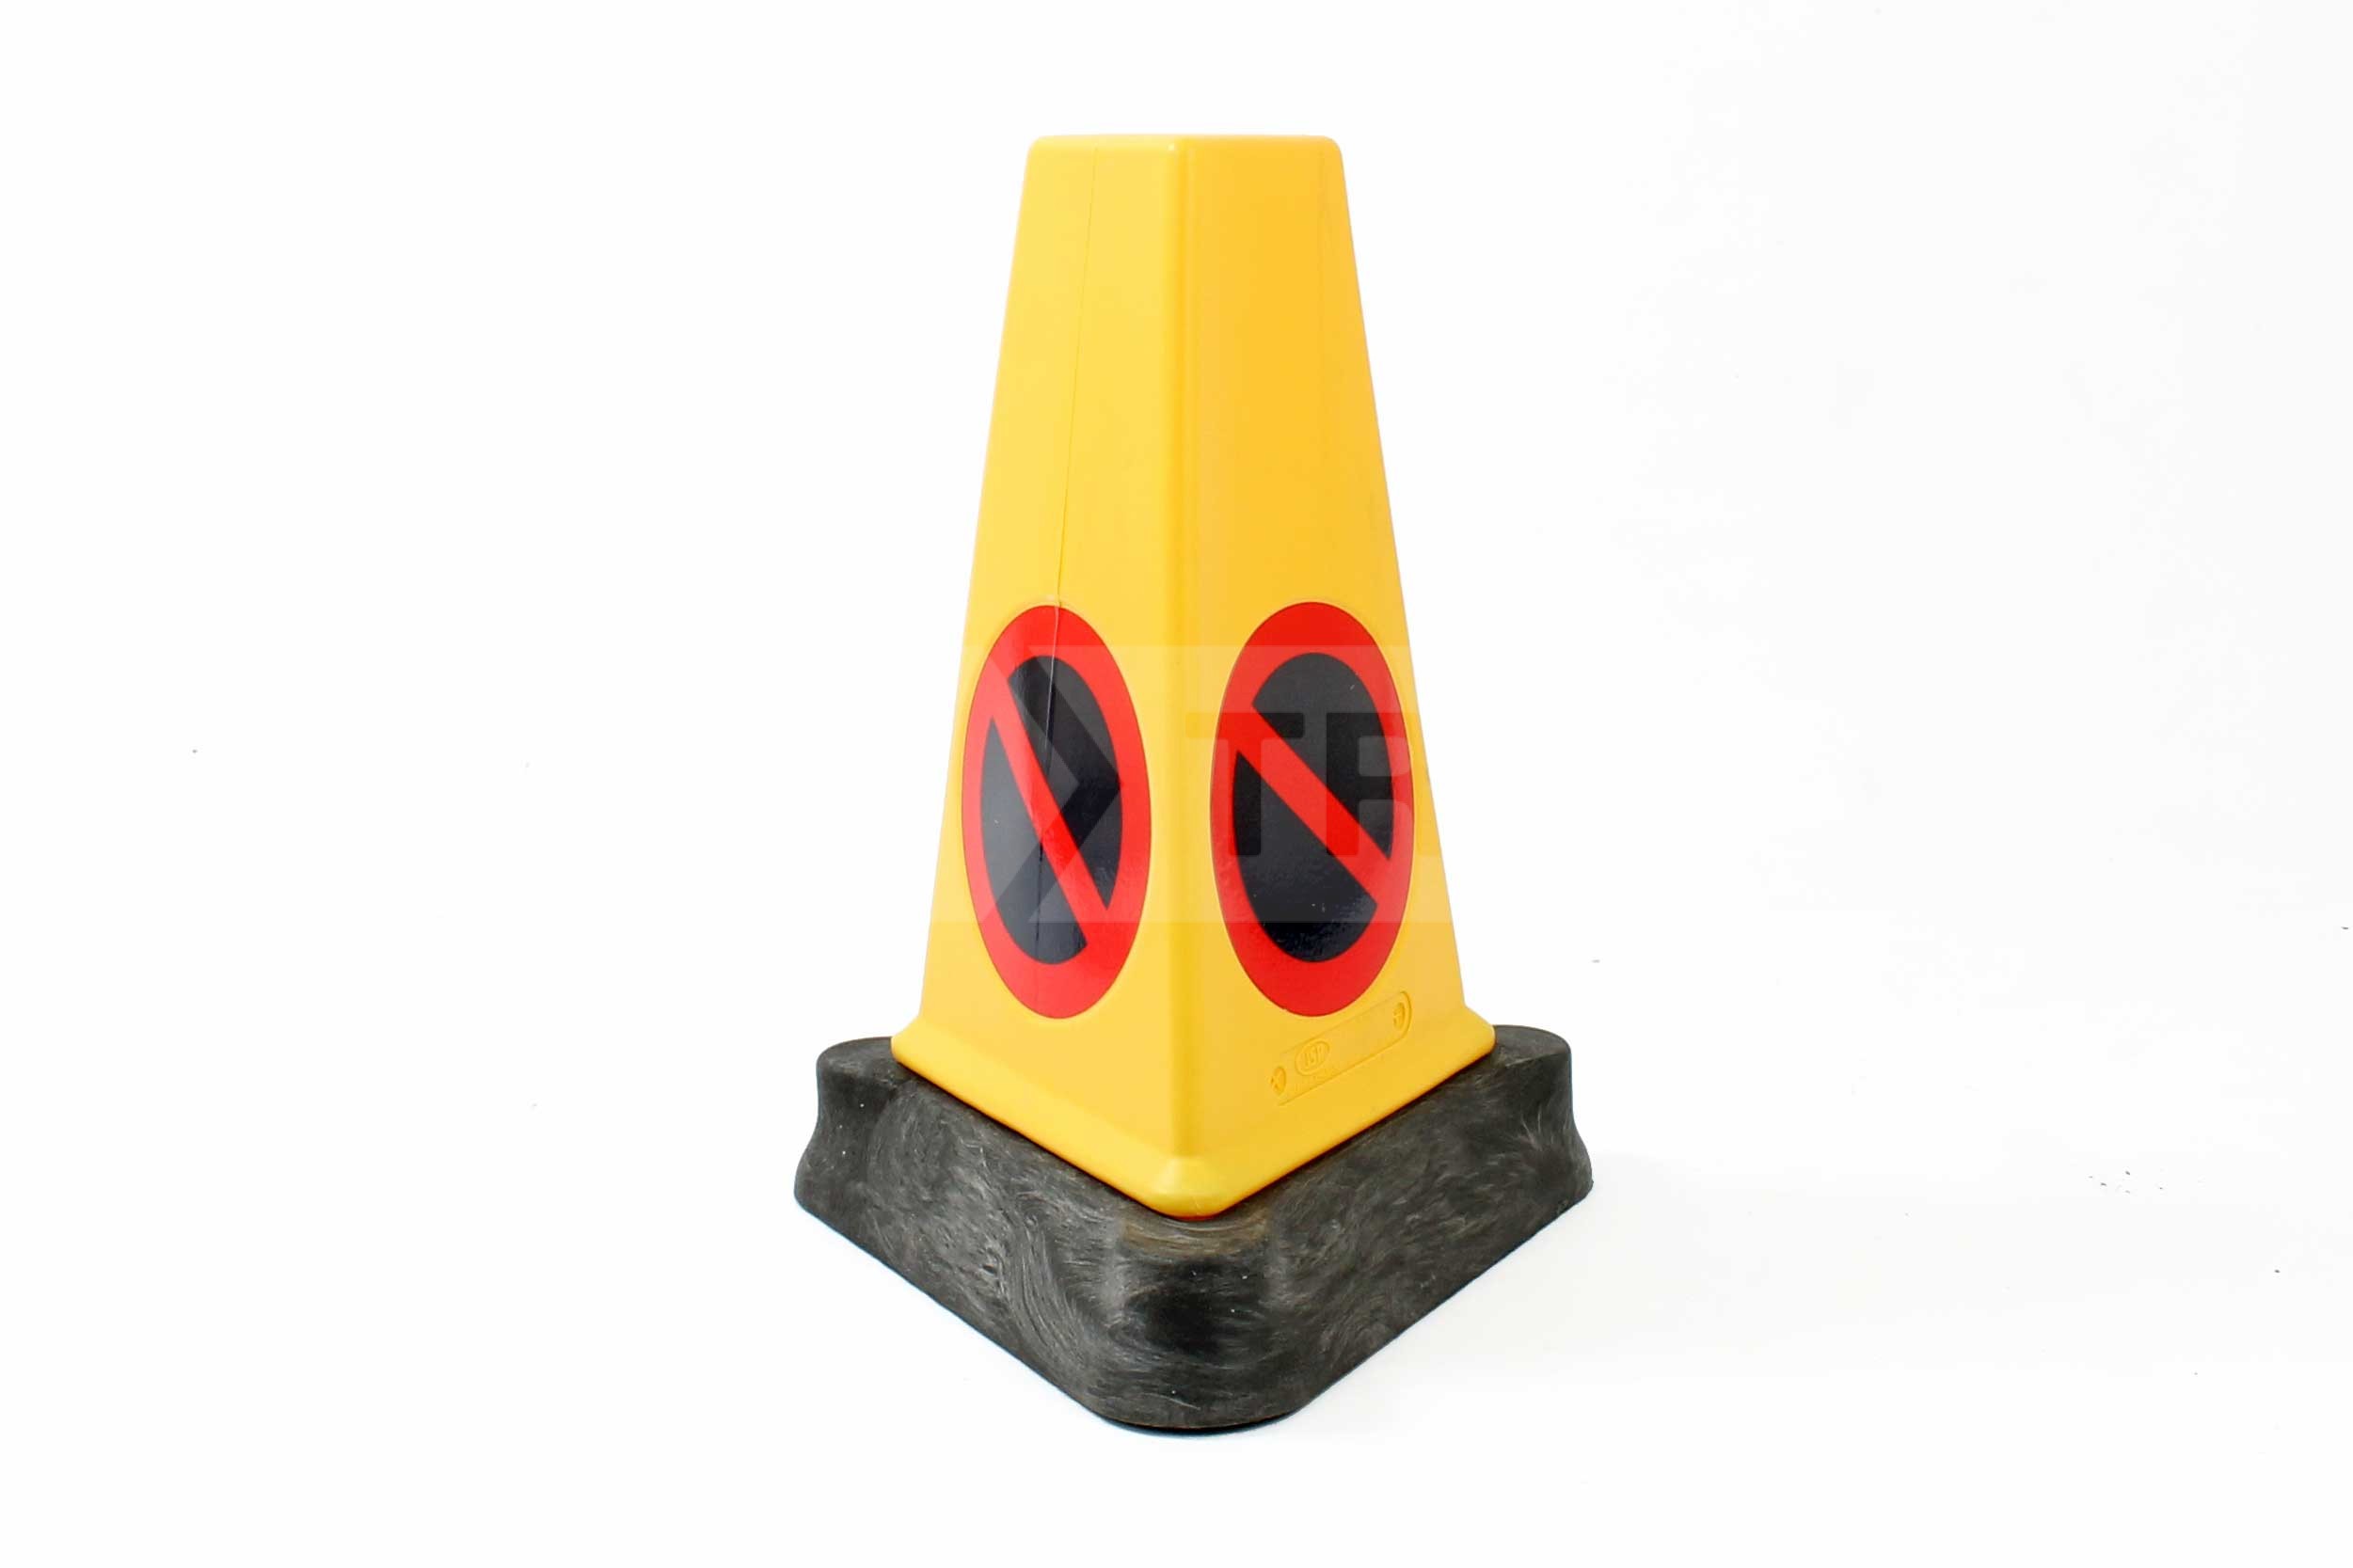
The JSP Triangular No Waiting Cone MK5 is the newest iteration on the traditional No Waiting Cone. A number of key improvements have been made to differentiate itself from other competing products.
This new no waiting cone is extremely well built and very robust, having a slightly heavier base than some of the other no waiting cones we have seen. This makes it even more stable in windy conditions.
Overall image of the JSP No Waiting cone.
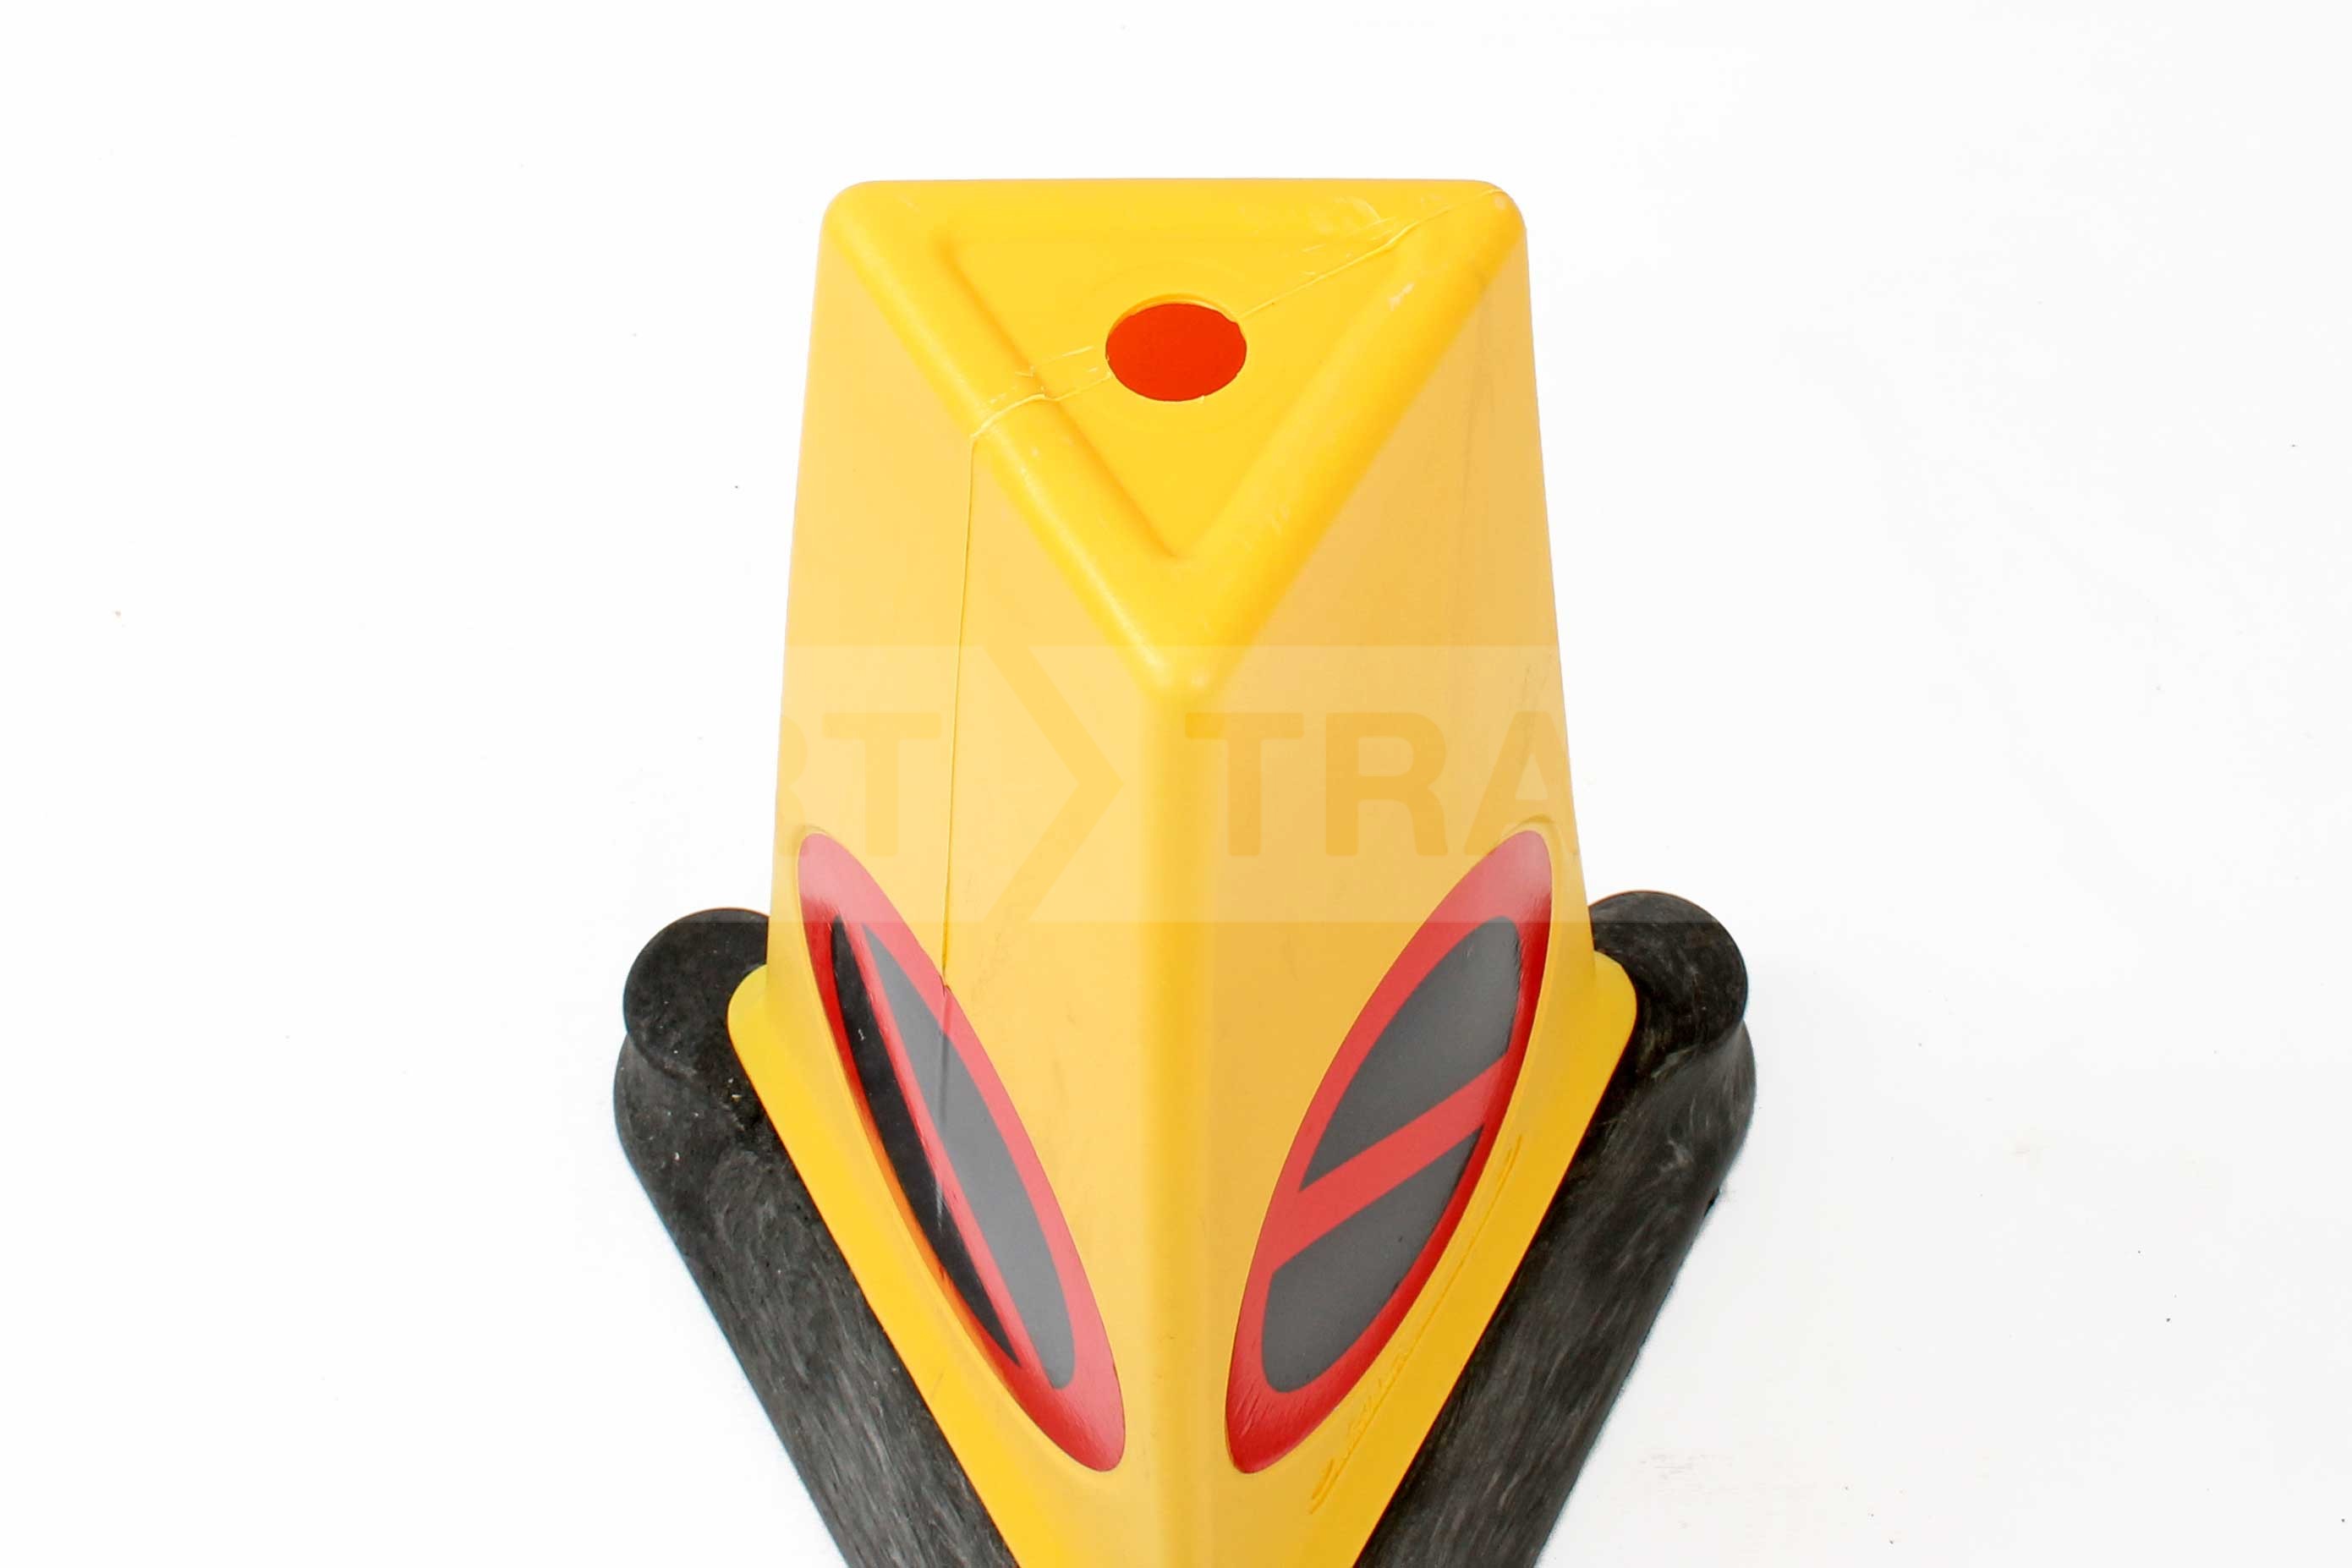
The cone has a finger grab hole in the top so that it is easy to pick up as well as grab handle around the base for when you are picking them up from a stack.
The Grab hole is a useful feature of this cone.
The 200mm Roundel ‘No waiting’ symbol fully conforms to road regulations and has 2 year UV stabilisation, to prevent any fading or discolouration.
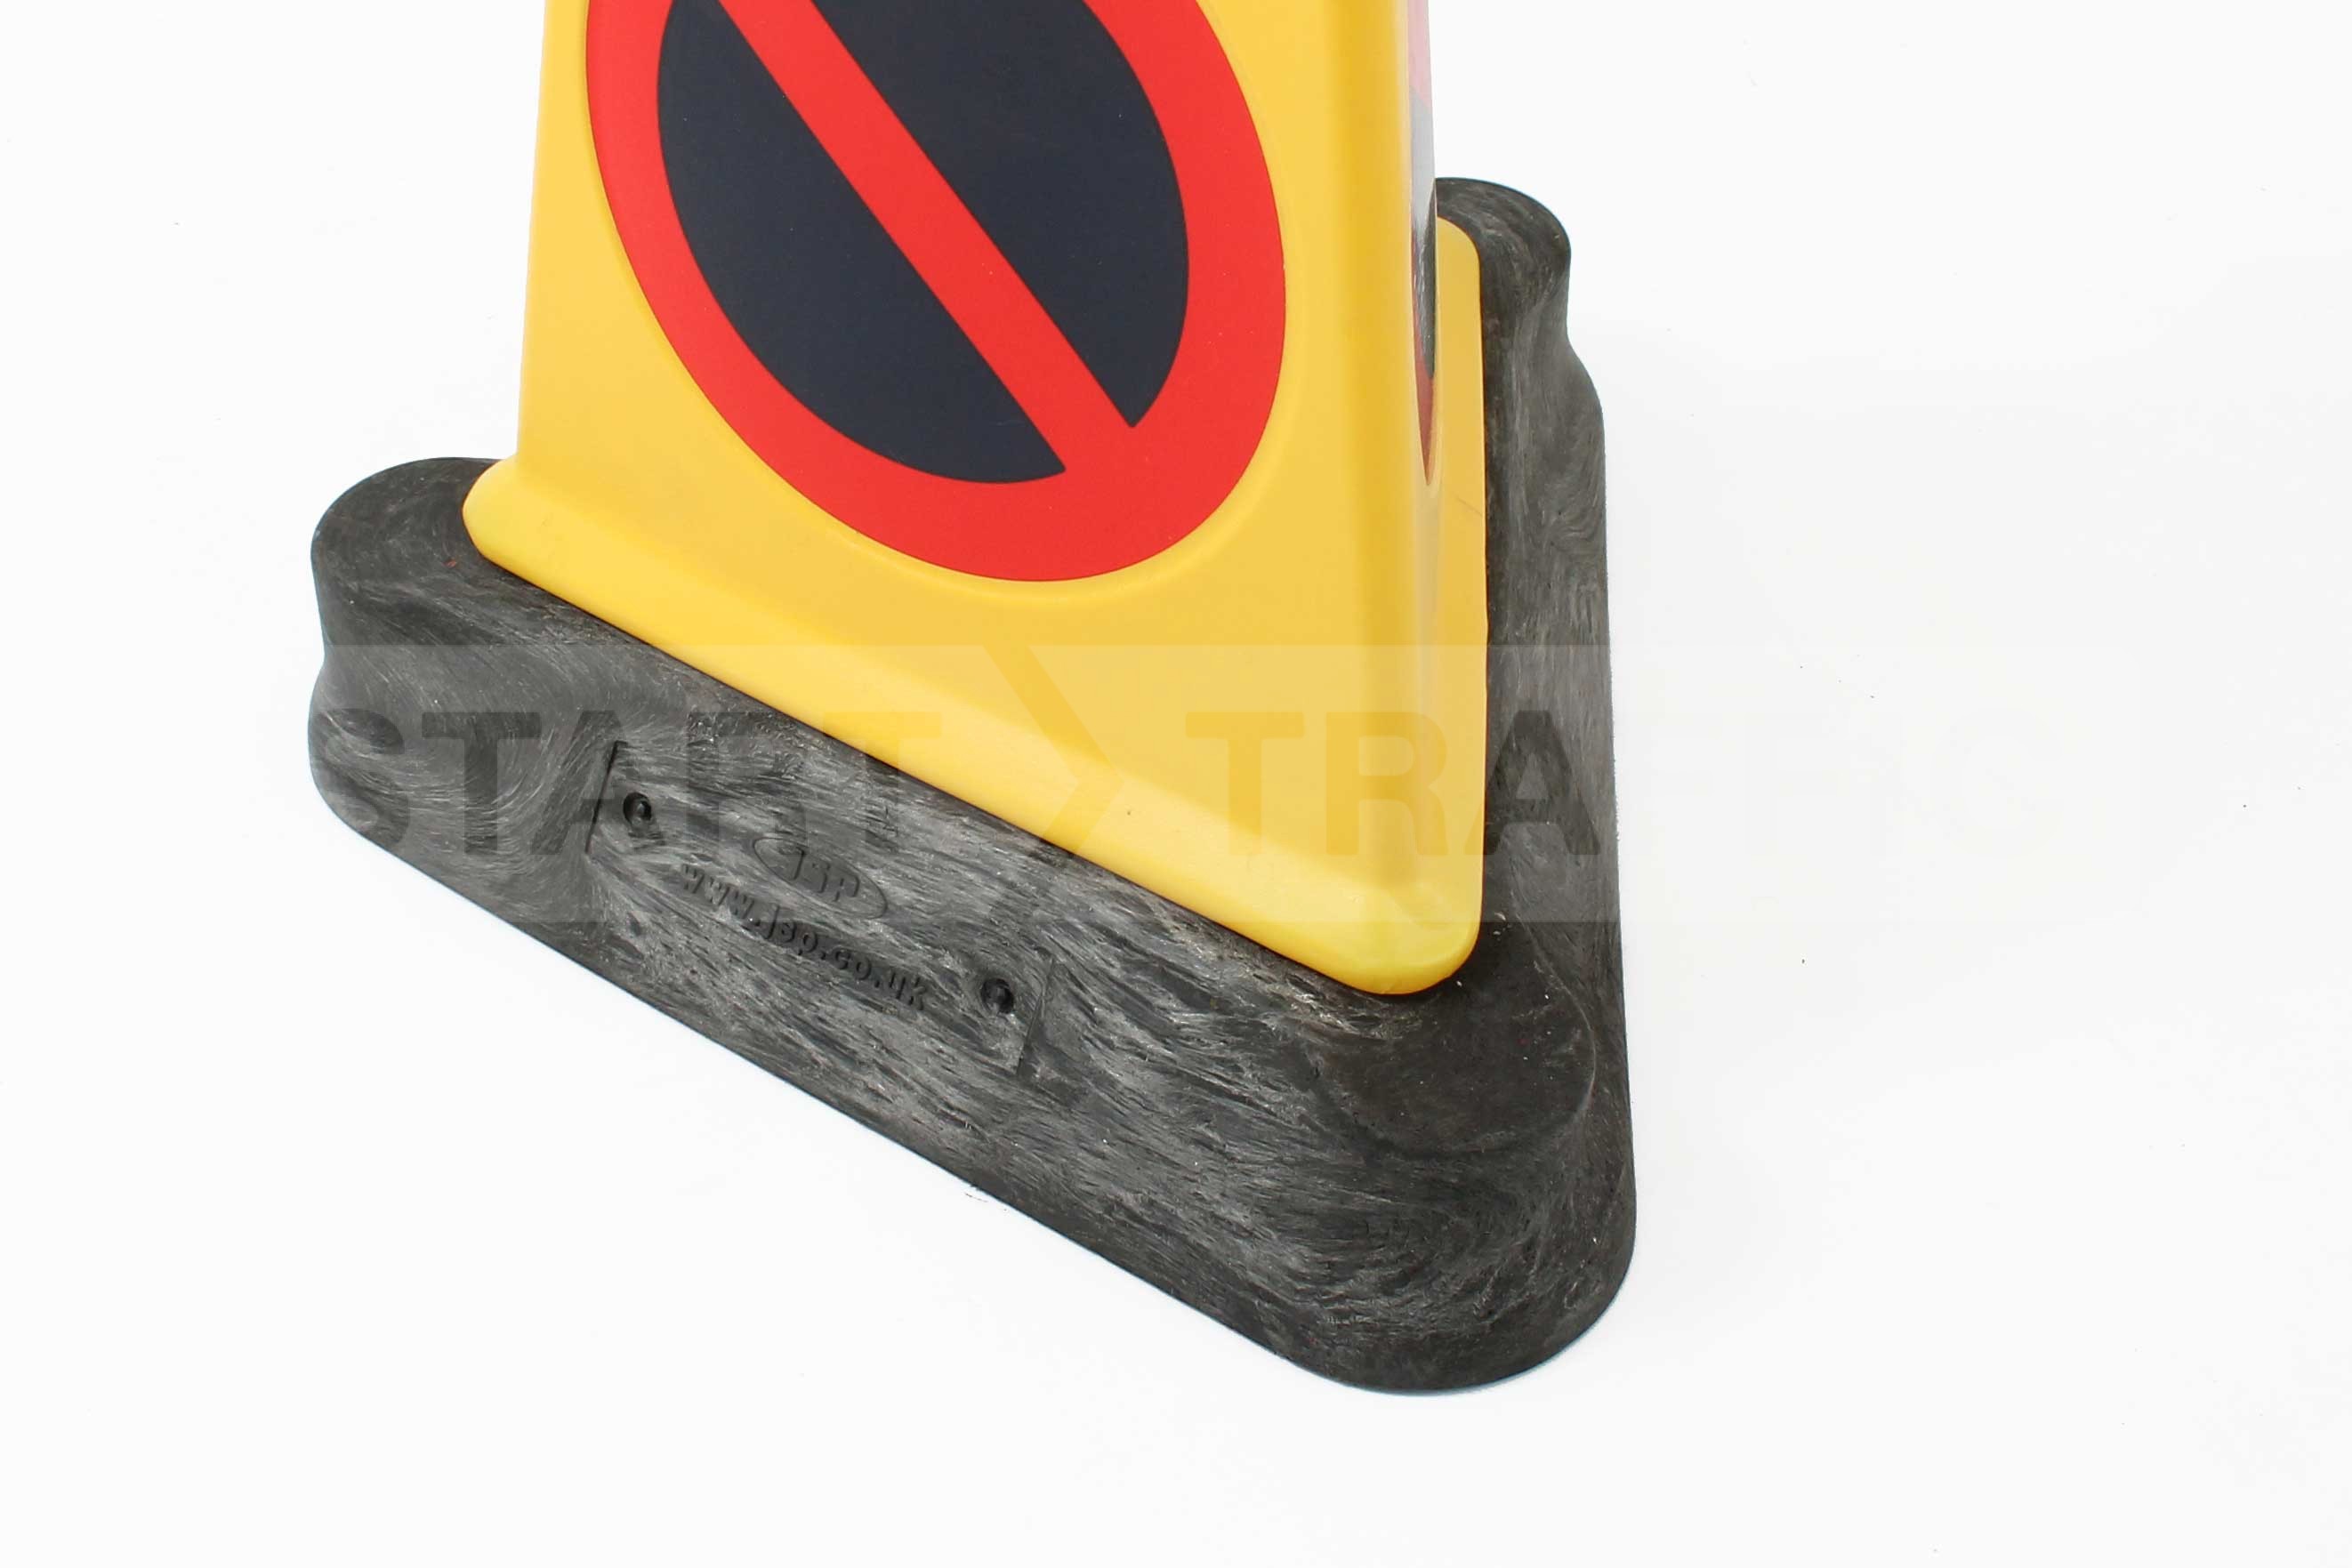
Close up of the new JSP No Waiting cone base.
This no waiting cone has a 100% recycled PVC base and a blow moulded polyethylene top.
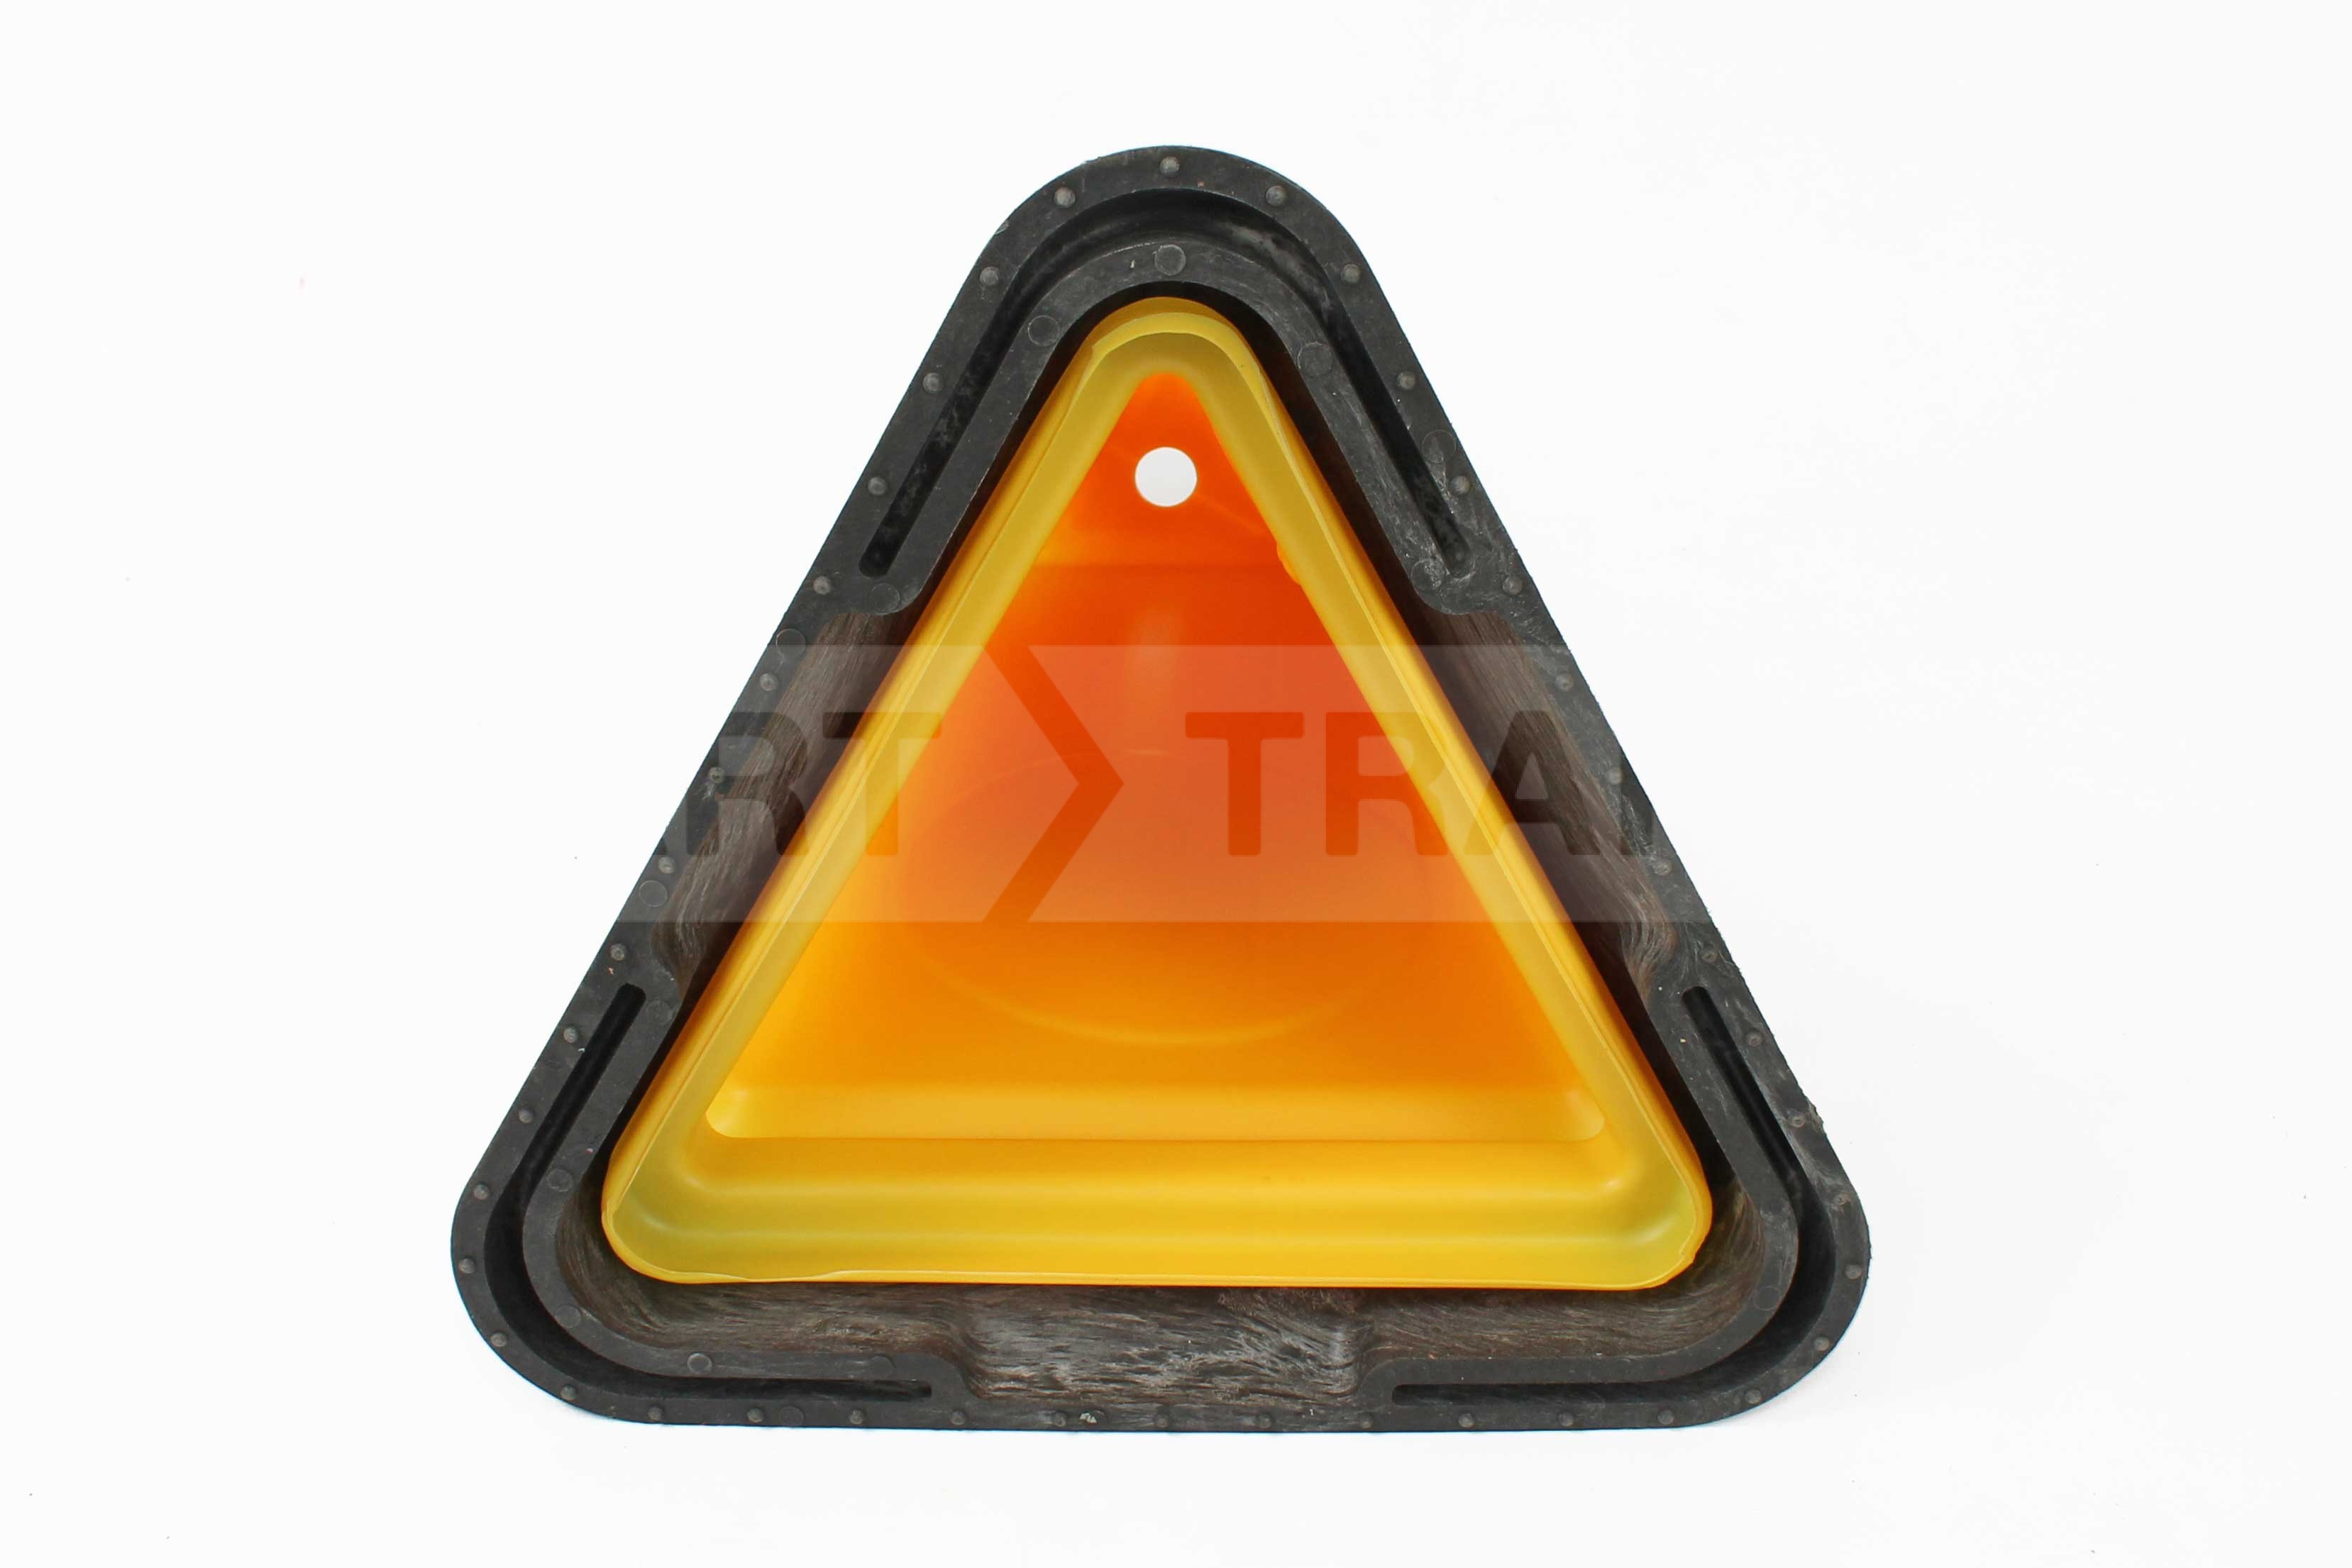
Underside of the new triangular no waiting cone.
One of the handy features of this cone is the unique finger grips underneath that make it a little easier when separating them from a pile of cones or even just carrying them.
Close up of the handles that can be used when lifting the cones from stacks.
These are in stock – please call us on 01905 794 875 if you would like to order or require any more information.
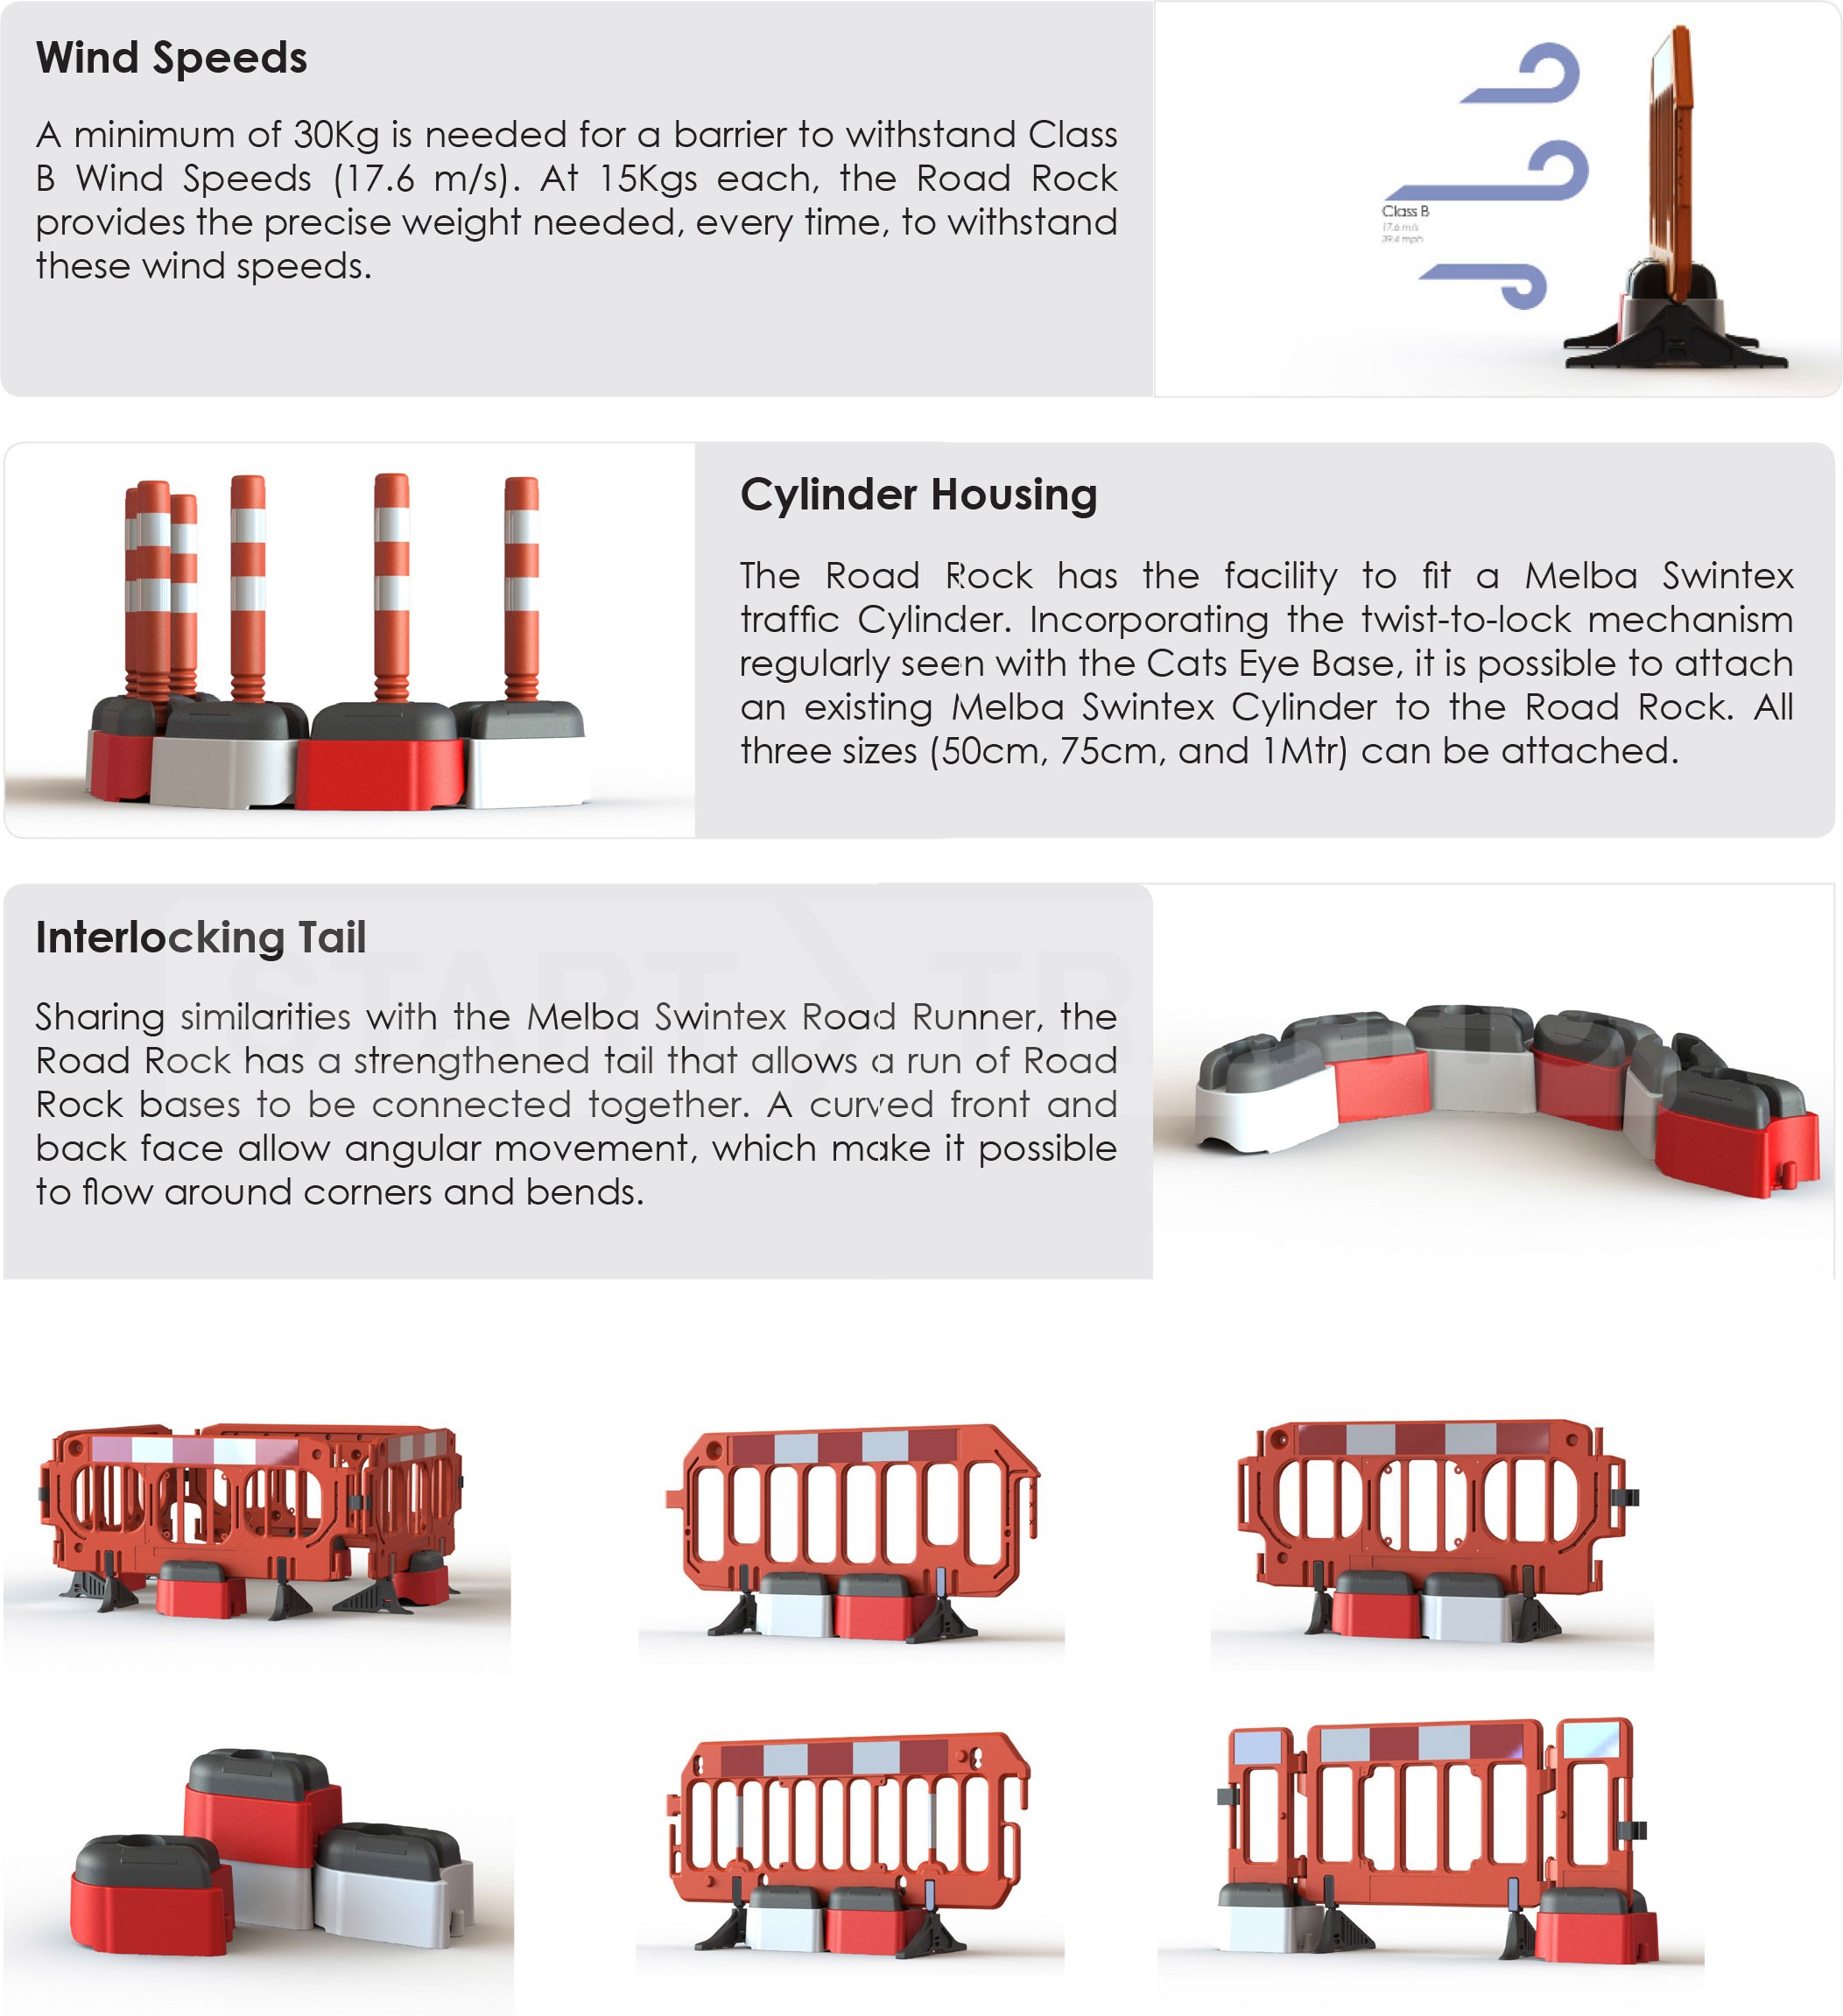
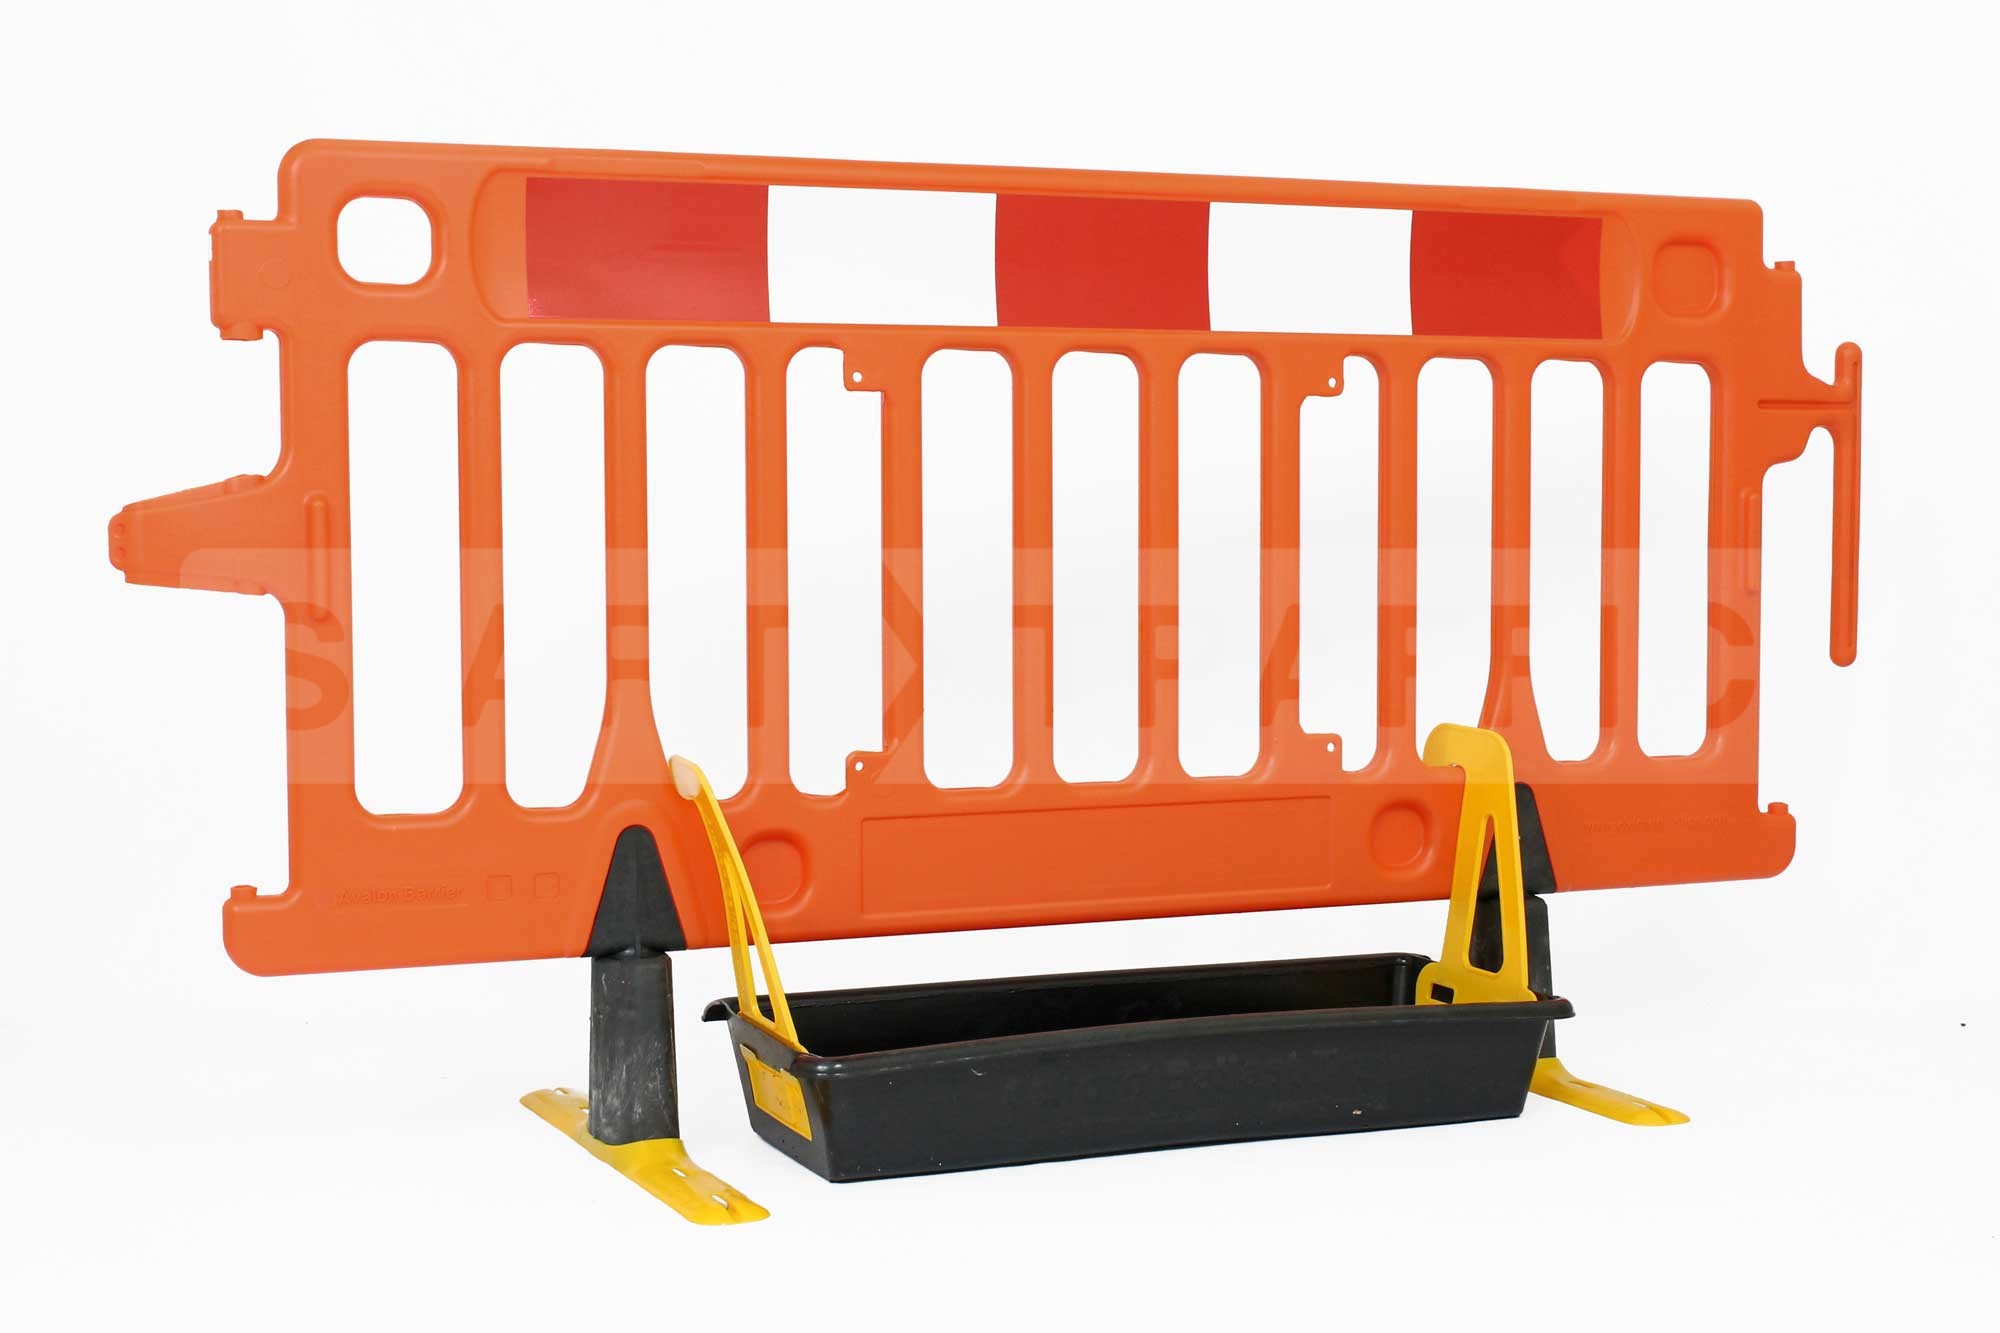
Since our last blog post on Stabilising Pedestrian Barriers Oxford Plastics and Melba Swintex have both bought out new solutions to Barrier Stability. These solutions have come about because of new legislation that enforces a varying ballast being added to pedestrian barriers depending on wind speed.
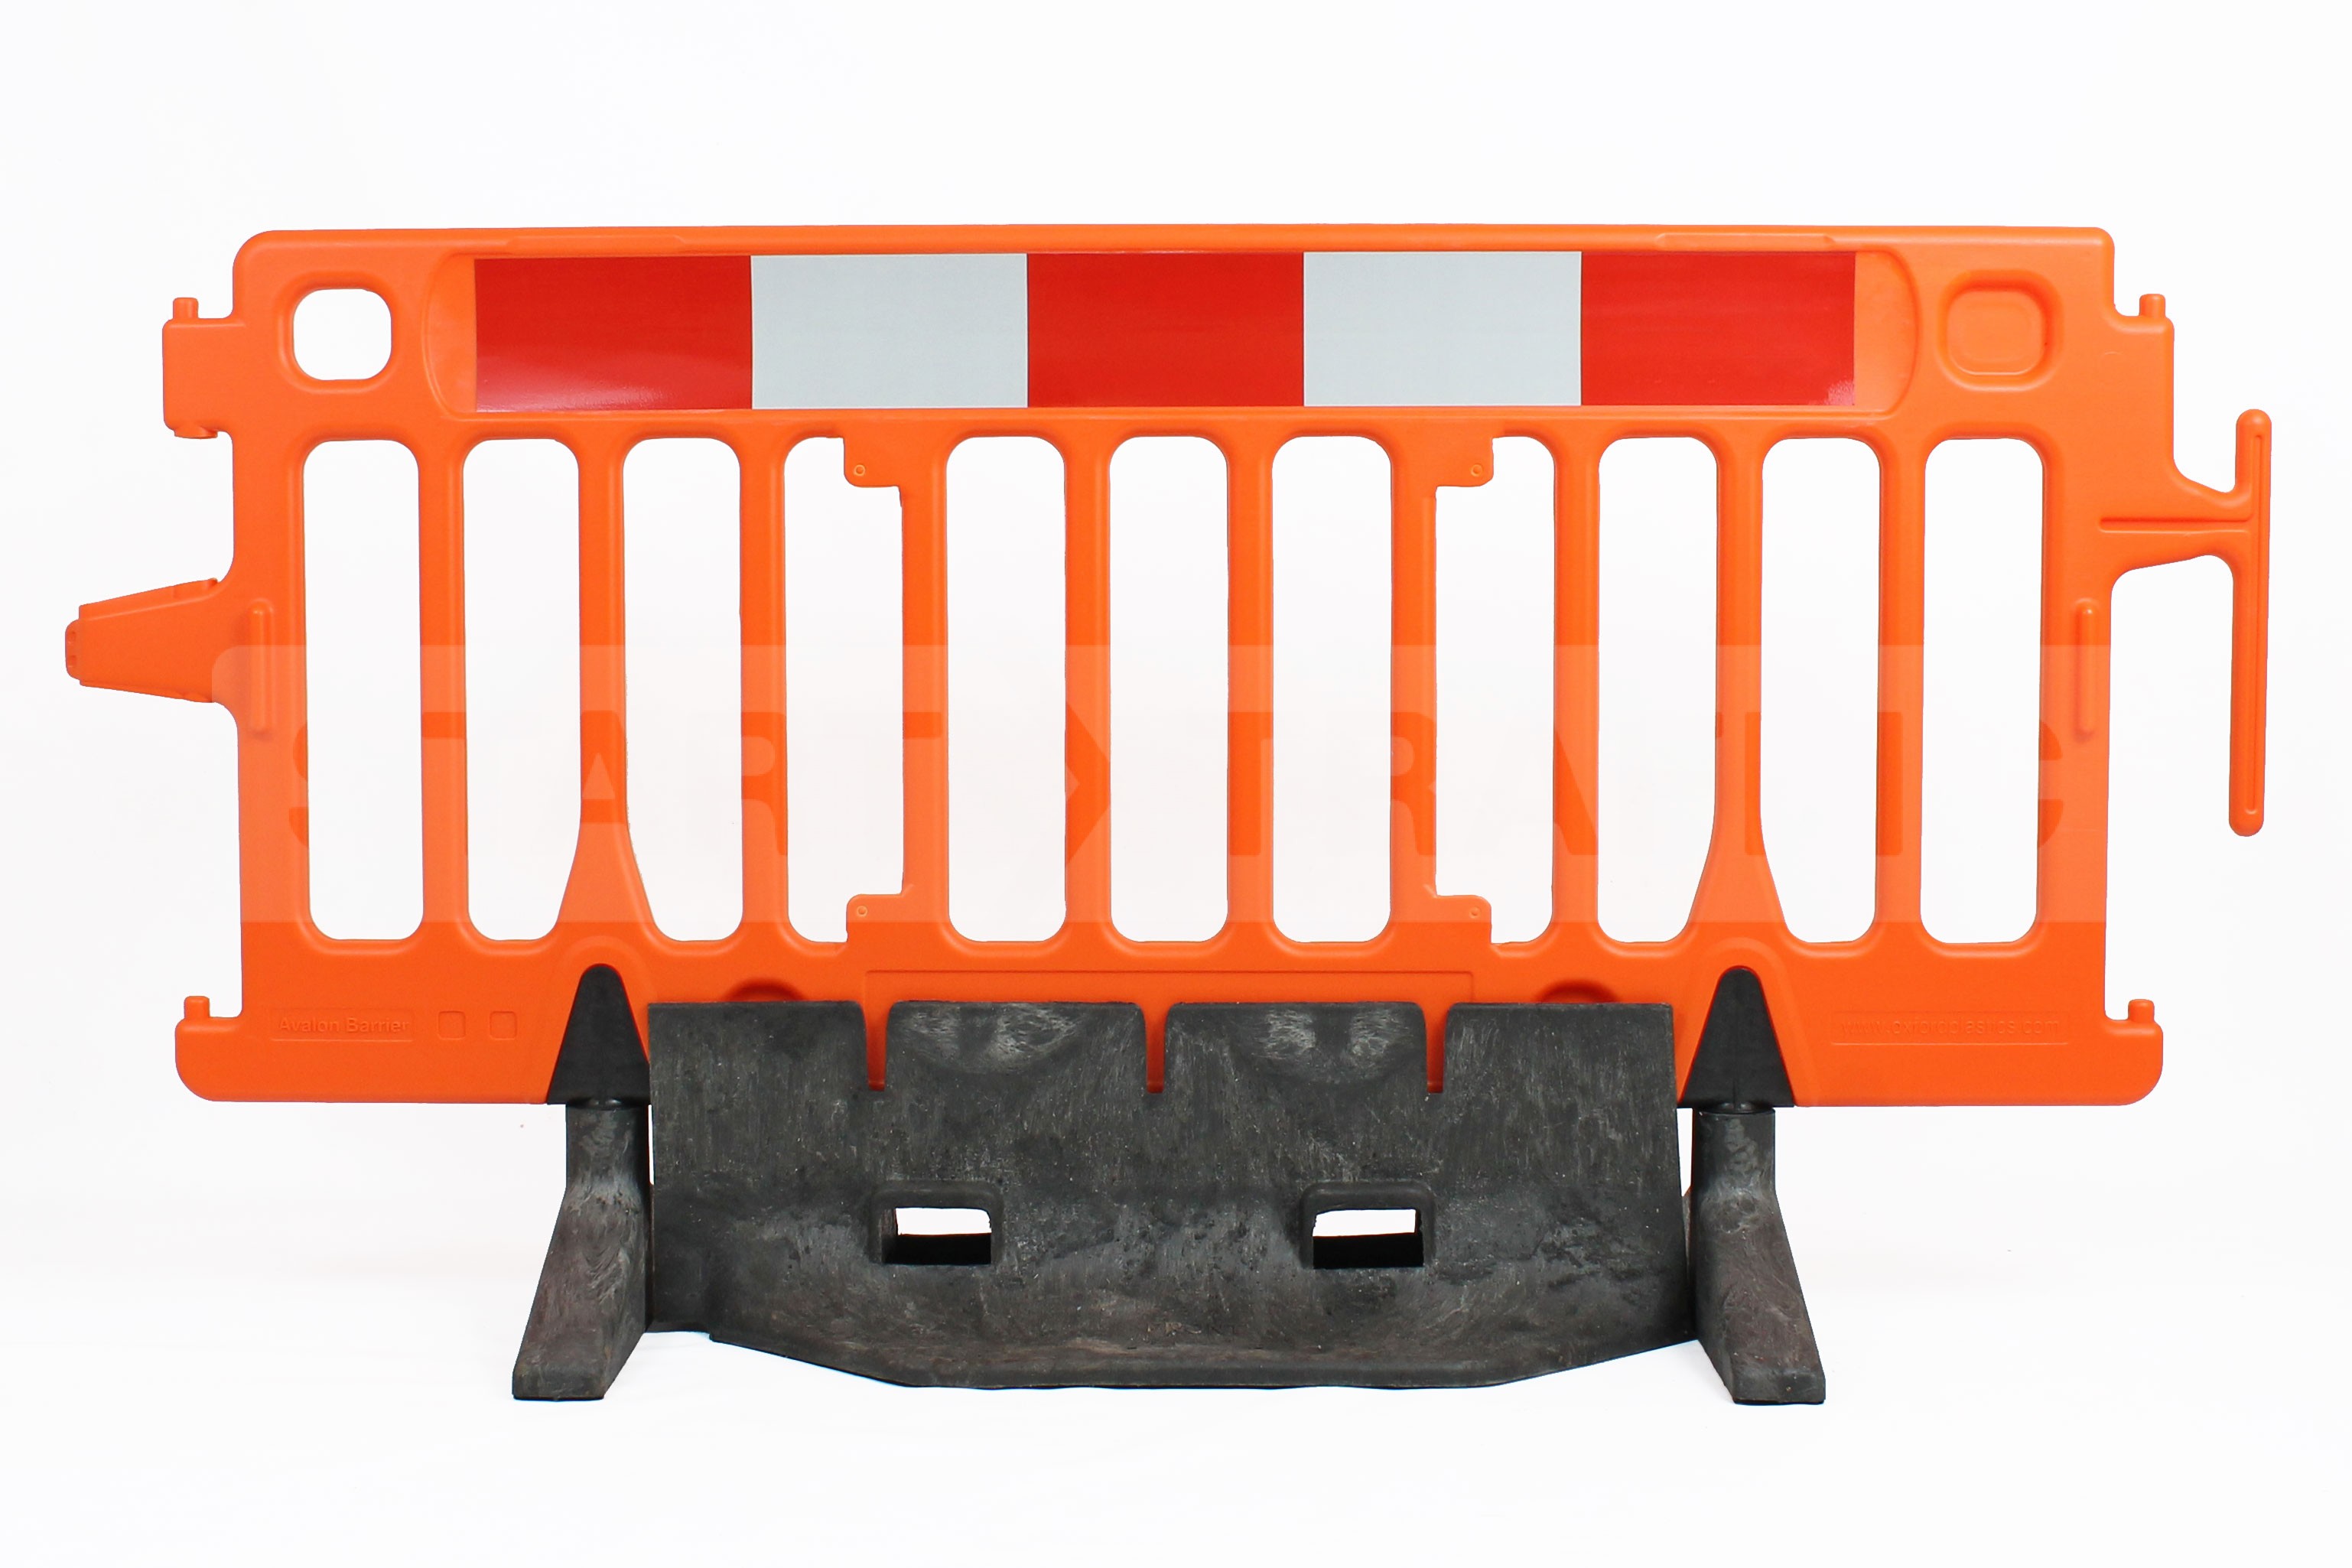
Oxford plastics have modified a strong-wall base to create the brand new Avalon Ballast Base which allows the Avalon Barrier to slot into the top of the Ballast Base keeping it secure and adding 18kg of ballast.
This solution is very heavy duty and almost eliminates the possibility of the barrier tipping over or moving.
The new Avalon Ballast Baseclose up of Avalon ballast base
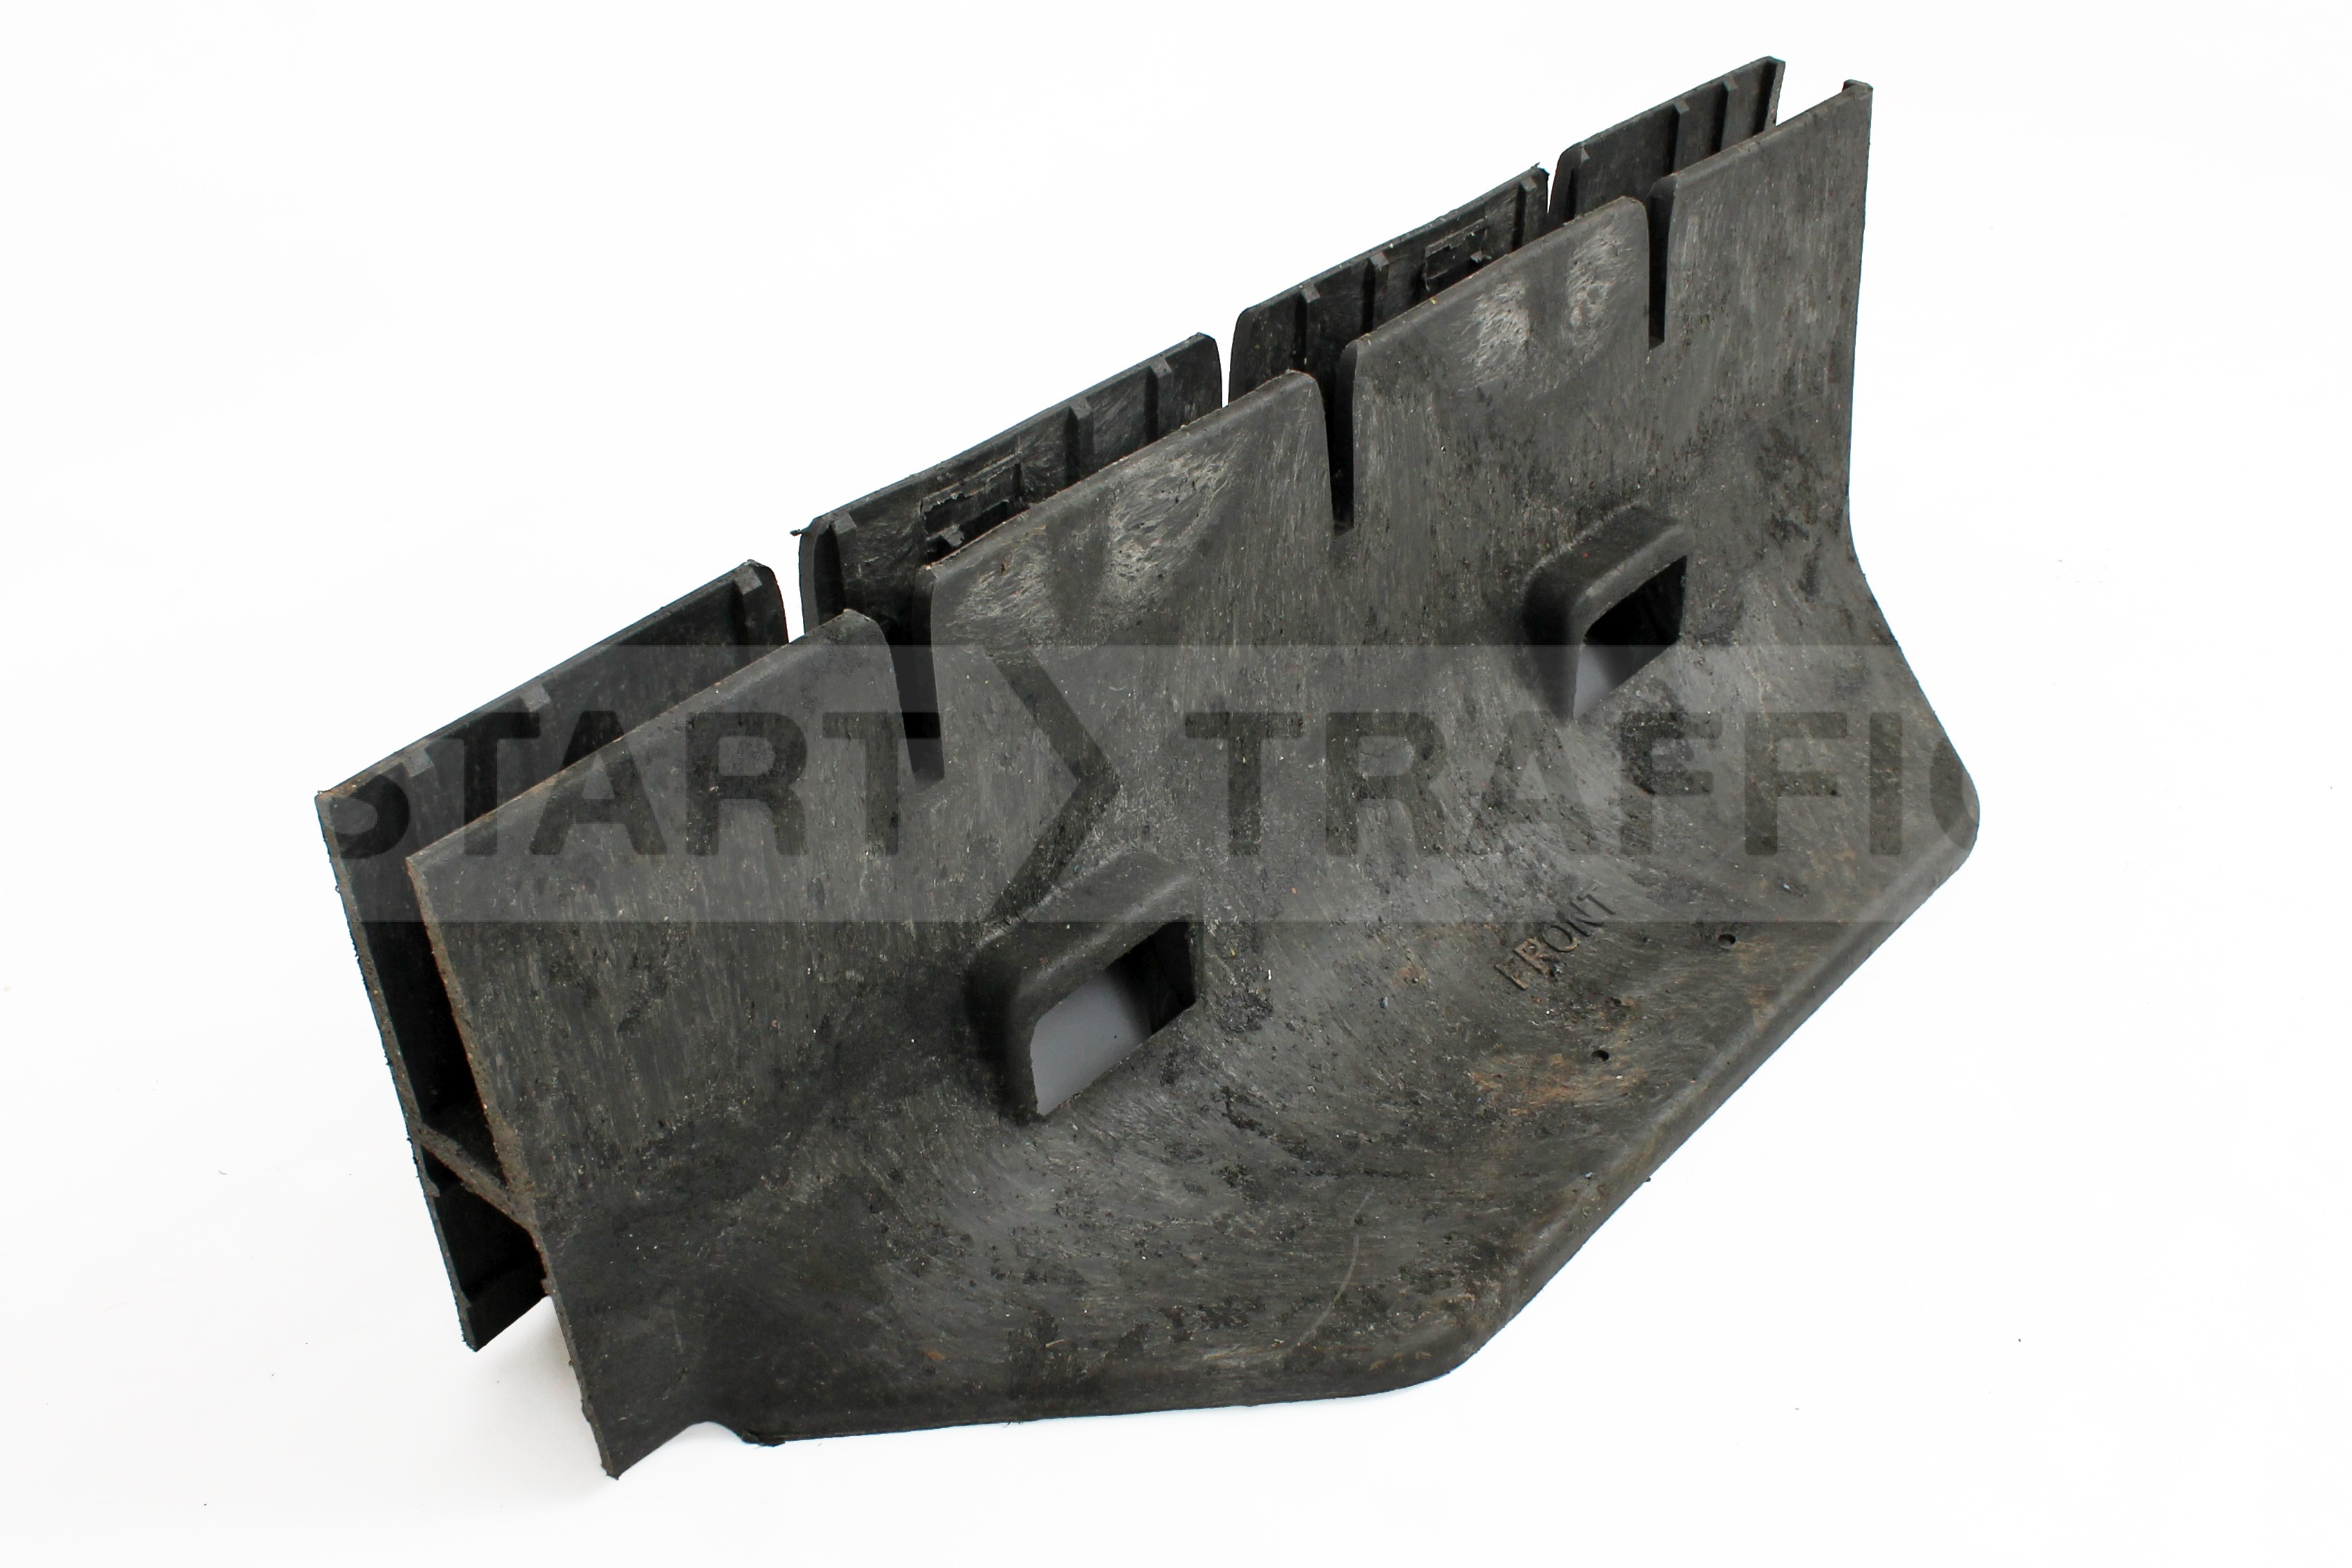
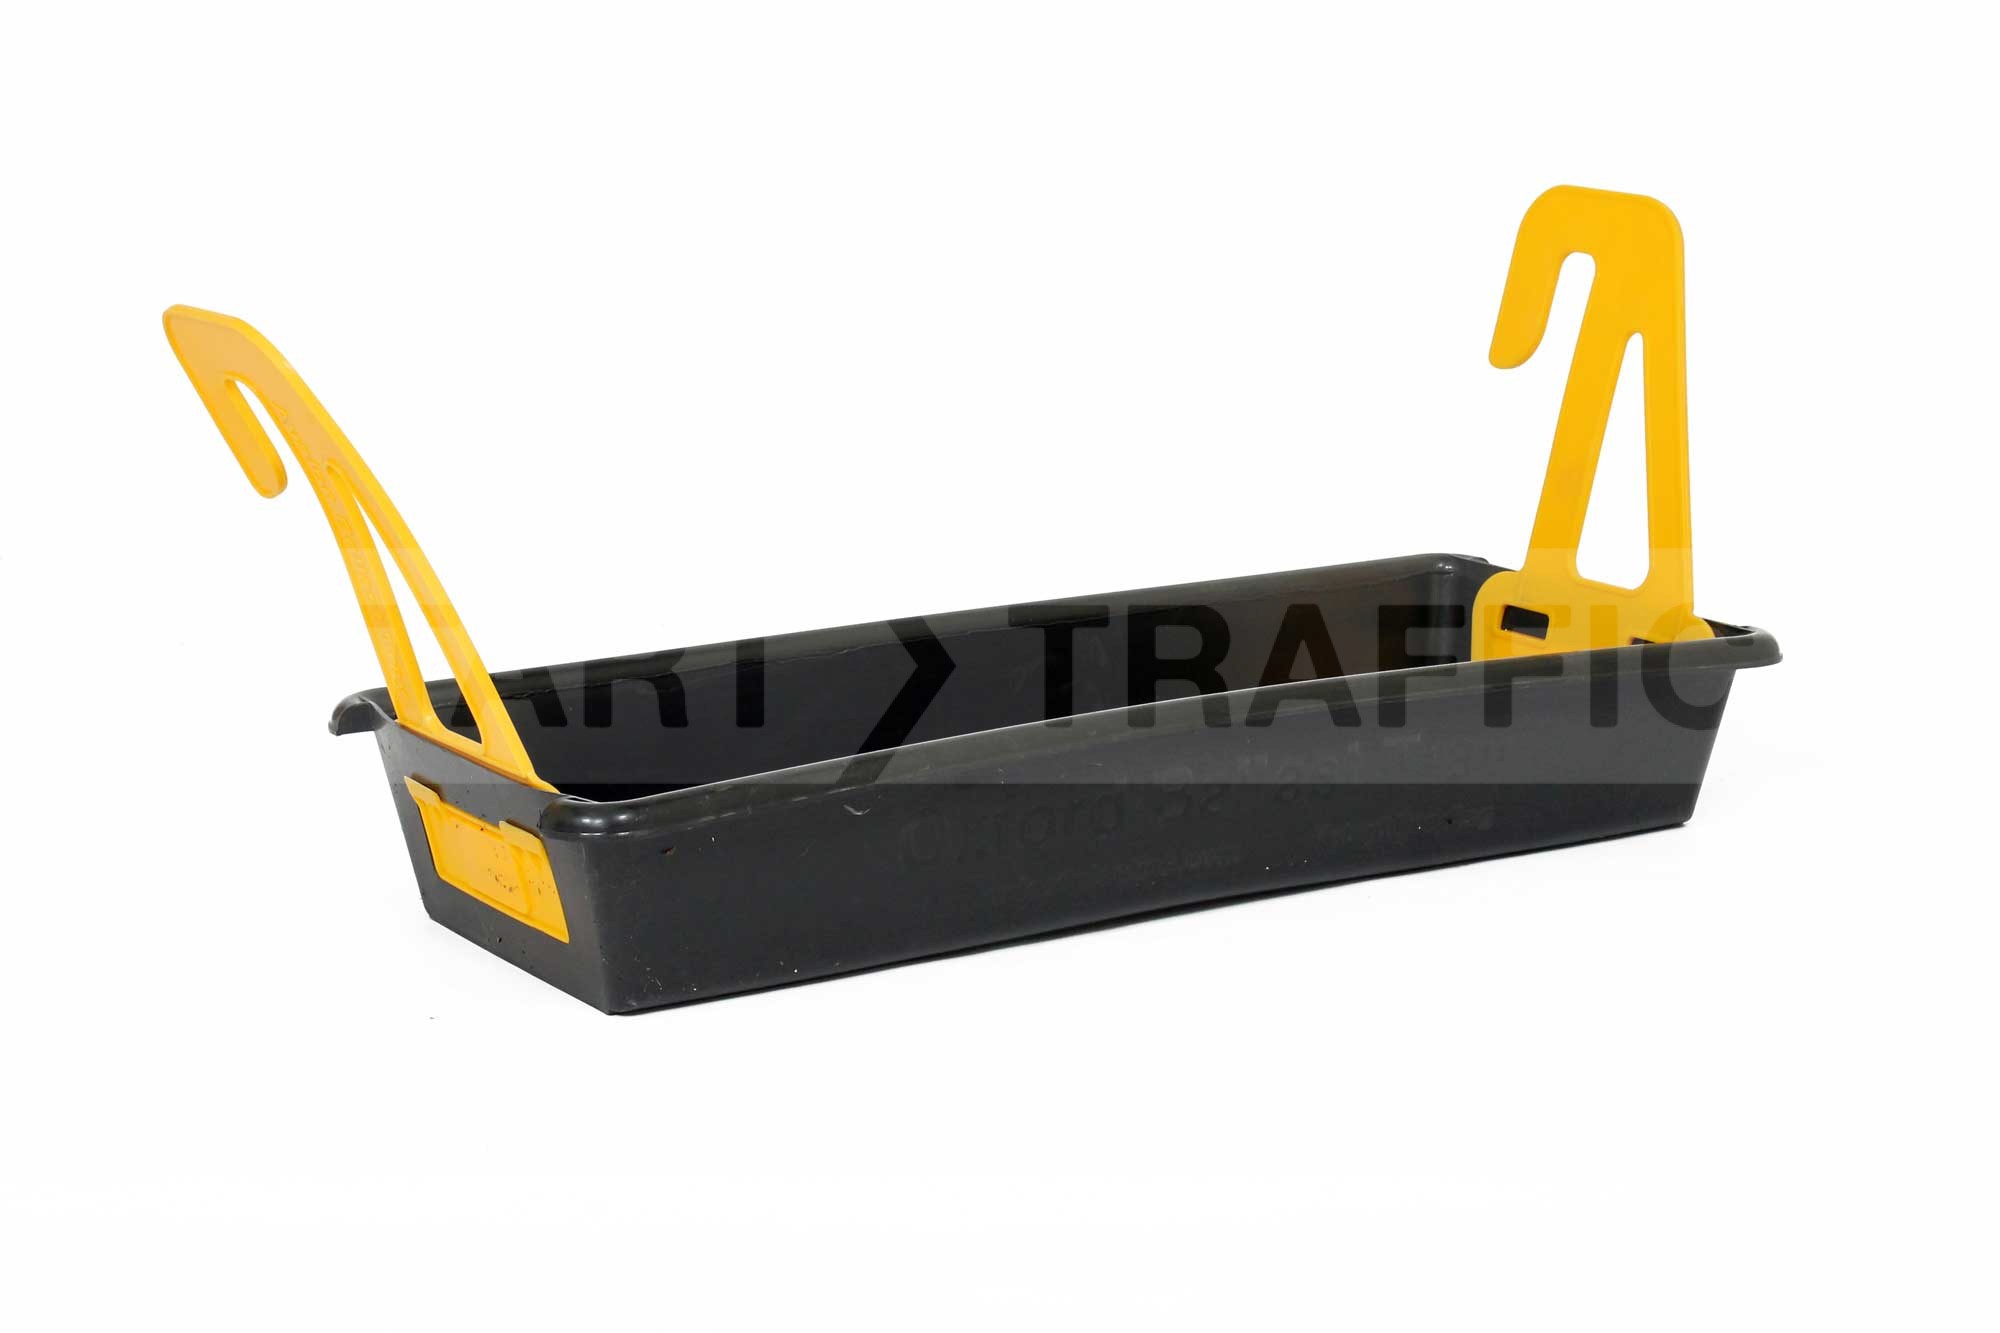
Another alternative product from Melba Swintex is an all new product called the Road Rock which uses a similar approach with a weighted block that the barrier slots into. The difference with the Melba Swintex Road Rock is that it is a multi-purpose product that can also hold any of the Melba Swintex Delineating Road bollards or hook together to create an interlocking trail.
Close up of the new Road Rock barrier stabiliser
The Road Rocks weigh in at 15kg each and 2 can be used on a single pedestrian barrier adding 30kg of ballast.
Perspective shot of the new Road Rock Pedestrian barrier stabiliser.more information about the new Road Rock
From Left to Right: ‘The Red Book’, Chapter 8 Part 1: Design and Chapter 8 Part 2: Operations
If you are working on the road it is important to meet the necessary requirements. This post is intended to be a short summary of the resources available.
“The Red Book” – Officially ‘Safety at Street Works and Road Works – A Code of Practice‘ – Described as:“… intended to help you to safely carry out signing, lighting and guarding of street works and road works on all highways and roads, except motorways and any dual carriageways with a speed limit of 50 mph or more. This Code is directed at operatives, supervisors, managers, planners and designers who are responsible for making sure that all street and road works are safe for both operatives and the public. Road users including pedestrians, cyclists and equestrians (horse riders) should not be put at risk, and should be able to see the extent and nature of any obstruction well before they reach it.”This is a concise guide to the regulations set out in the full Chapter 8 of the Traffic Signs Manual. Read the Red Book Here.
Traffic Signs Manual – Part 1: Design.This is the comprehensive guide for those responsible for the design of temporary traffic management arrangements to facilitate maintenance activities.At 334 pages it can be intimidating however spells out in detail the methods involved during the design stage. It is available digitally at no cost here.
Traffic Signs Manual – Part 2: Operations.This is the comprehensive guide for those responsible for the planning, managing of, and participation in, implementing, maintaining and removing temporary traffic management arrangements.The second part of Chapter 8 is again very comprehensive at 229 pages. It is available digitally at no cost here.
Over the last month we have been simplifying our identity and branding. We started with shortening our company name to Start Traffic Ltd which removed any ambiguity from our primary business model.
Now, we are making some further improvements as part of our future ecommerce strategy from today.
Our website address has changed from starttraffic.co.uk to starttraffic.uk (All contact Email addresses are also correspondingly updated. e.g. sales@starttraffic.uk)
Standards and Authority – The .uk domain is set to become the de facto standard for UK websites (e.g. gov.uk) to fall in line with other country code domains. The vast majority of countries have a direct top level also (ccTLD), which means that users outside the UK are naturally inclined to type website.uk because they’re used to typing .de or .fr or .ca. The only way to survive in the web industry is to keep evolving and moving to .uk helps reflect this as it is now the third most popular country code top level domains with over 11 million .uk domains now registered.
Short and Sweet – It may only be three characters different, but it quickly adds up if you’re a mobile user visiting multiple times a day. Fewer characters mean less chance of typos.
A New Website – Next generation design with a familiar feel, faster and mobile friendly. Our new store is built from the ground up in alignment with our American sister company starttraffic.com
Our new website is designed to be mobile web responsive (smartphone friendly) enabling us to better support our vast majority of customers on the move.
A change is as good as a rest – Improving our function and design gives us chance to re-think the way we support our customers and products with many new features coming in the near future. You’ll hear more about this soon.
Site Wide Security – (EV SSL)
Extra security for our customers and protecting privacy – Although we have always encrypted and securely handled your personal data through our site, we have decided to go one step further and implement encryption throughout the entire browsing experience from the moment you visit us.
That’s it for now, we hope you’ll look forward to using our new site and services. If you have any questions regarding these changes, please contact me personally on 01905 384 666.
We receive a number of phone calls every week asking how to specify impact barriers, in particular the following issues:
How many Post and Lap bolts do I need?
How many lengths of barrier do I need?
How many posts do I need?
Which type of post do I need?
This post is intended to explain exactly how to specify the sizes of impact barriers and when to use custom length pieces.
Impact Barrier Basics
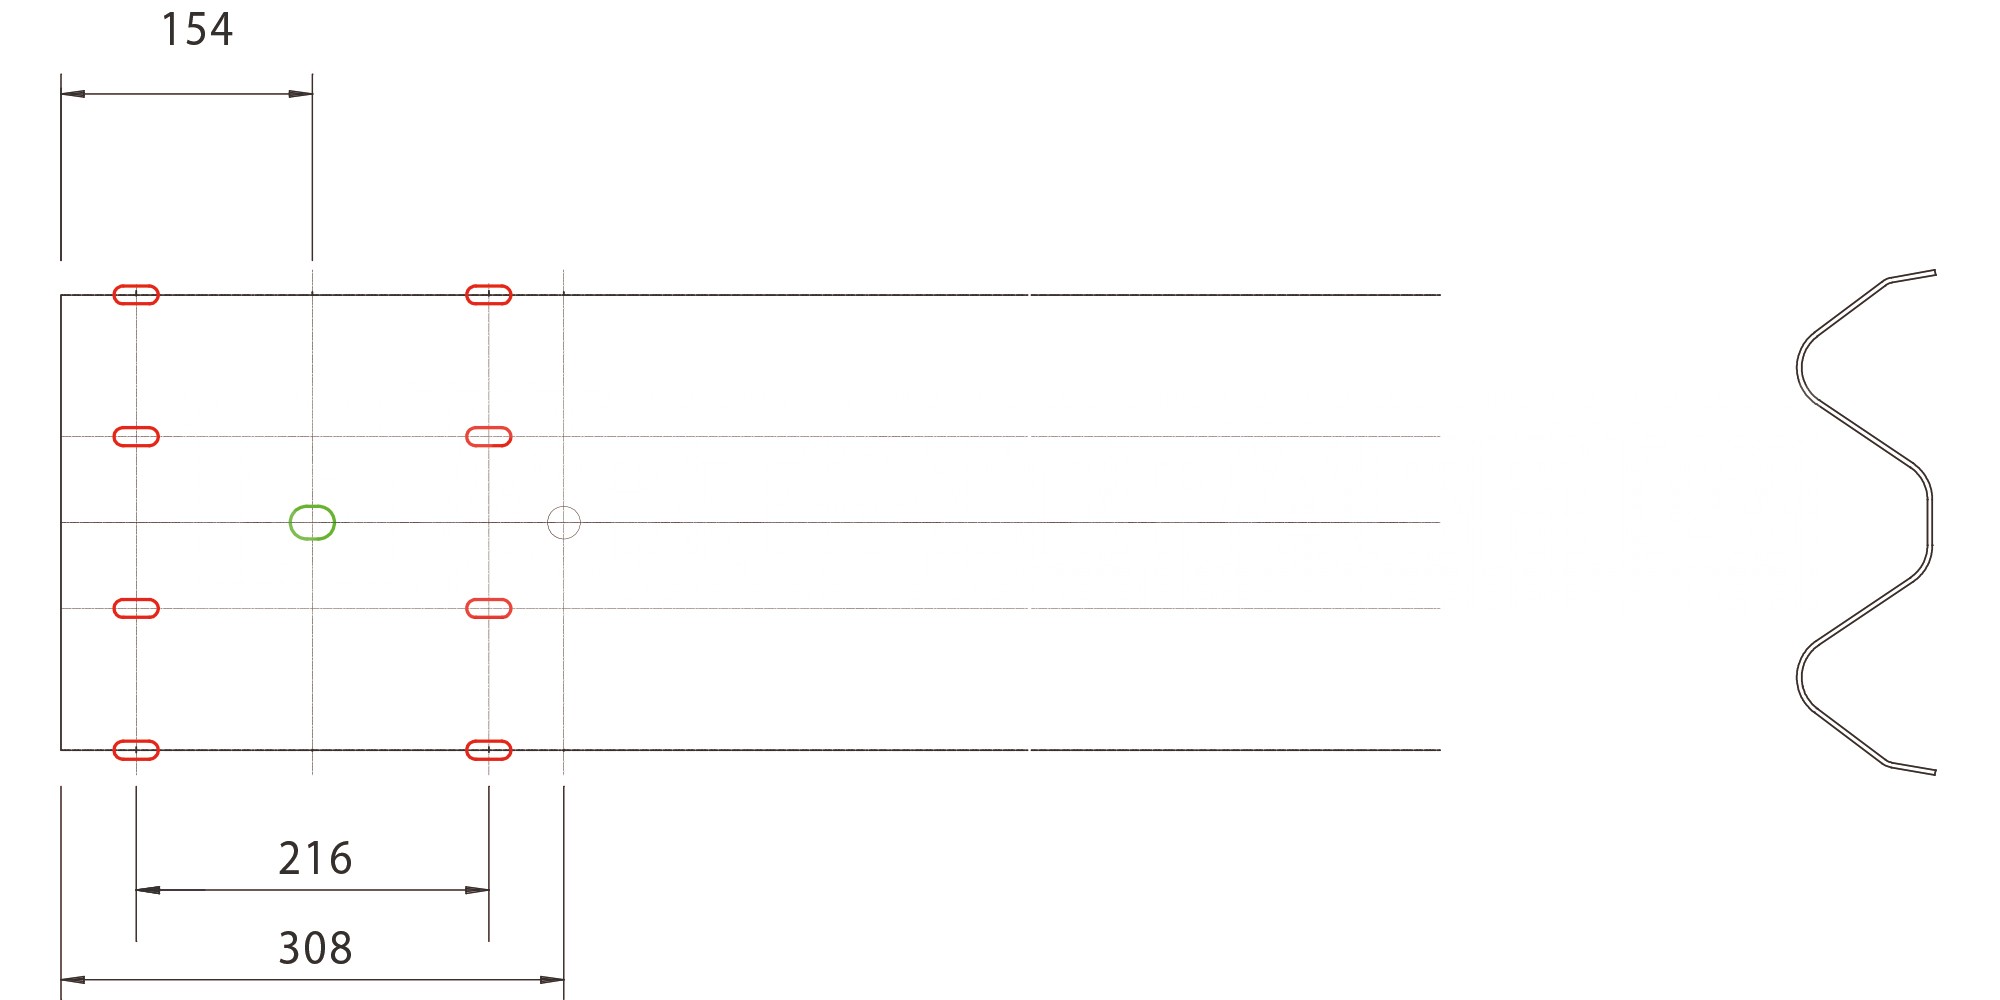
The most important concept to understand about standard impact barrier is how barrier sections and ends are connected together.
At the end of each piece there are 9 holes.
8 of these holes are for Lap bolts. These bolts secure the ends to each other. Each lap bolt is M16x35mm.
1 centre hole is for the Post bolt. This is the bolt that secures the crash barriers to the upright posts.
The diagram below illustrates this.
The red holes are for Lap bolts, the green hole is for the post bolt.
Lengths of barrier
There are two lengths that are commonly referred to when talking about impact barrier lengths:
Actual length: This is the total length of the barrier from the very end to end.
Effective length: This is the length between the post bolt holes. This is also the post spacing.
For example, if you fixed together two pieces of 3.5m (3.2m effective) impact barrier, distance between posts at each end would be 6.4m, with a length from end to end being 6.4 + 0.15 + 0.15 = 6.7 metres.
Post Spacing
Depending on the application, you can space your posts at either 3.2 metres or 1.6 metres. A post spacing of 1.6m will obviously offer a lot more protection and strength once installed.
Post Types and Mounting
There are two types of post available and two types of mounting system. Post types include:
Z section – This is the most economical type of post available and is formed from a single piece of 5mm steel plate – forming a ‘Z’ shape when looking from above.
RSJ / ‘I’ Beam – This follows the same shape as many RSJ beams used in construction. They are considerably more expensive but are the strongest type available.
Both types are available in:
Bolt down – The post is welded to a large plate that is designed to be bolted down with our impact barrier bolts.
Cast in – The post is designed to be set into concrete.
Corners and Finishing a Run of Impact Barrier
Typically it is advised to allow an additional 0.5m from the post to the apex of the corner. Our flexible corners can be bent from the standard 90 degrees to other angles to suit your application.
Tolerances of Impact Barriers
When designing an impact barrier application on paper it is common to design to very precise measurements – and this in turn usually adds significant cost as custom lengths are required to meet these dimensions.
In reality, because of the scale of impact barrier installations being within half a metre of the perfect length will often be good enough. This avoids having to have increased costs, lead times and instead we are able to deliver direct from stock without any waiting.
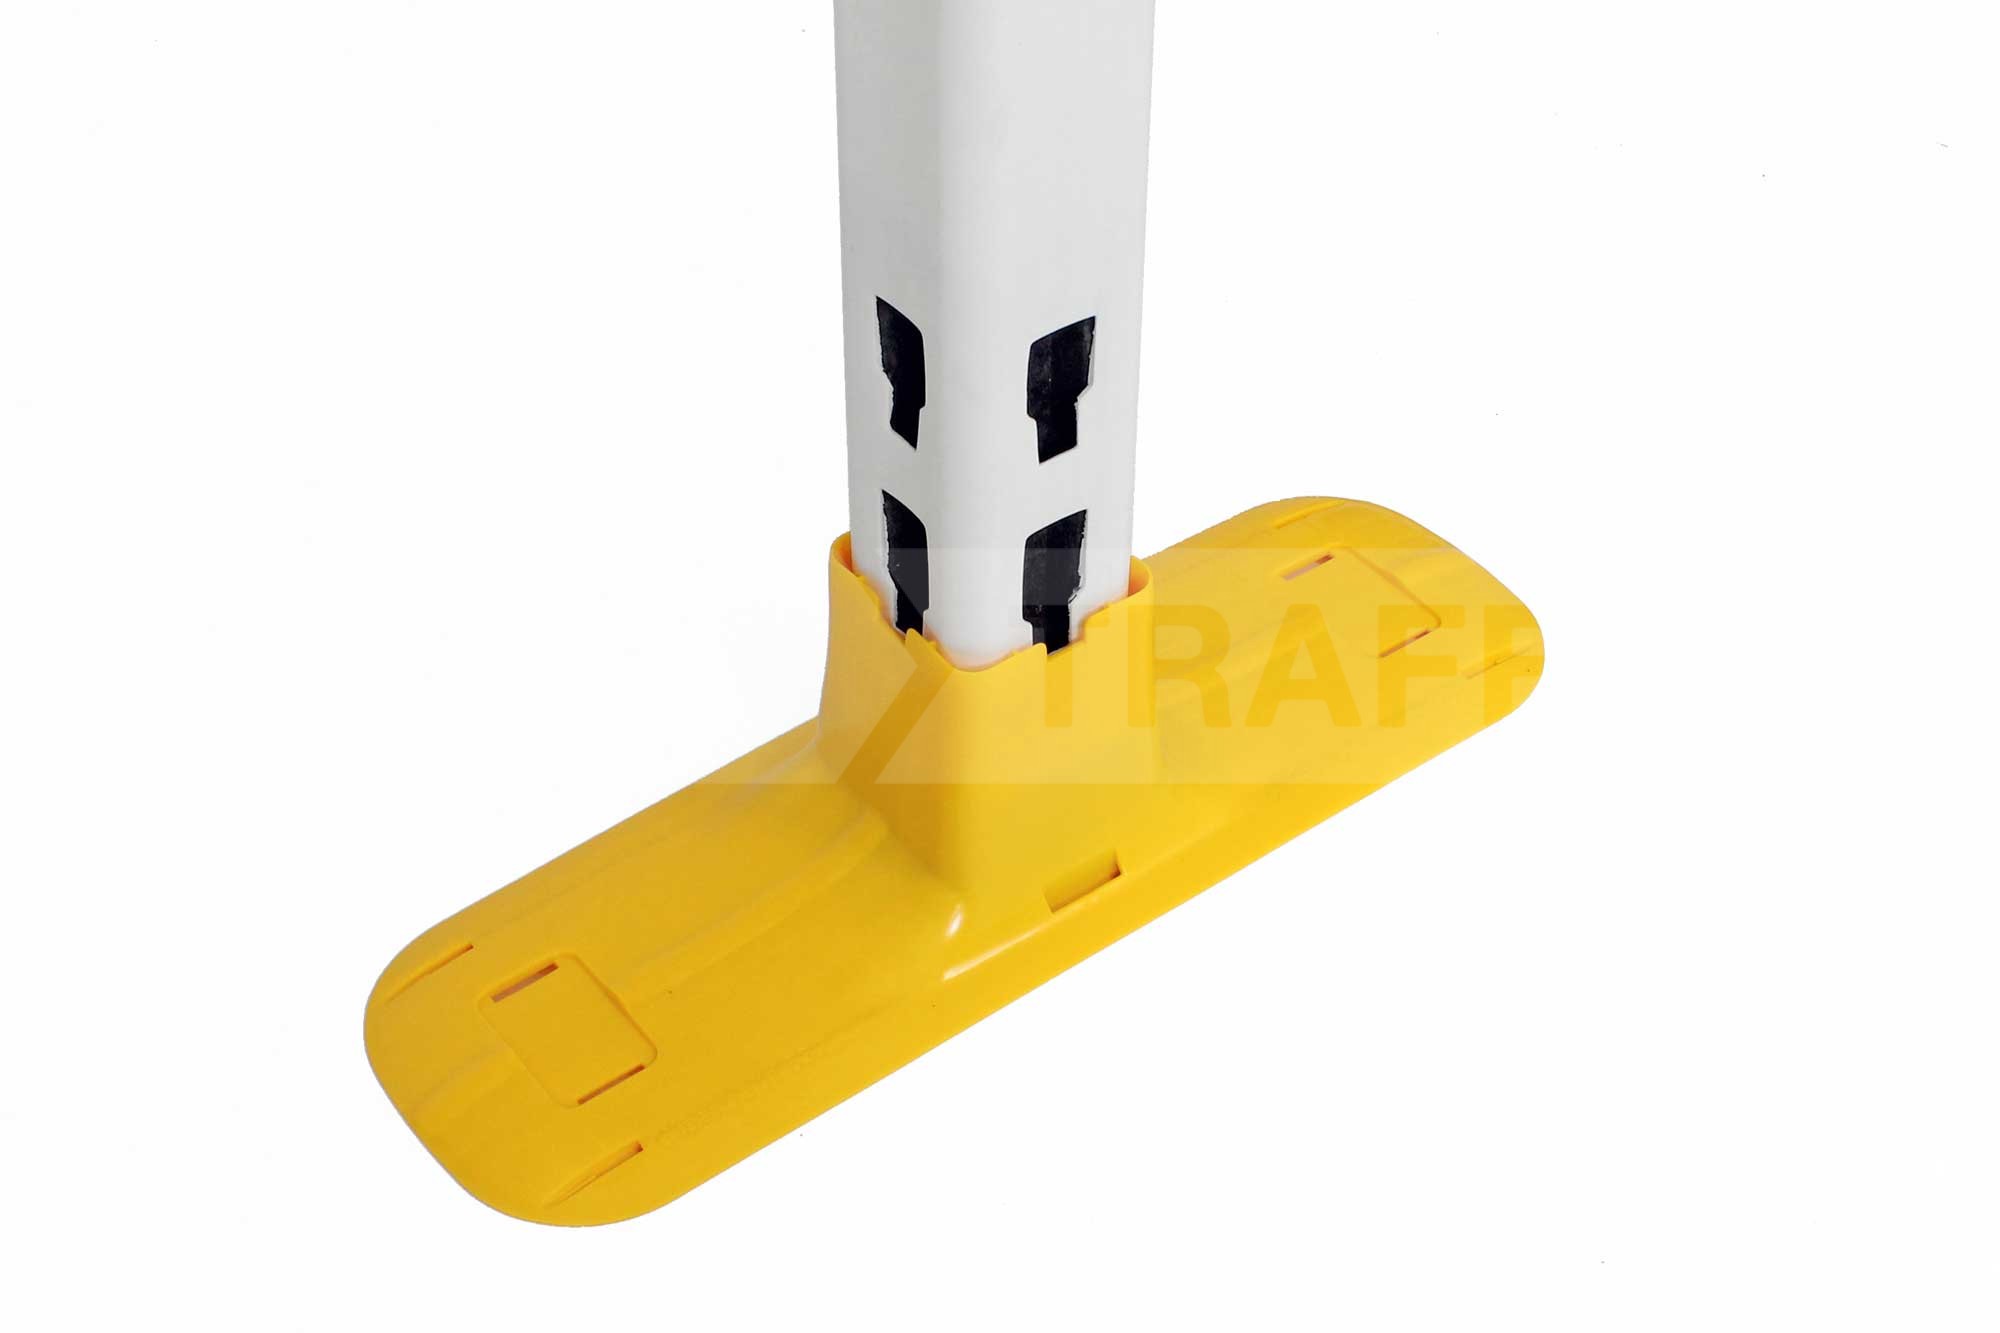
A compact and lightweight barrier system, the Watchman Barrier, has recently been revamped – the Watchman Barrier MKII.
The new Watchman MKII includes anti-trip feet – 2M kit shown.
This redesign is intended to introduce a number of improvements to the older design that includes.
HDPE Planks for longer lifespan – These don’t go brittle or crack easily. These are available in yellow or white.
Non-trip feet and revamped posts – even more stable. An innovative foot design means that the trip hazard is reduced to virtually zero.
A range of reflectives and lamps are available for the system.
The new Watchman Barrier has a new anti-trip foot.
The feet in the new system are almost completely flat, yet maintain rigidity by using a single GRP rod throughout the middle.
The new, long lasting planks are built to slot into the posts without wobble or slack, and within the post is a heavy duty recycled weight that gives additional stability.
When space is a premium, this is the barrier system to choose – and improves on the original post and plank system in every way.
Please contact us if you would like a quote on the Watchman MKII barrier system.
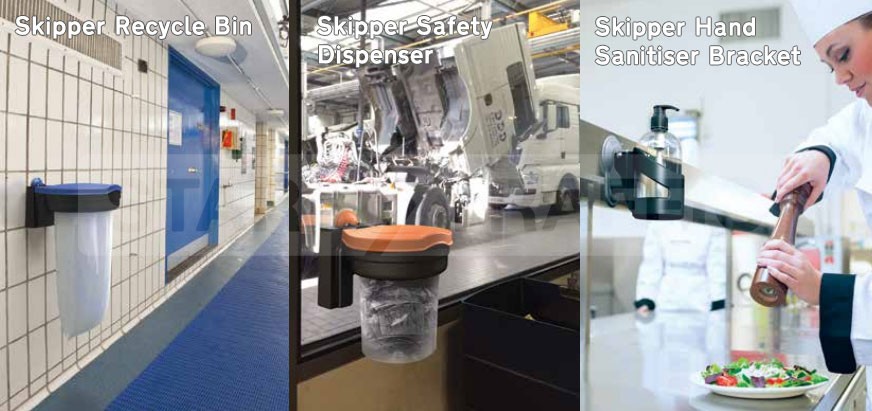
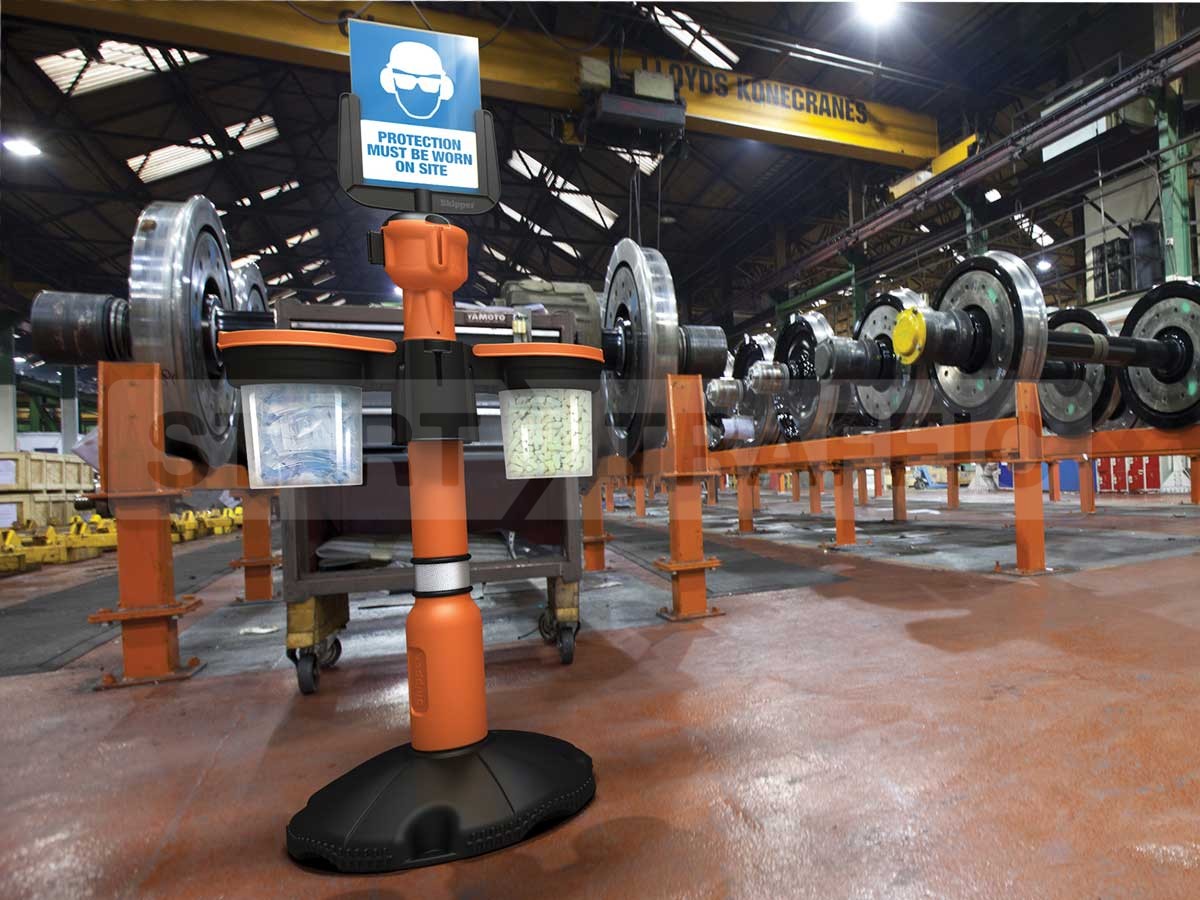
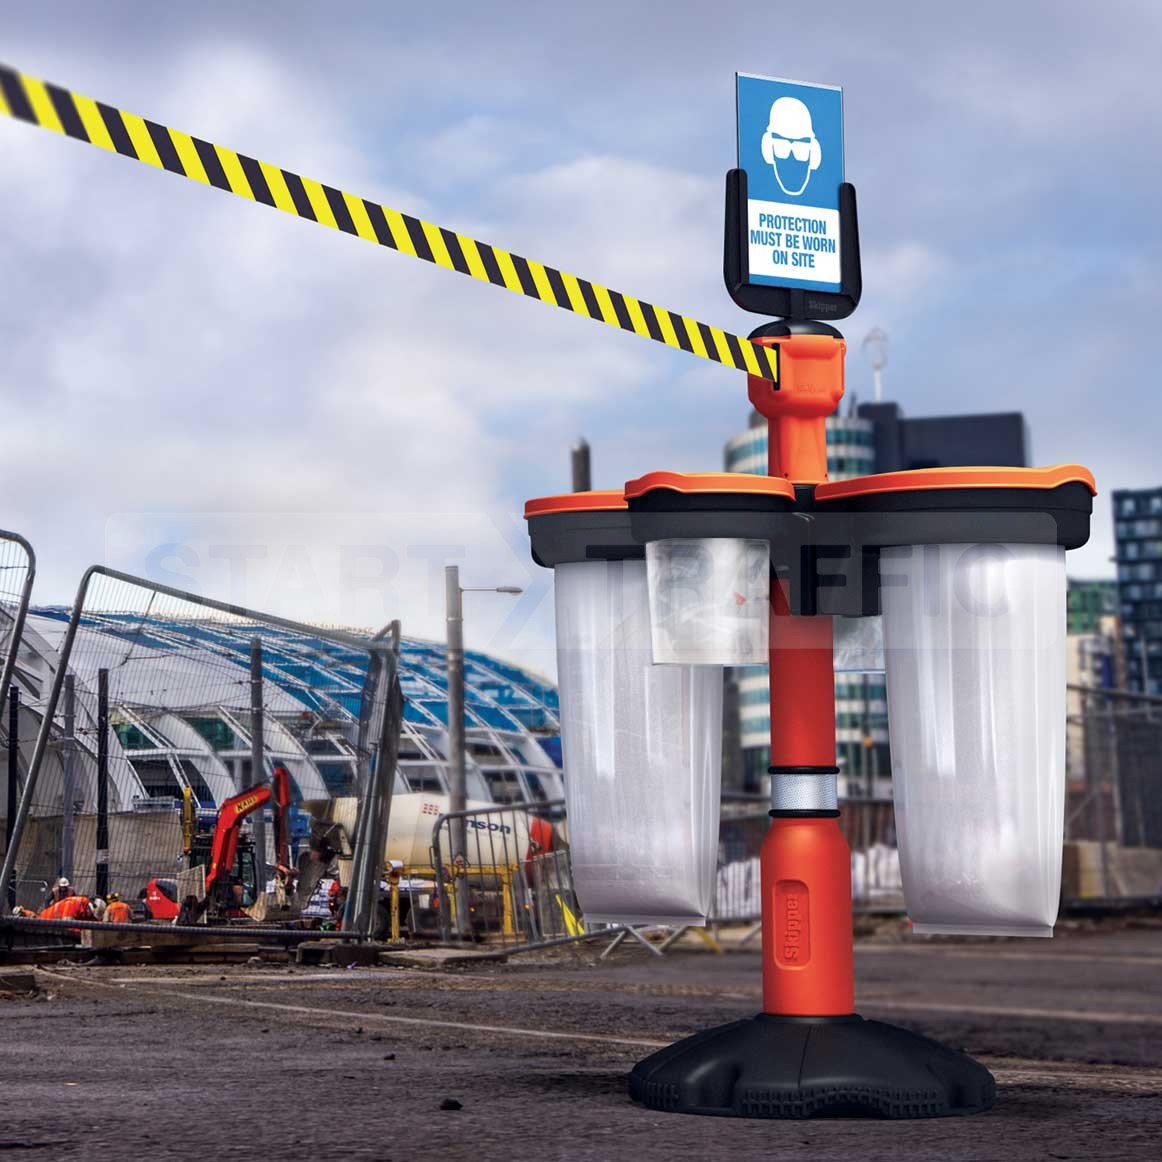
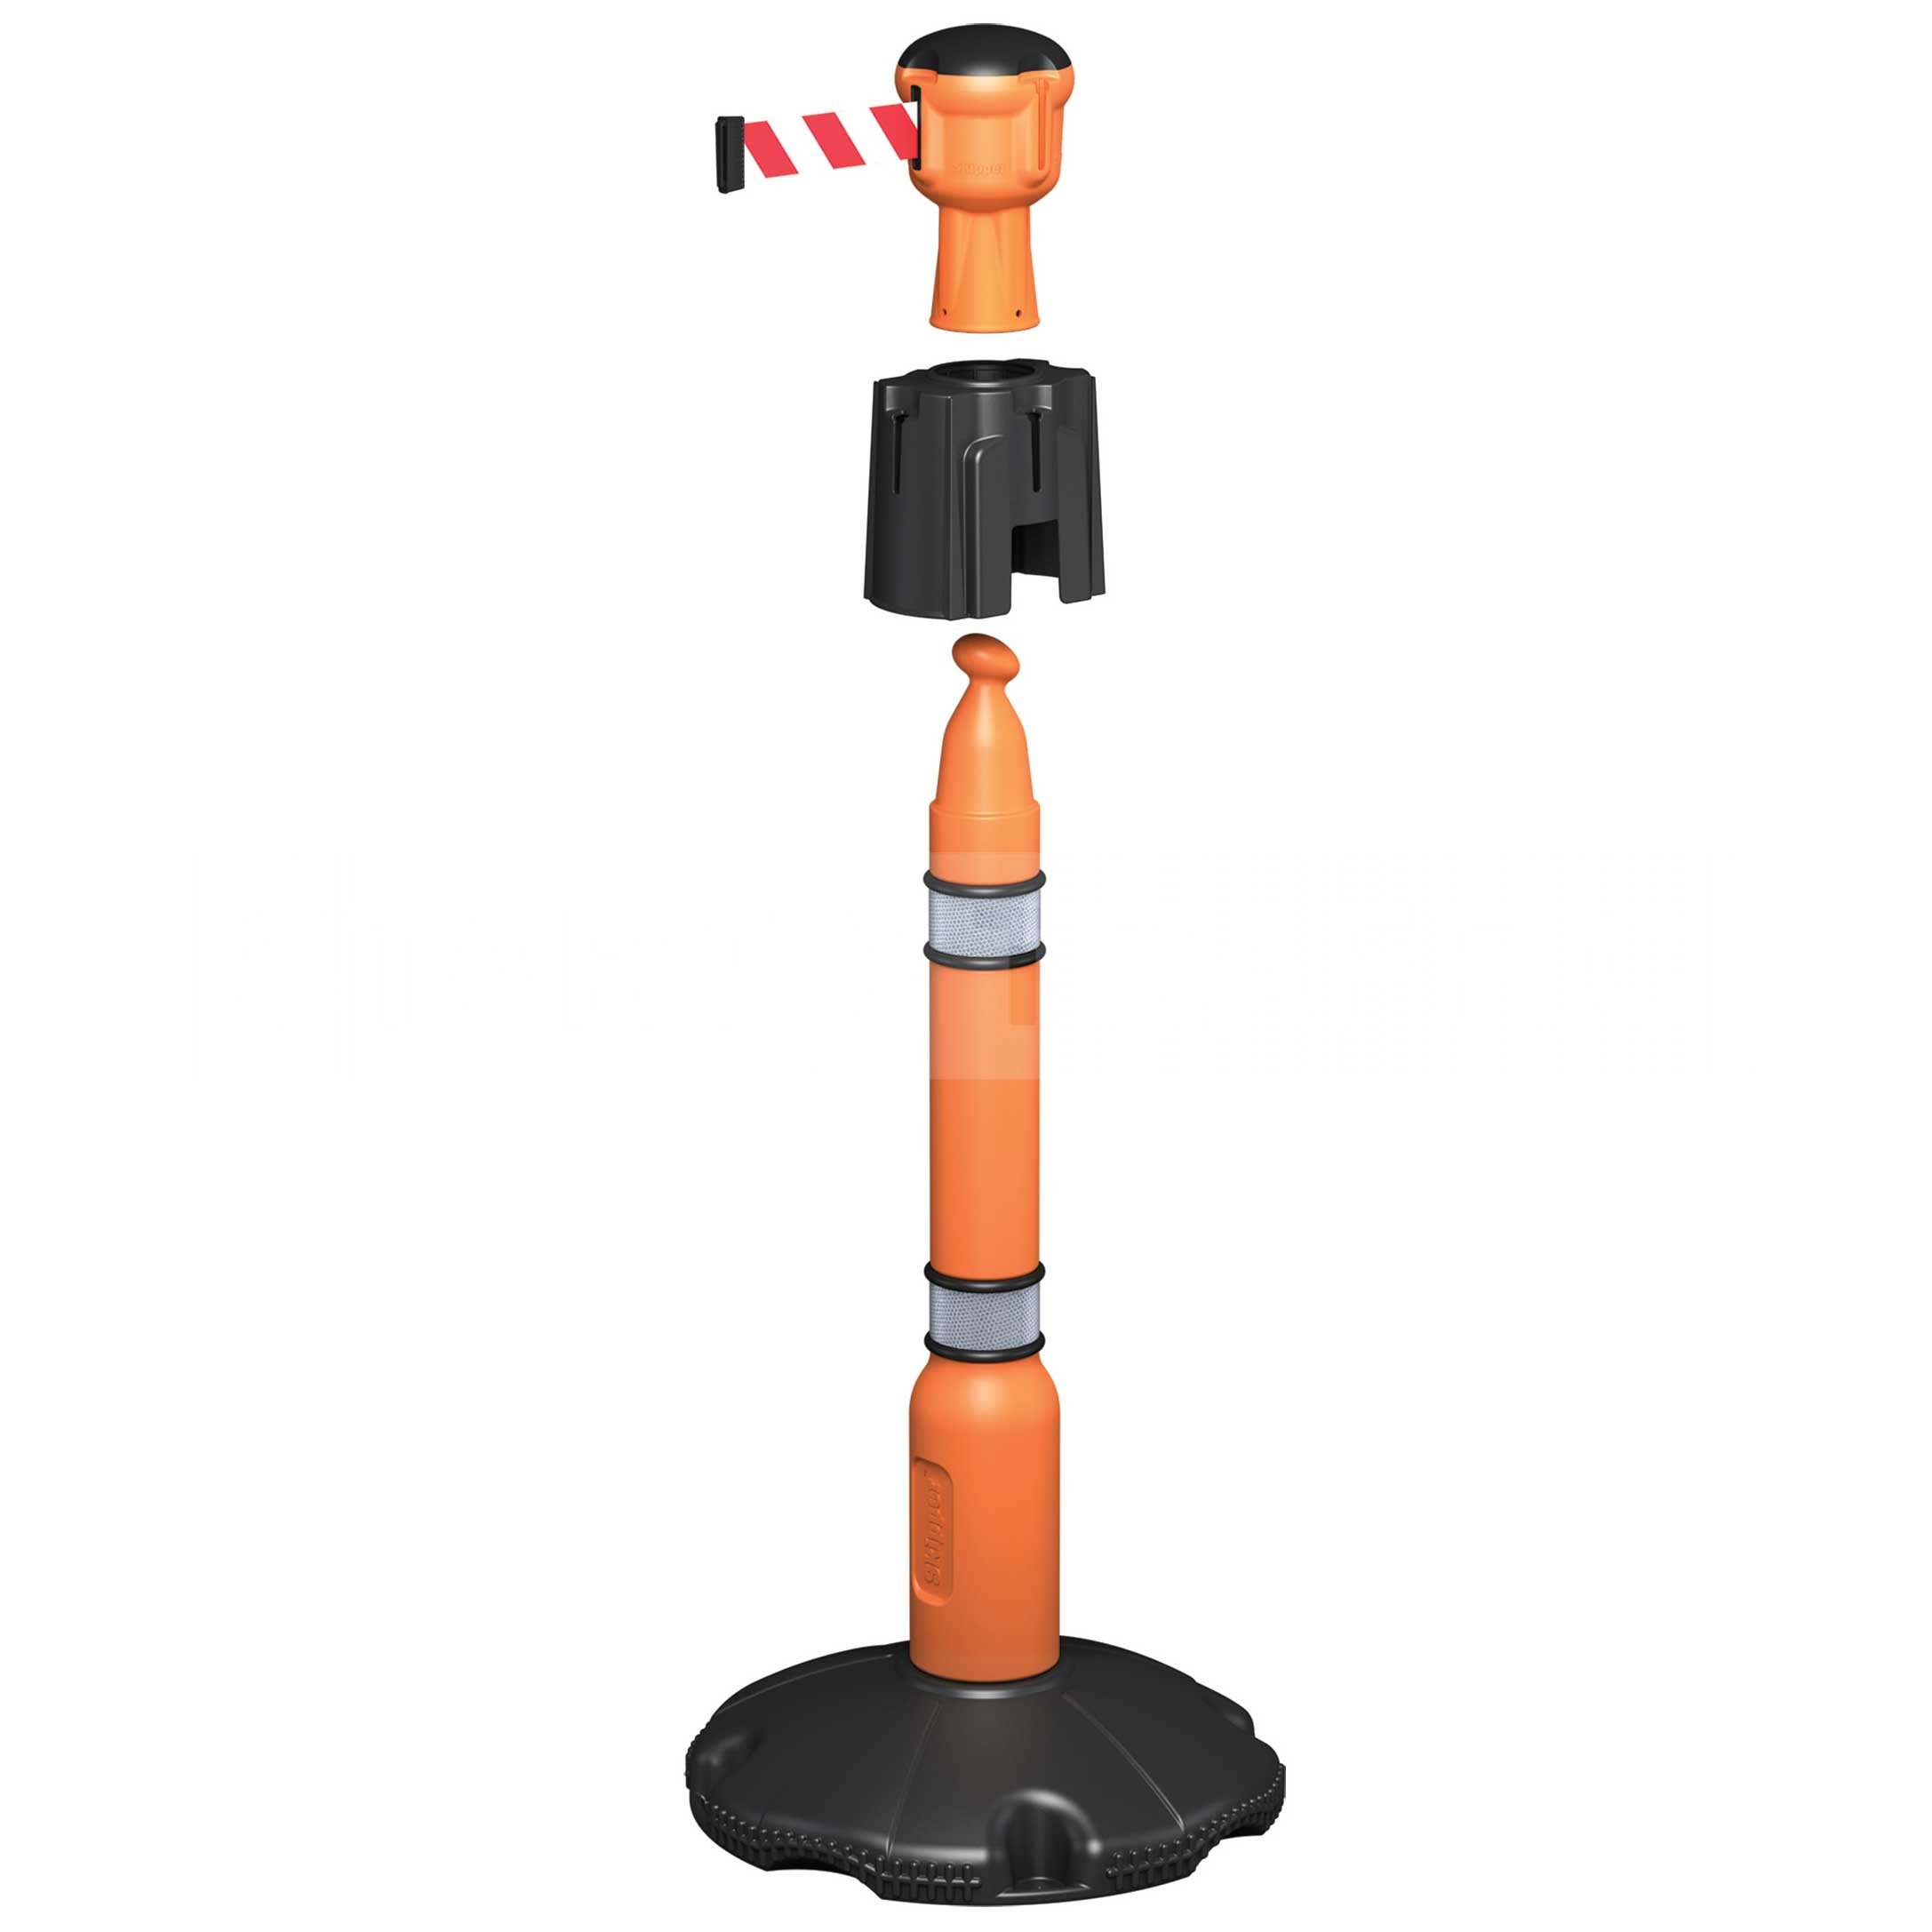
Recently Skipper have released three new products to compliment their Skipper barrier range.
The Skipper Recycle bin.
The Skipper Safety dispenser.
The Skipper Hand sanitiser bracket.
From left to right: The Skipper waste bin, The Safety dispenser and the Sanitiser dispenser.
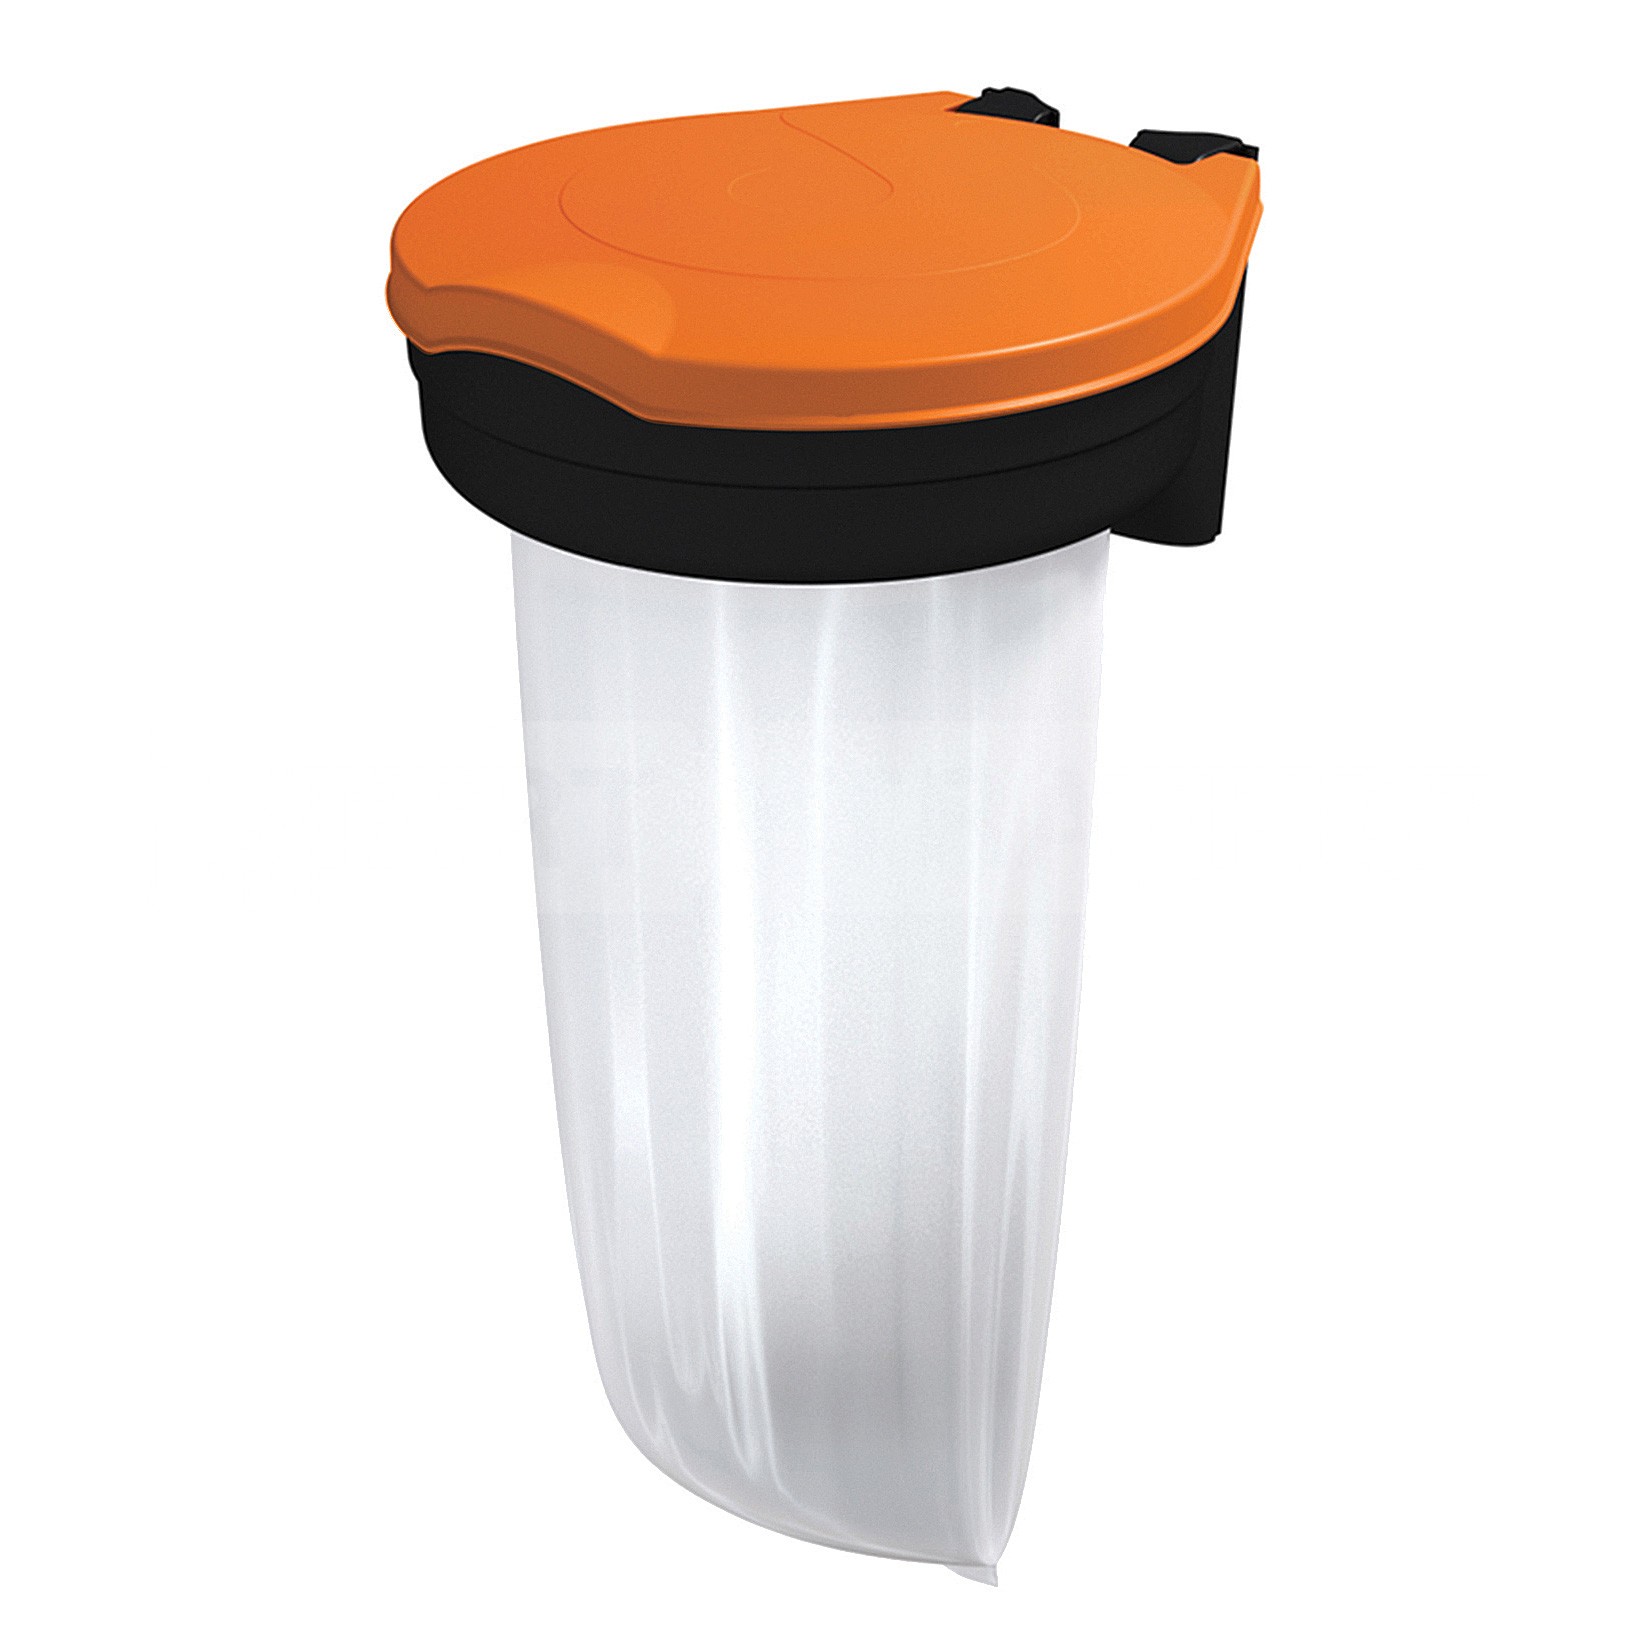
Skipper Recycle Bin
The new Skipper recycle bin offers a versatile approach to waste disposal. The bin can attach to the Skipper post & base collar, the magnetic & cord strap holder/receiver and the suction pad holder/receiver via the suction cup bracket. This allows the Skipper bin to be moved around to wherever it may be needed and used to be used in many environments.
The new Skipper recycle bin on its own.The Skipper bin and dispenser
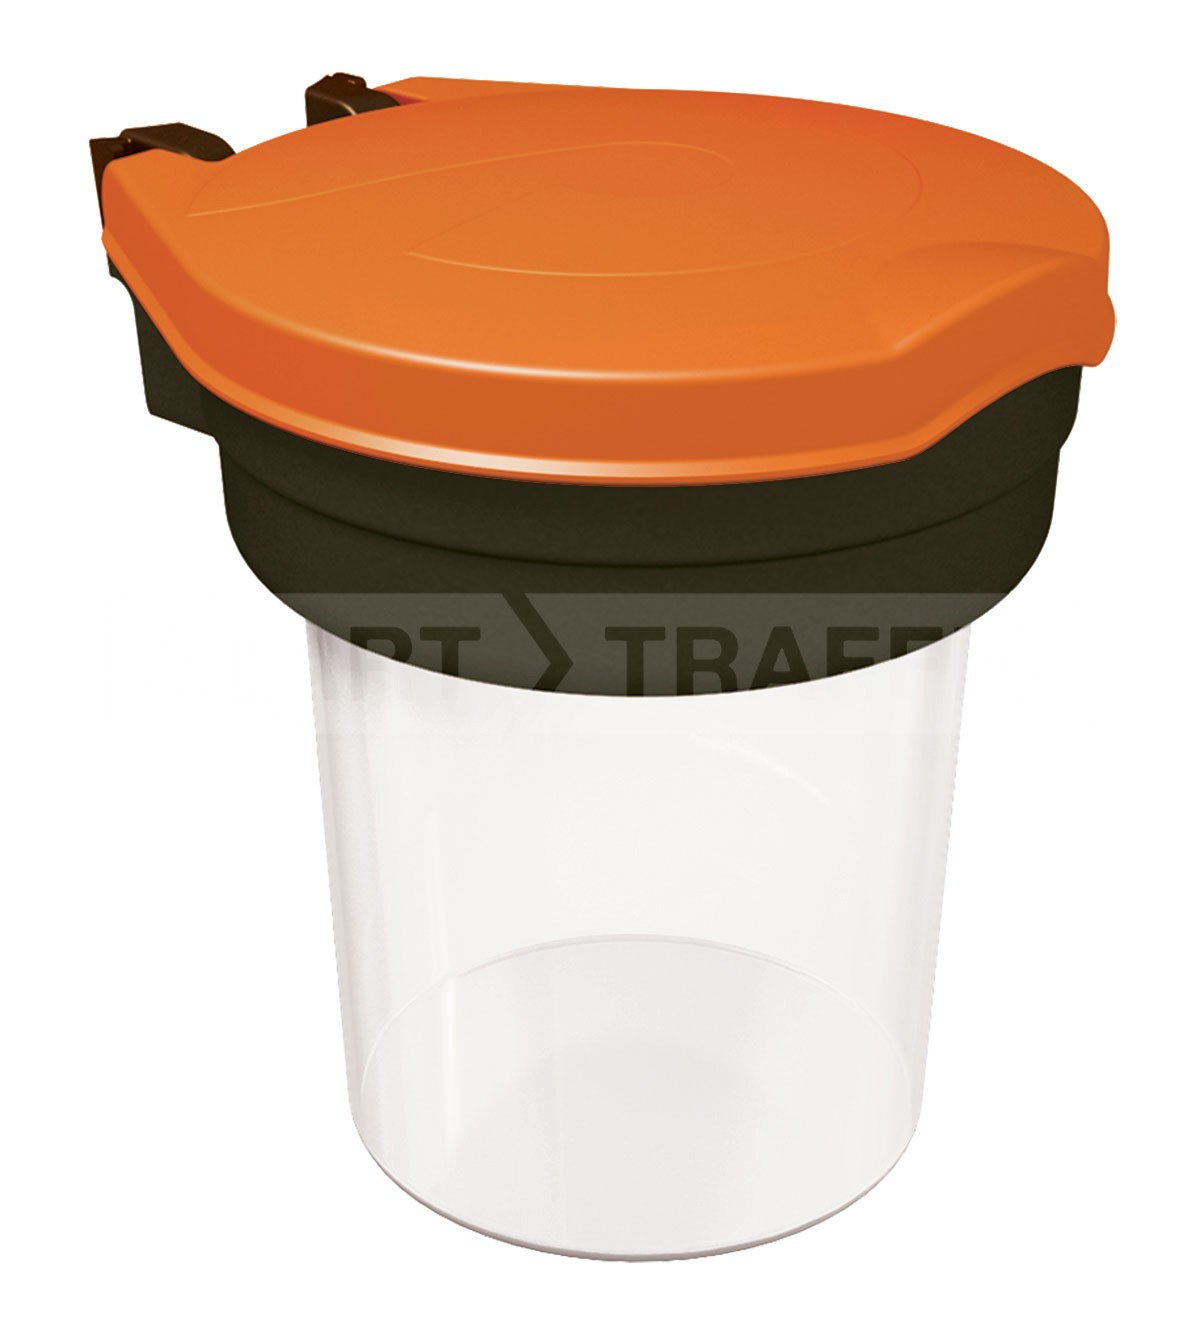
Skipper Safety Dispenser
The Skipper Safety Dispenser is designed for environments where safety equipment or PPE needs to made available. Ear buds and safety glasses are common items to dispense. Like the recycle bin above, it works with the rest of the Skipper system allowing it to be attached or placed anywhere – freestanding or on a wall.
The Skipper safety dispenser on its ownThe Skipper barrier system being used on a factory production line
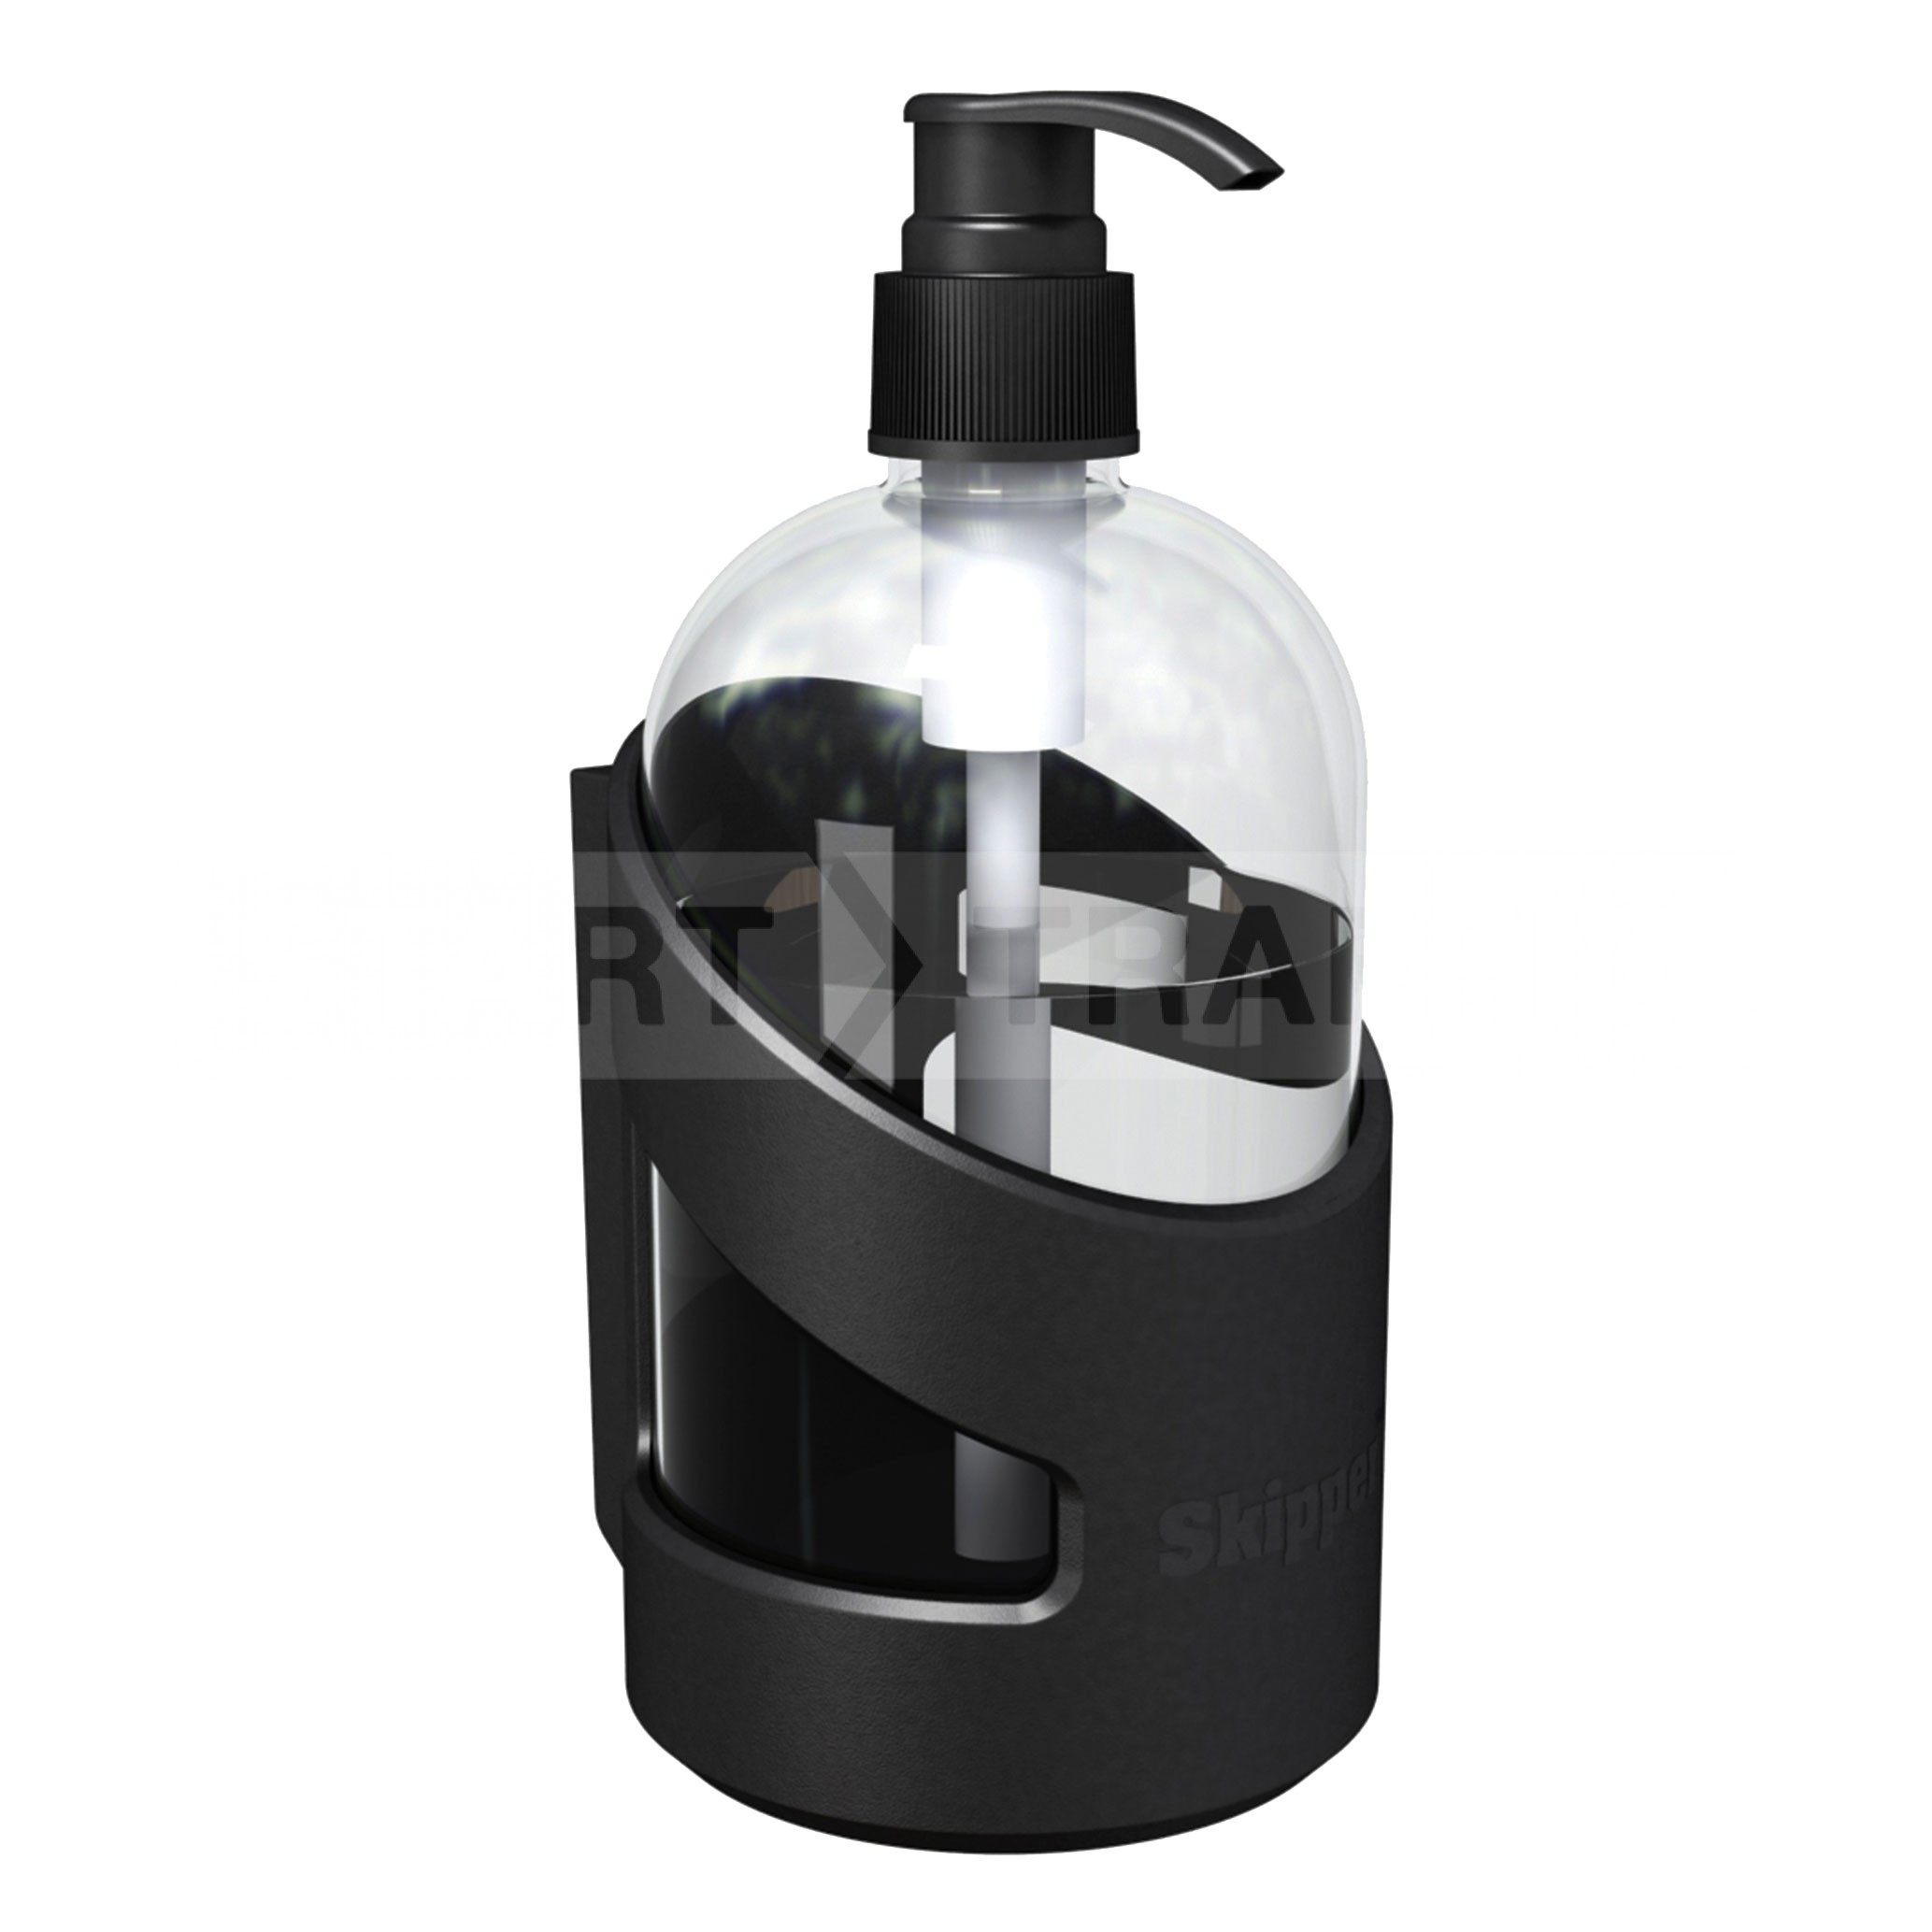
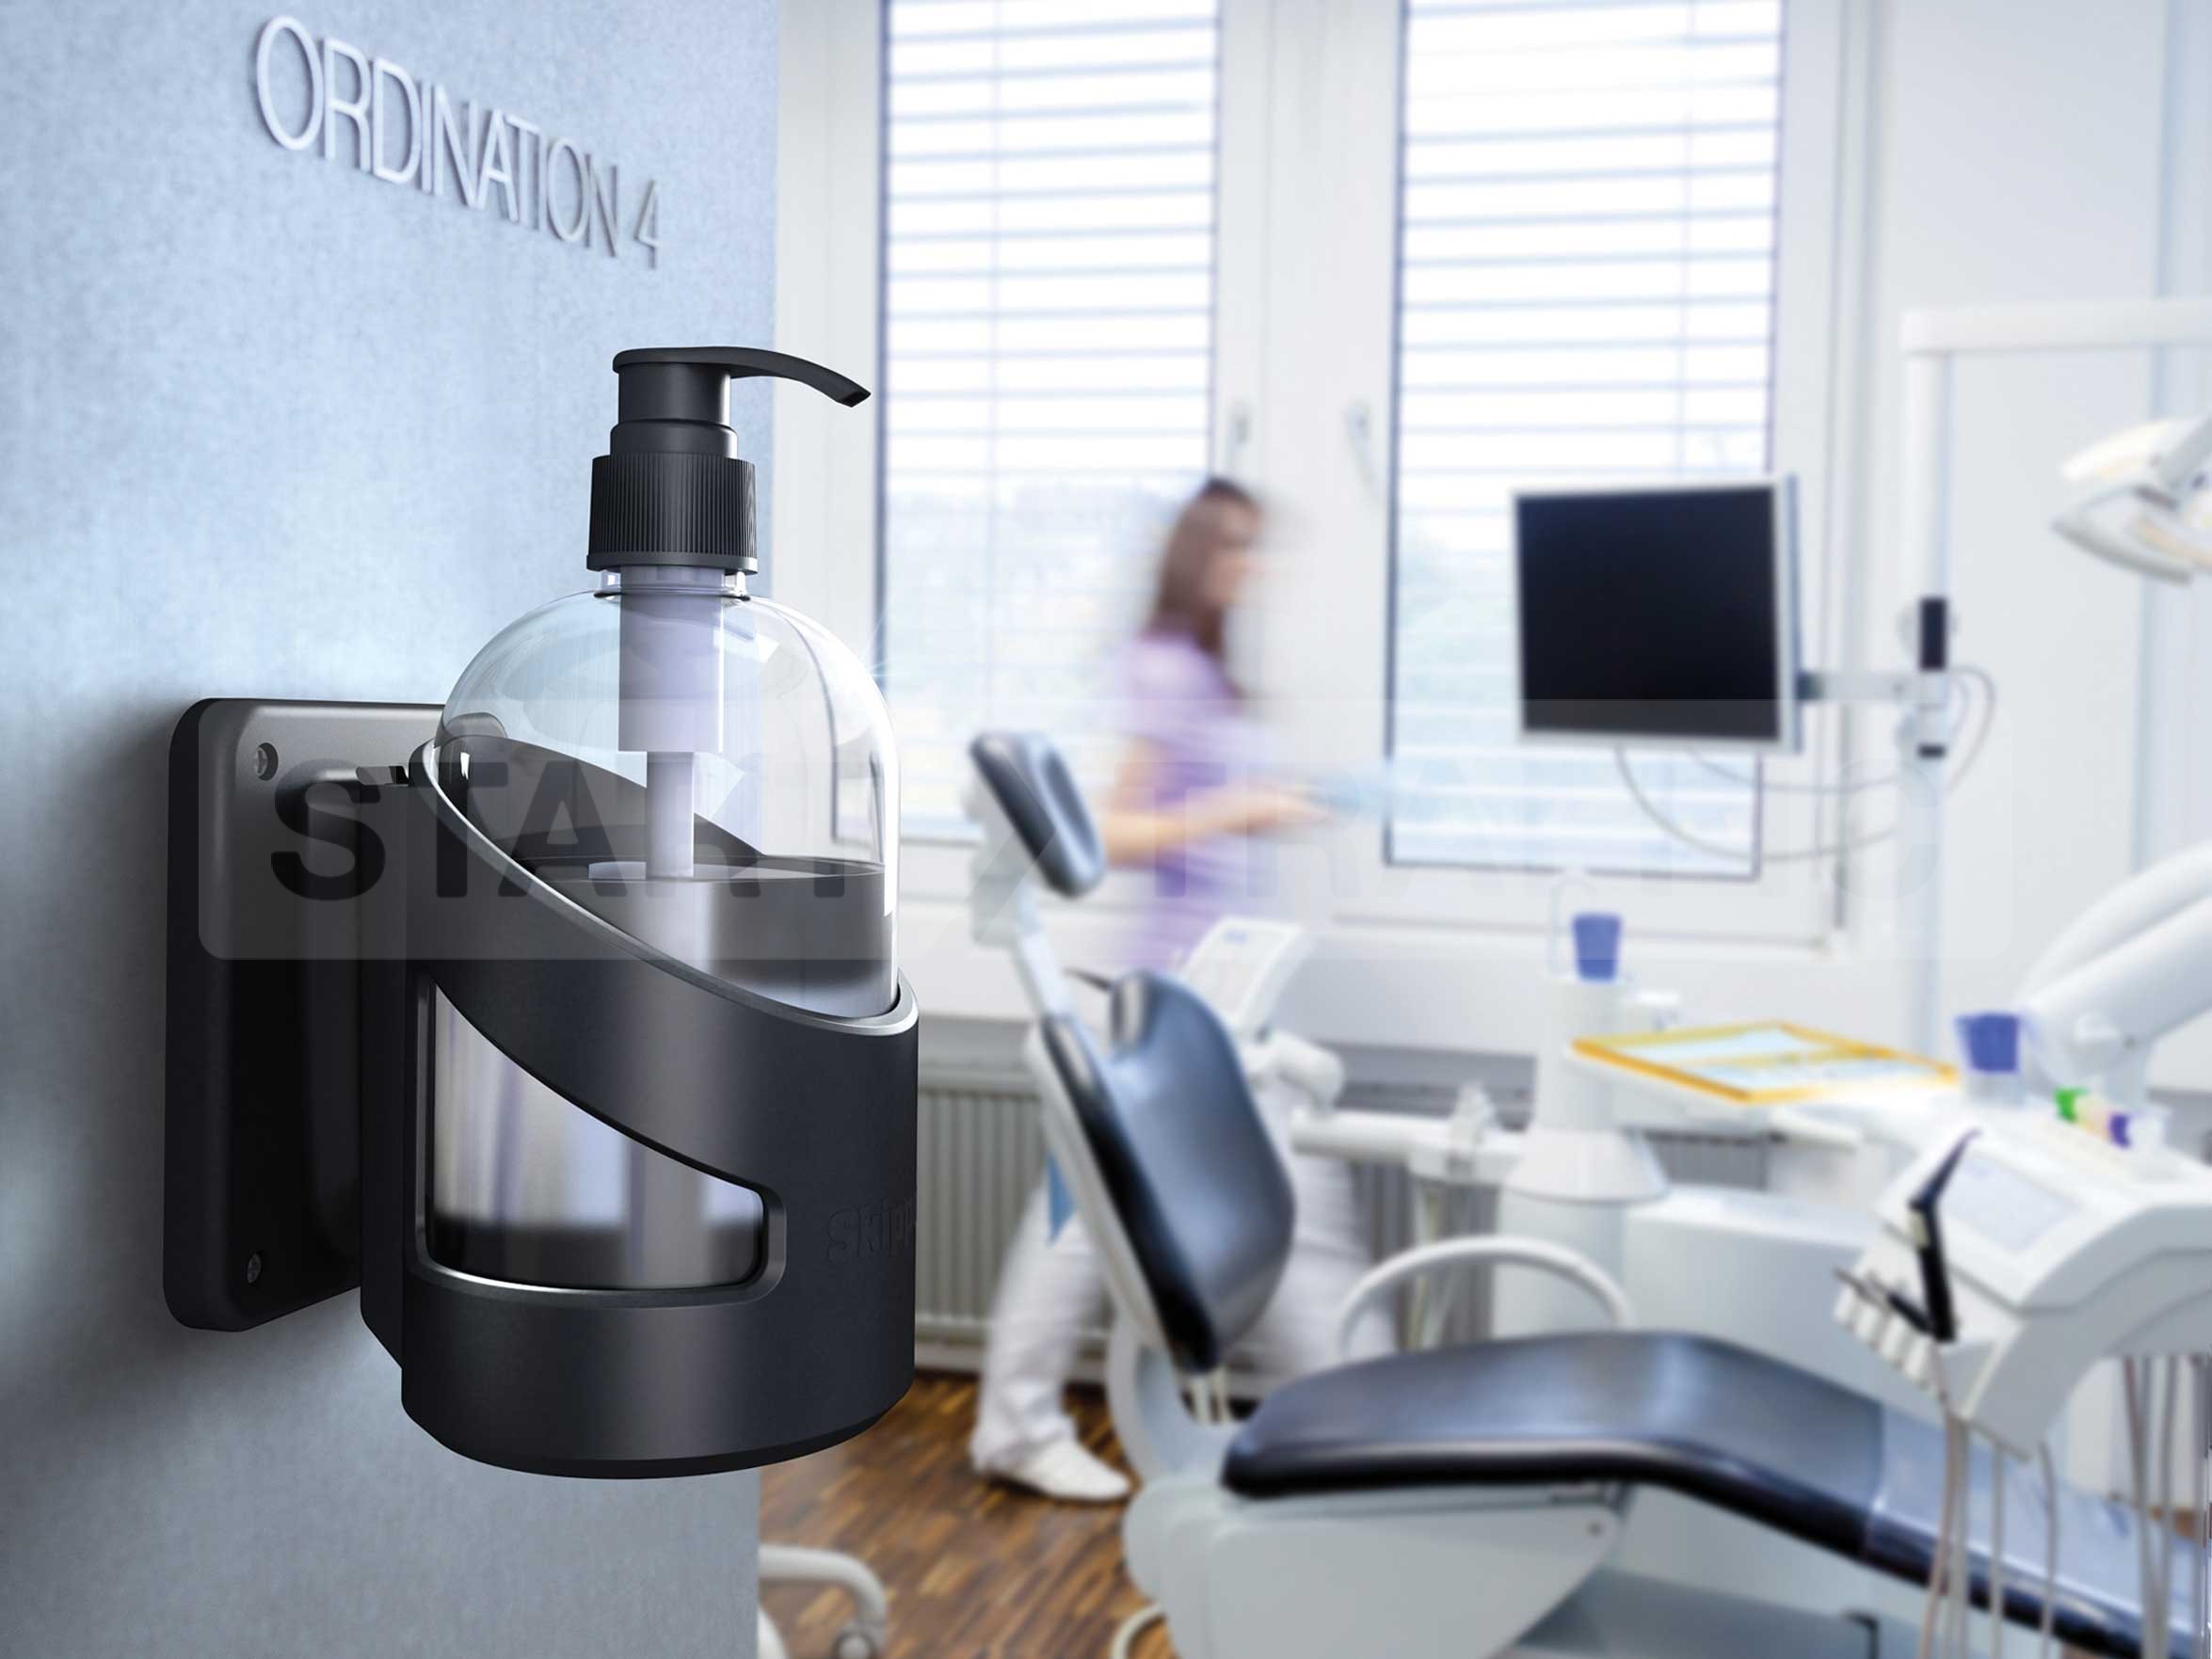
Skipper Sanitiser Bracket
The Skipper Sanitiser Bracket complements the above accessories – it adds the ability to hold a bottle of hand sanitiser or other dispenser. Ideal for hospital or health-conscious environments where it can be placed literally anywhere.
The Skipper sanitiser hand bracket on its ownThe Skipper hand sanitiser bracket with wall mount (sold separately)
How they can be used together
All skipper accessories are designed to work together using a standard mount – The image below shows how you could use the bin and safety dispenser. It has been used with the post and base system, including a standard Skipper retractable barrier and A4 Sign holder.
The Skipper barrier system with accessories in use
The Skipper collar is an accessory that allows any of the above to be connected to the Skipper post and base.
The collar fits over the post and base, allowing many other Skipper accessories to be fitted.
These are available to buy from Start Traffic here:
Standard Stop and Go sign (or lollipop signs) often come with reflective or non-reflective faces that are vulnerable to scratches, can discolour over time and may have bubbles caught underneath. This is not only unsightly but will reduce the visibility and lifespan of your product. Why waste your money on a stop / go sign that won’t last?
We use 3M Engineer Grade Prismatic Reflective Sheeting which is a non-metalised microprismatic sheeting for permanent road traffic signs meeting the performance requirements of BS EN 12899-1:2007 Class RA1.
Reflective faces designed for a seven year effective performance life.
Durable – provides a seven year effective performance life.
Improved legibility, due to better colour contrast.
Enhanced brightness by day and by night.
Better visibility in all weather conditions.
In addition to the reflective face being very high quality, this is stuck on to a body that has the following features.
Single molded body from HDPE – virtually impossible to break and doesn’t rust.
Detachable handle for more compact transport between locations.
The premium stop and go lollipop signs is available in stock, ready for same day dispatch from Start Traffic here: Premium Stop and Go Lollipop Sign
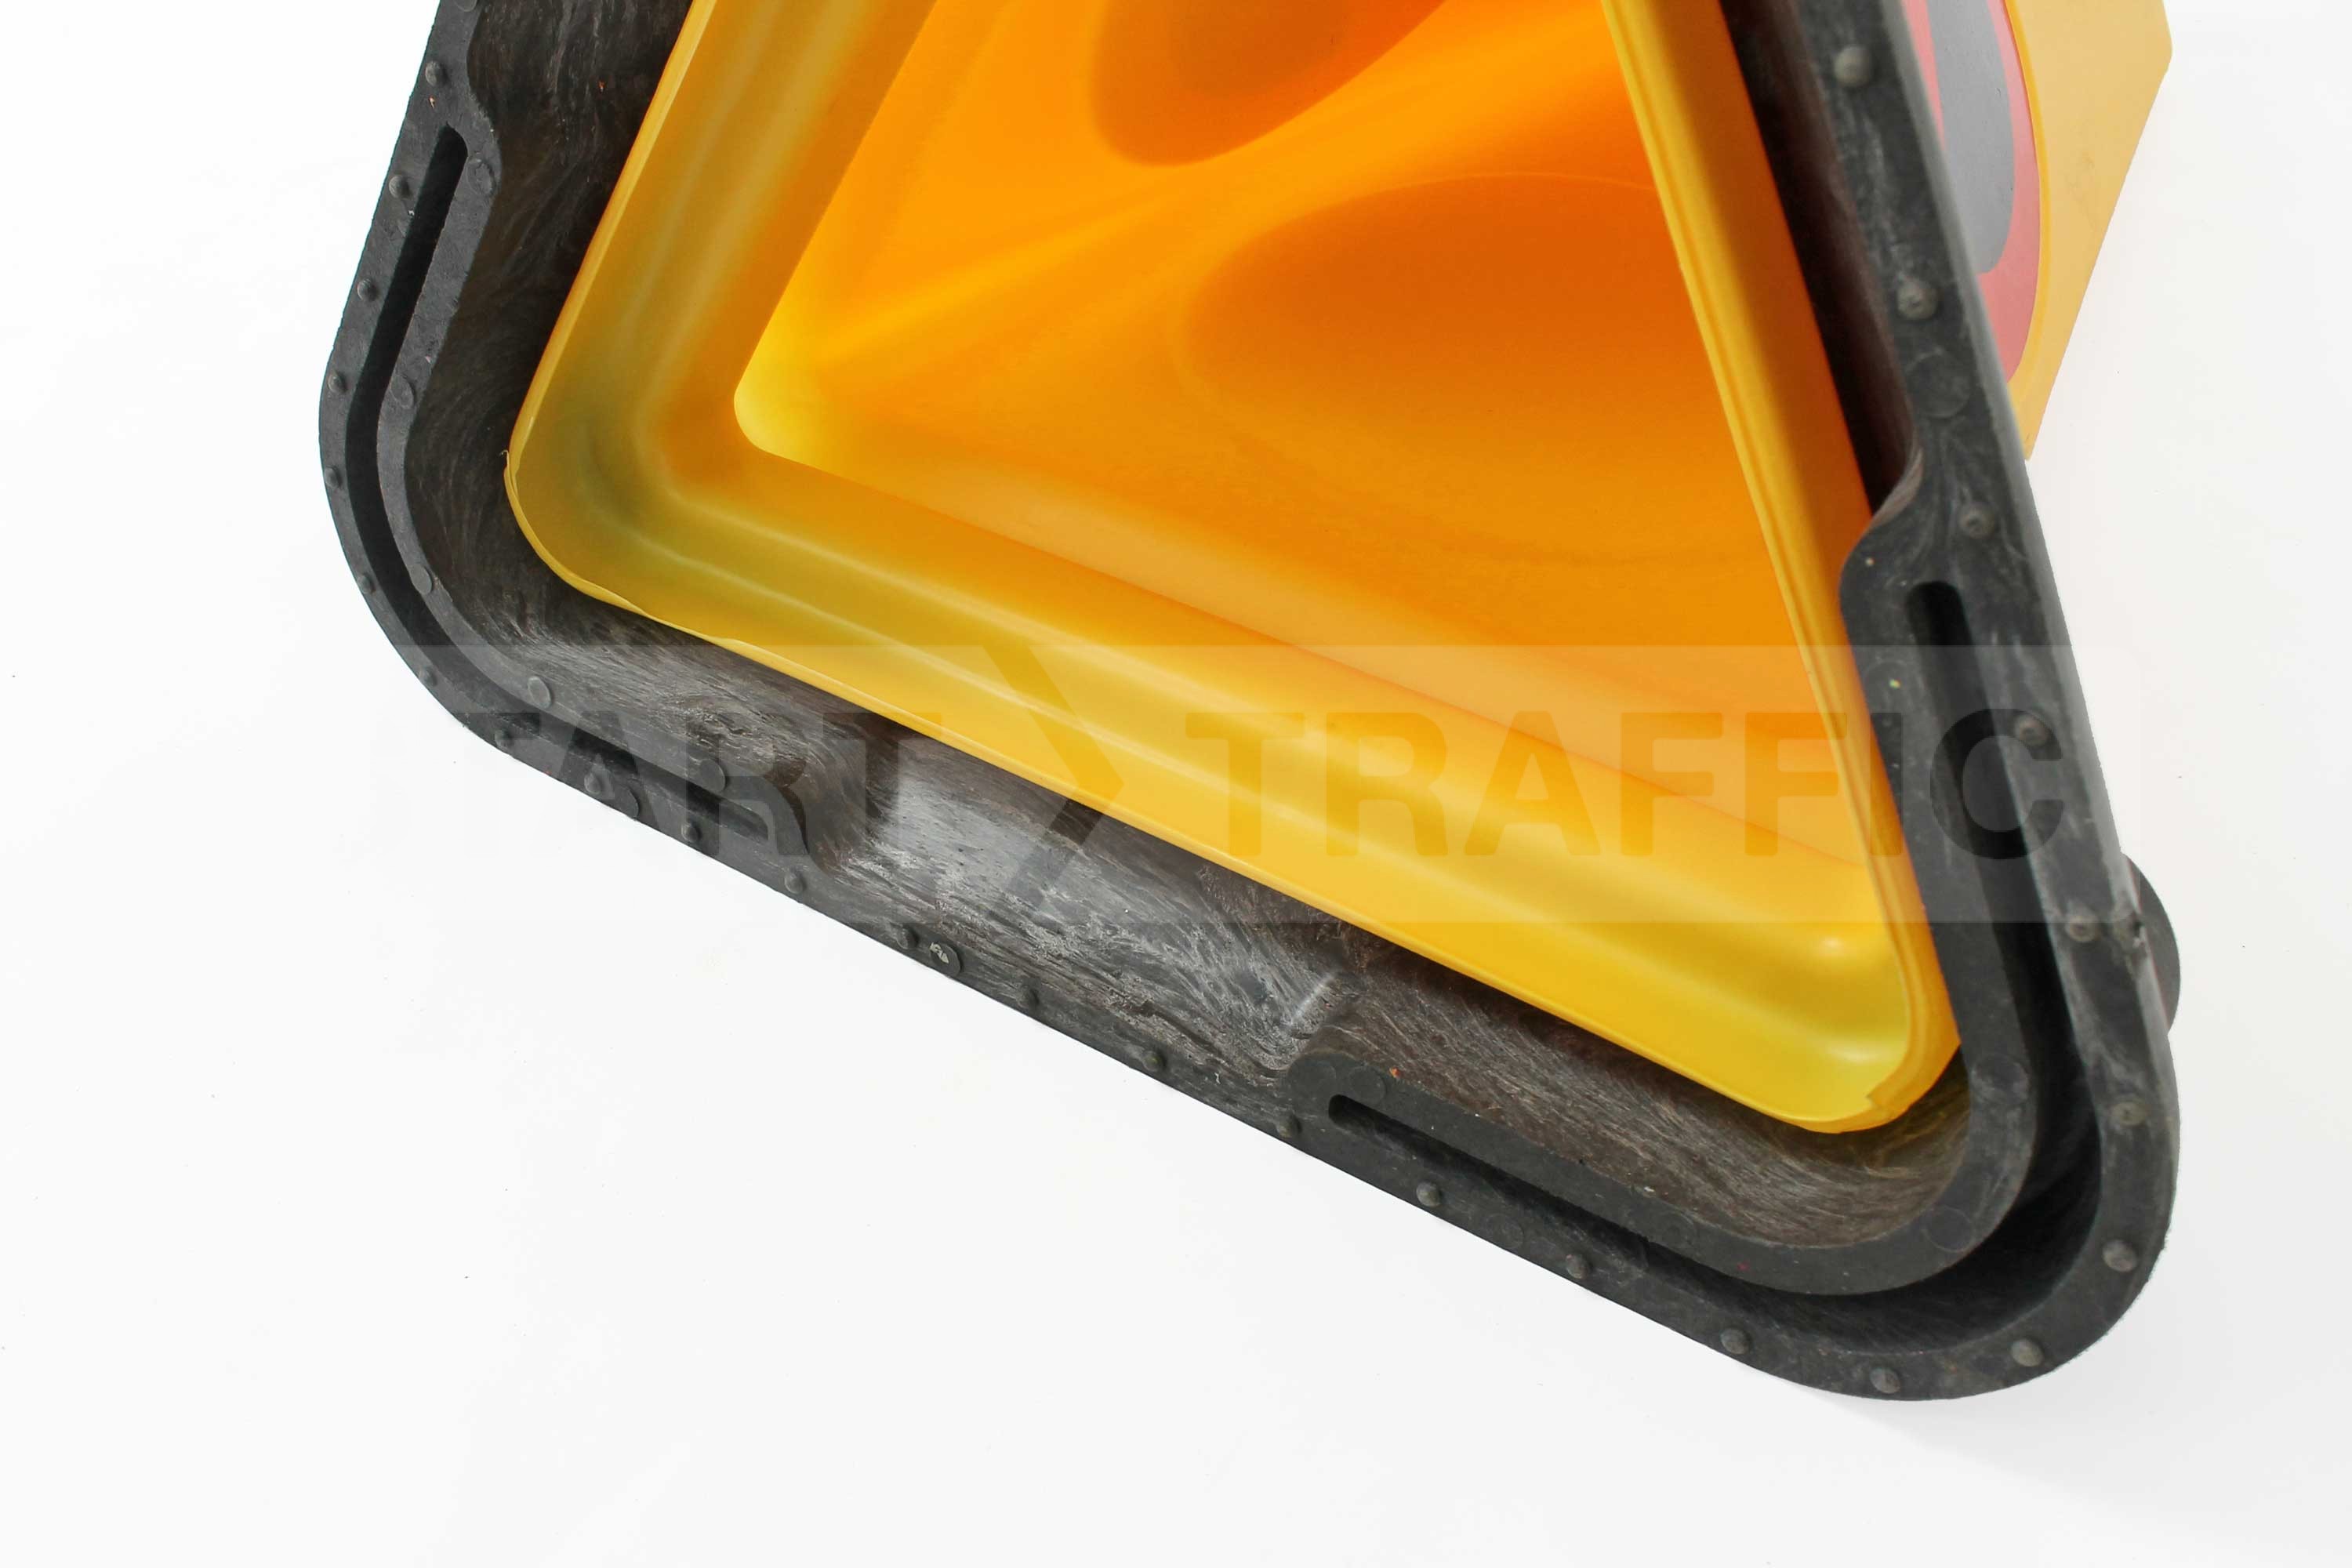
With the introduction of new wind speed code of practice and stabilising pedestrian barriers, Oxford Plastics has released an innovative new ballast tray which allows the barrier to withstand even the worst windspeeds.
The new ballast tray for Avalon barriers.
The feature that makes this unique is that the tray can be filled with Heras fence feet, sand, soil or other ballast. These are usually on-site where the barrier is being used!
Below is a table that lists the weight required in the ballast tray to meet the specific wind speed class regulations. This varies according to the barrier type being used.
Kg required for each windspeed class BS8442
Barrier Type
C 19.5mph
B 38.4mph
A 58.8mph
2m Avalon
0
37
90
2m Pro
0
25
65
1.25m Watchman
0
0
16
1.5m Watchman
0
3
24
2m Watchman
0
12
44
3m Watchman
0
34
97
Tray weighs approximately 45kg when level filled with soil
Standard fencefoot weighs 18kg
The Oxford Ballast Tray can be purchased on its own or with the Avalon barrier
The ballast tray is available in stock, ready for same day dispatch from Start Traffic here: Oxford Ballast Tray.
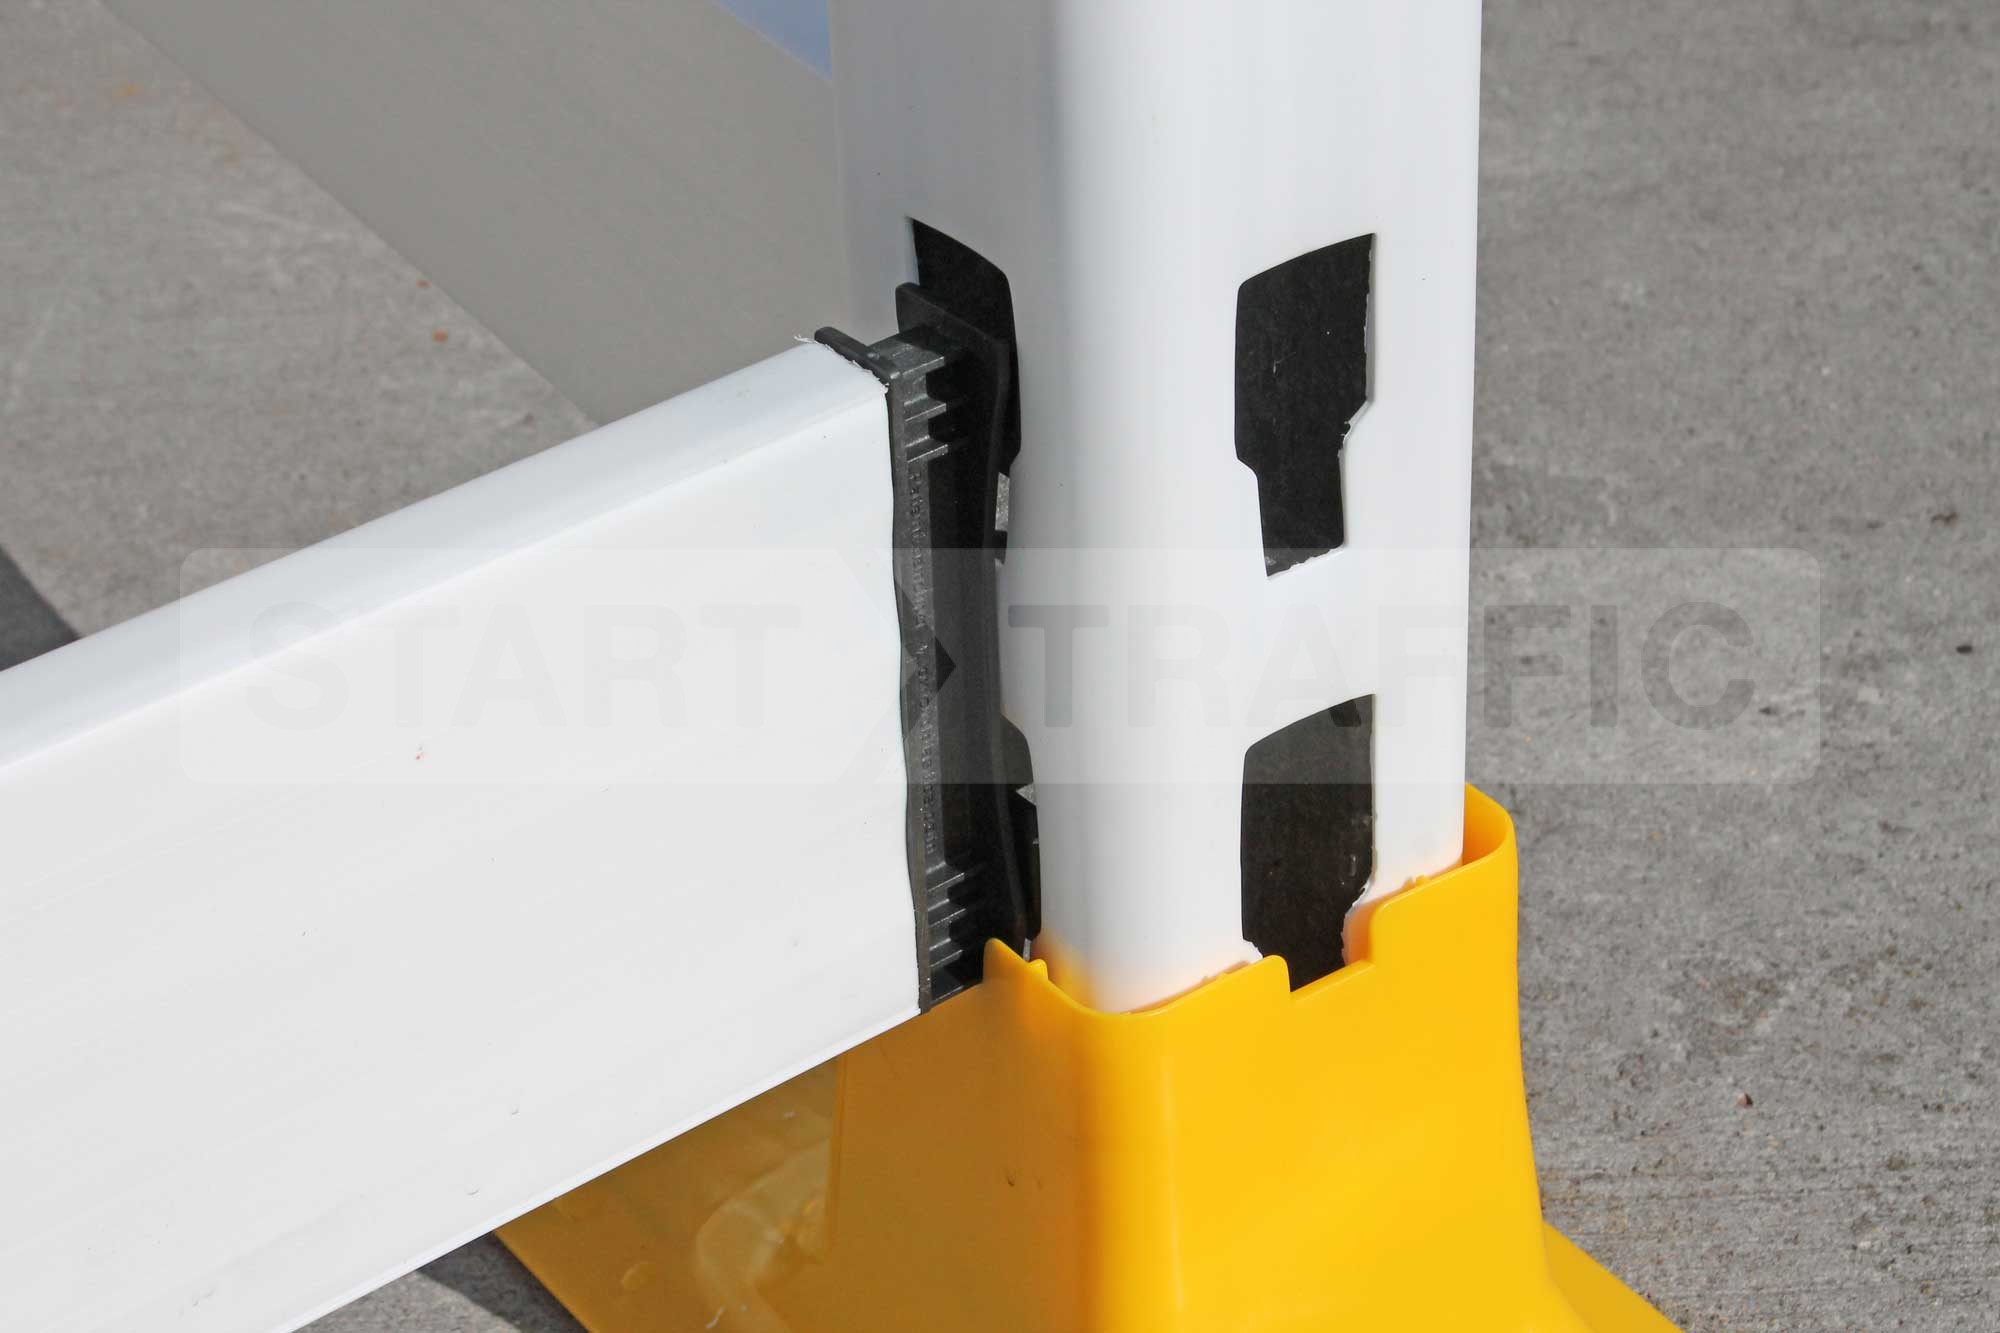
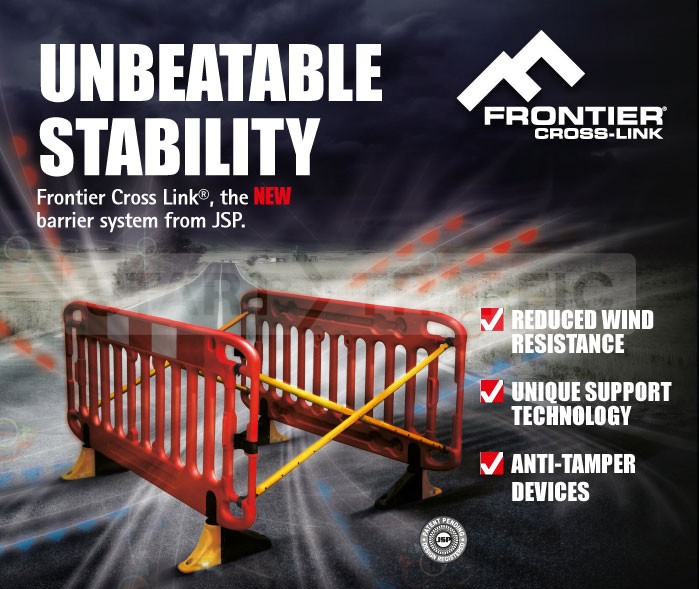
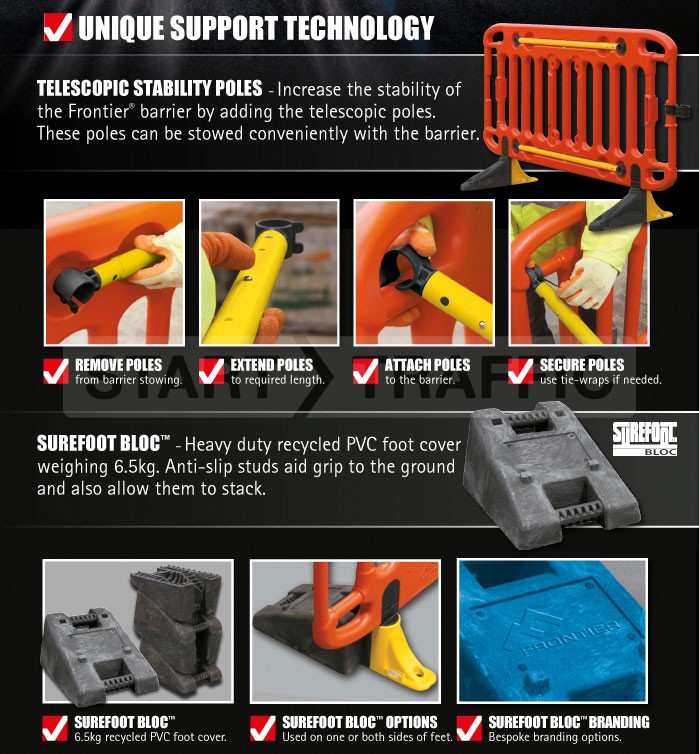
An alternative – the JSP Cross Link Barrier
Whilst the new ballast tray solution is suitable for almost all jobs, other alternatives do exist to add stability. One of these is the JSP Cross Link system for the Frontier Barrier.
The new Frontier barrier form JSP
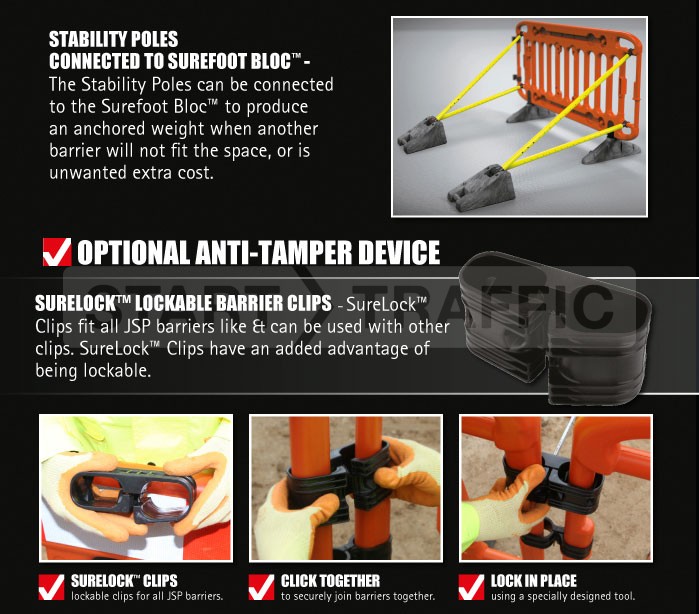
Using two telescopic stability poles, it is possible to cross brace barriers to each other or alternatively to weighted blocks. This gives some flexibility in certain applications.
Cross-link pole in detail
The Surefoot bloc is a high density PVC weight which can be used in one of two ways.
It can be placed over any JSP foot, adding weight and increasing stability.
It can be combined with the telescopic stability poles to provide even further wind resistance and stability.
An anti-tamper device is also available for the Frontier barrier
The Frontier barrier system is in stock and available from Start Traffic, ready for same day dispatch here: Frontier Barrier from JSP
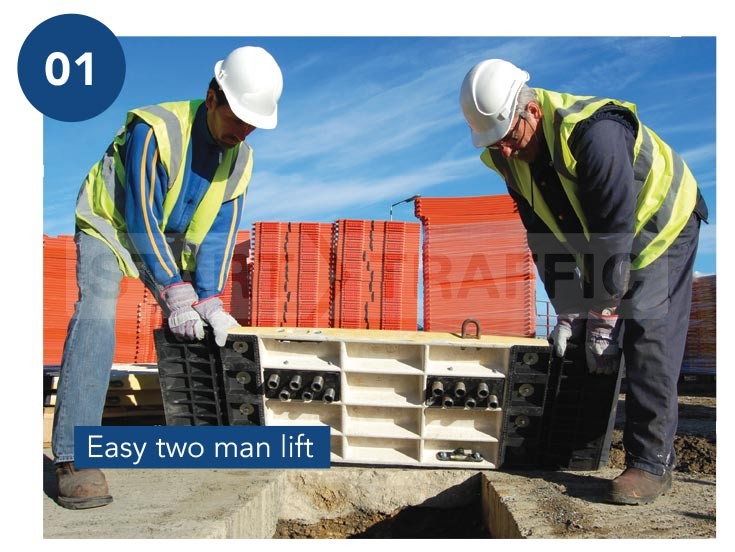
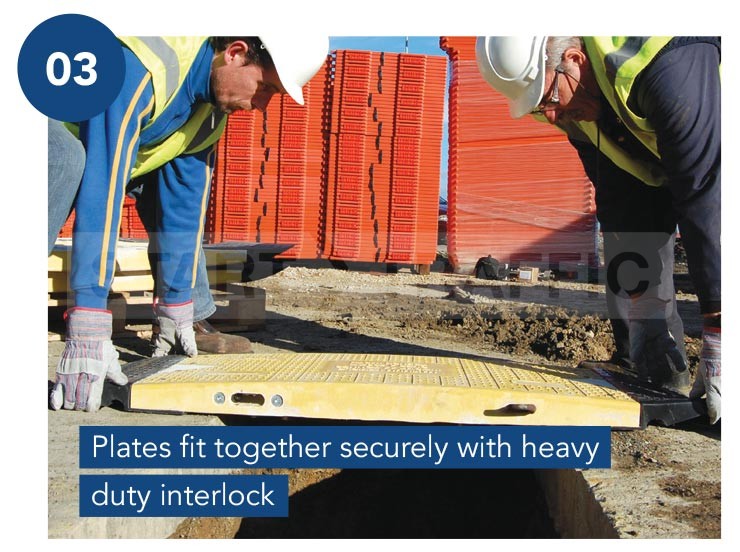
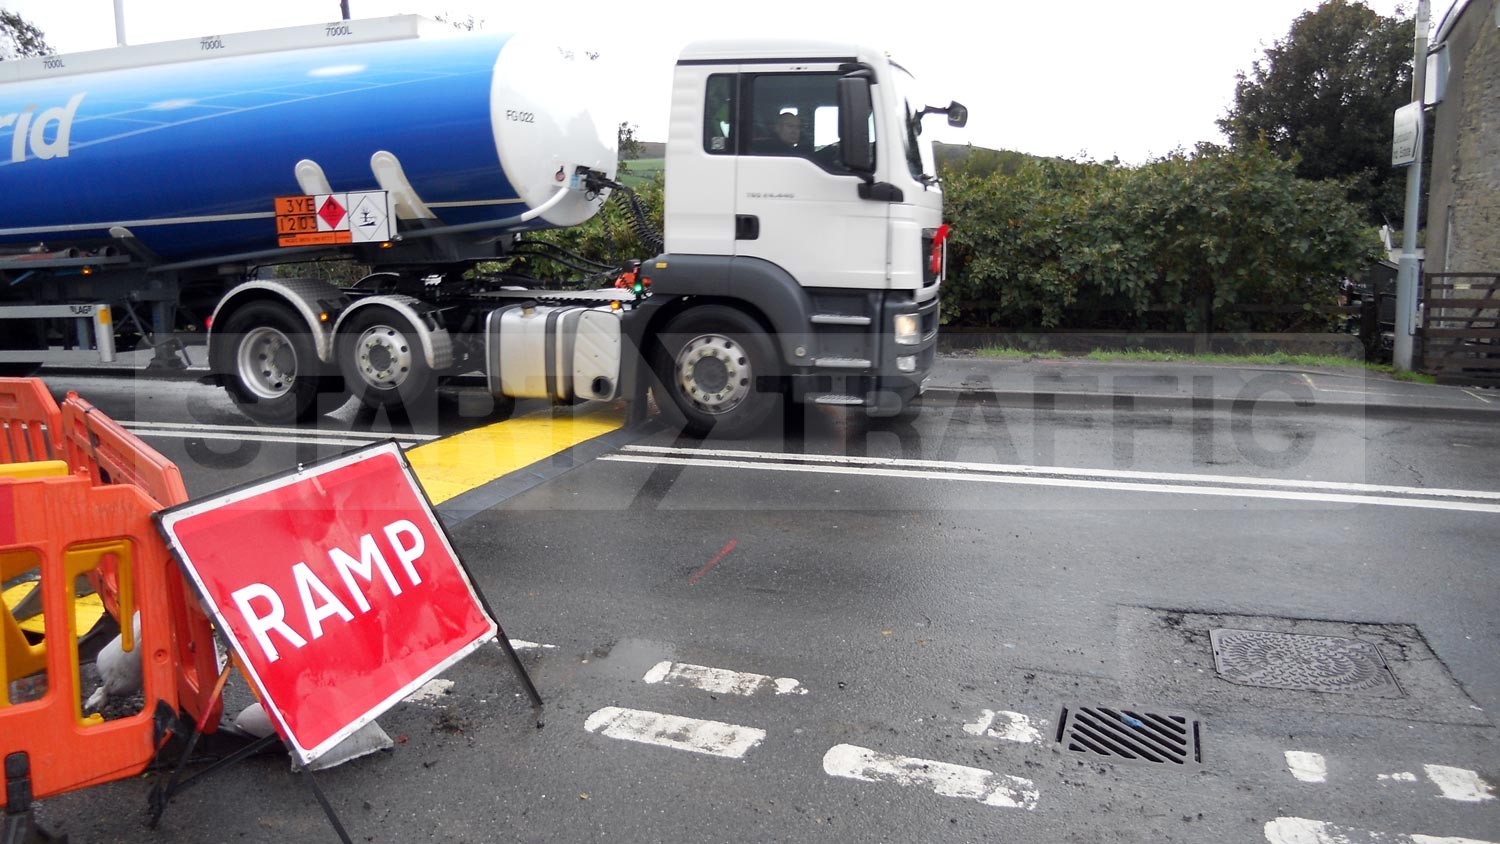
When digging trenches across a roadway as part of road works, utility installation or construction project the most frequent solution to cover up trenches is steel plates. These require specialist lifting equipment and are difficult to transport and store. Our alternative solution is the composite road plate system.
The Composite Road Plate system from Oxford Plastics is the new approach to solving this problem. Only two men are required to deploy this and everything needed to cover trenches over typical roads can easily be stored on a single pallet.
Below you can see the simple steps needed to deploy a road trench system with only two men.
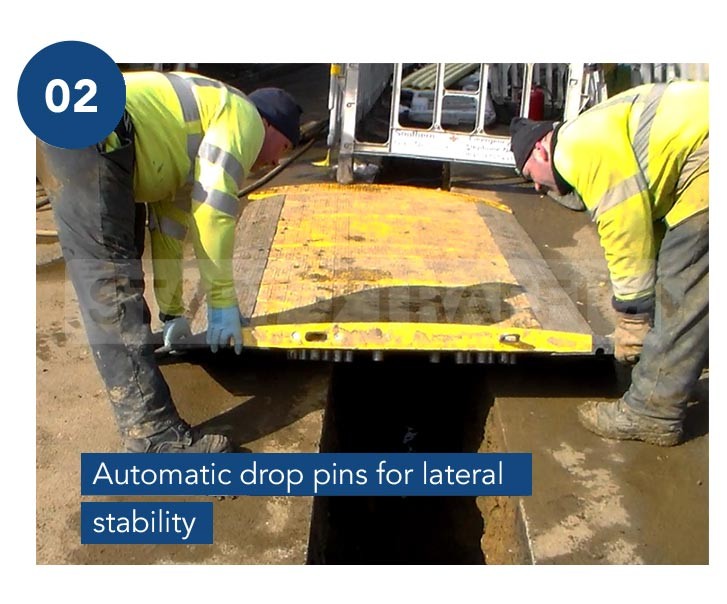
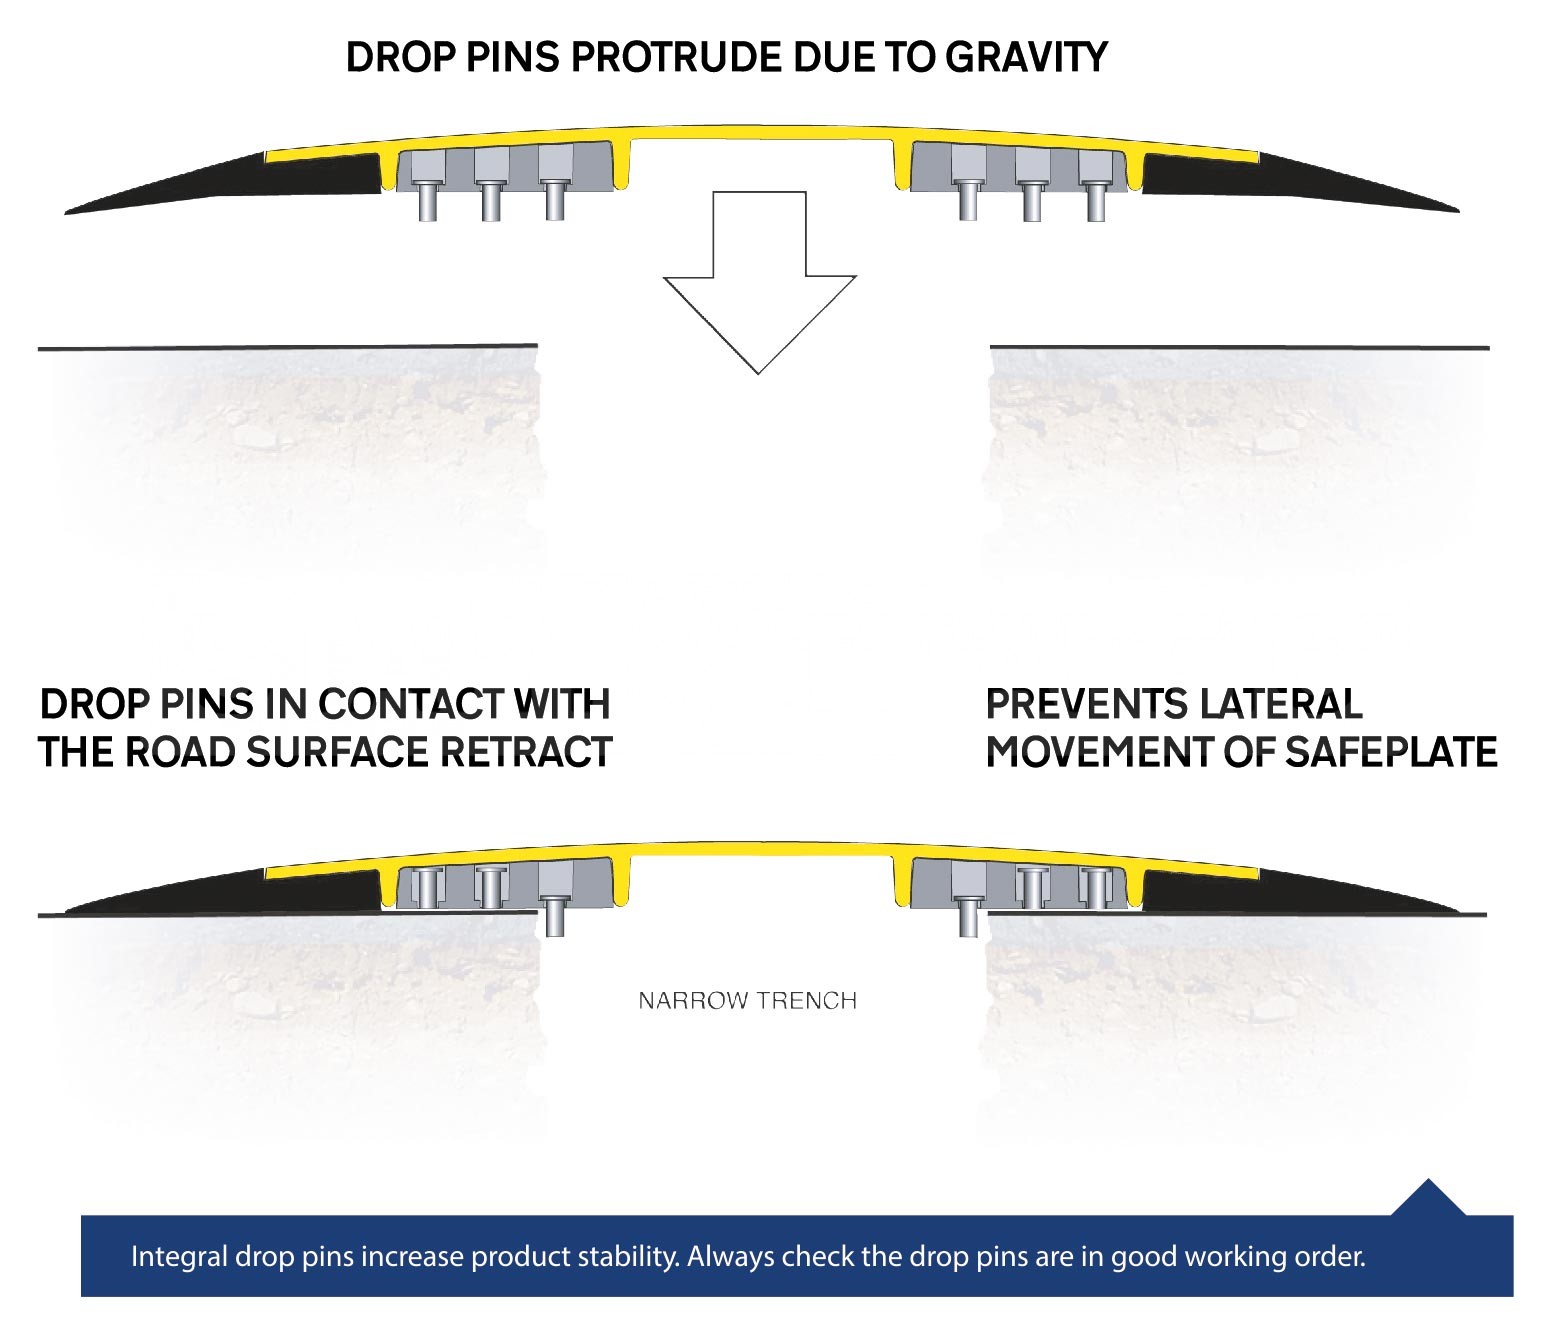
No fixings are needed on the inner pieces as they use a built in pin system to lock them into place. No messy cold tarmac, awkward fixings or wasted time!
The pins underneath the road drop down and lock the plate in against the edges of the trench.
Each inner section comes complete with the pins (3 blocks and 14 pins) so that you can deploy them straight away.
Some other advantages of the Composite Road Plate system are:
The surface is anti-slip.
Very little noise compared to clanging steel plates.
Increased safety during deployment due to much lower weight.
They are able to withstand all standard traffic including 44T HGV’s.
Both the inner and end sections of the composite road plate system are available to buy from Start Traffic here: Composite Road Plate System.